🎓 A brand new STEM-kit is available for pre-order on Lectronz: the 8-bit Workbench™ ED.
Finally, attach an ASCII Keyboard to the 8-bit Workbench™ product line!
Explore bit-level addition and subtraction using the Byte Adder Subtractor.
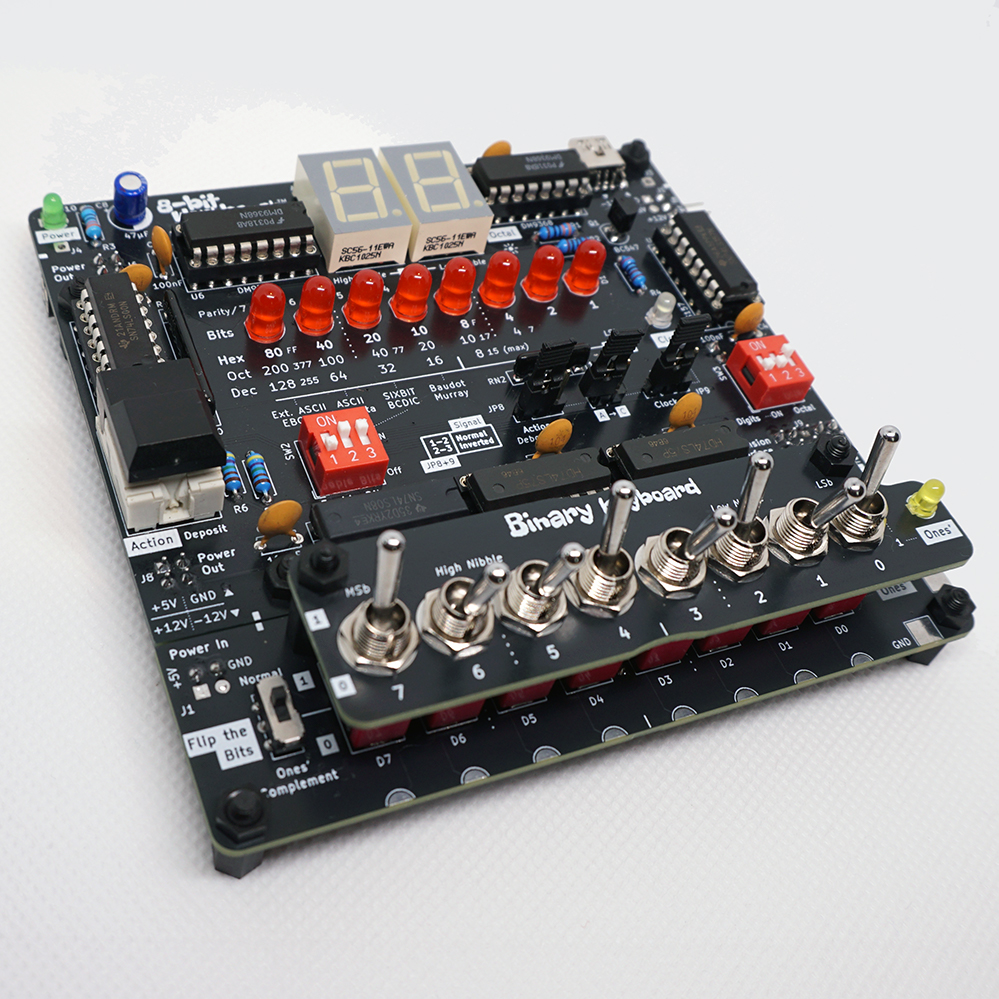
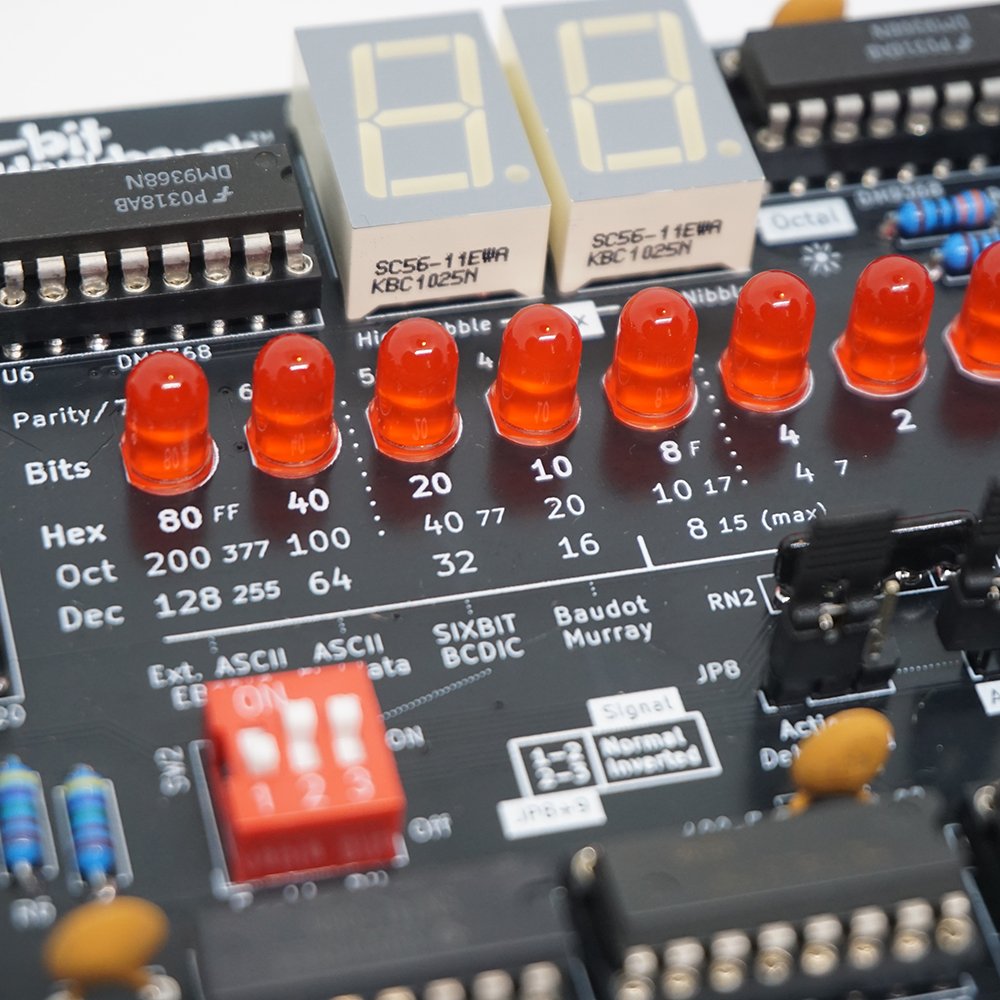
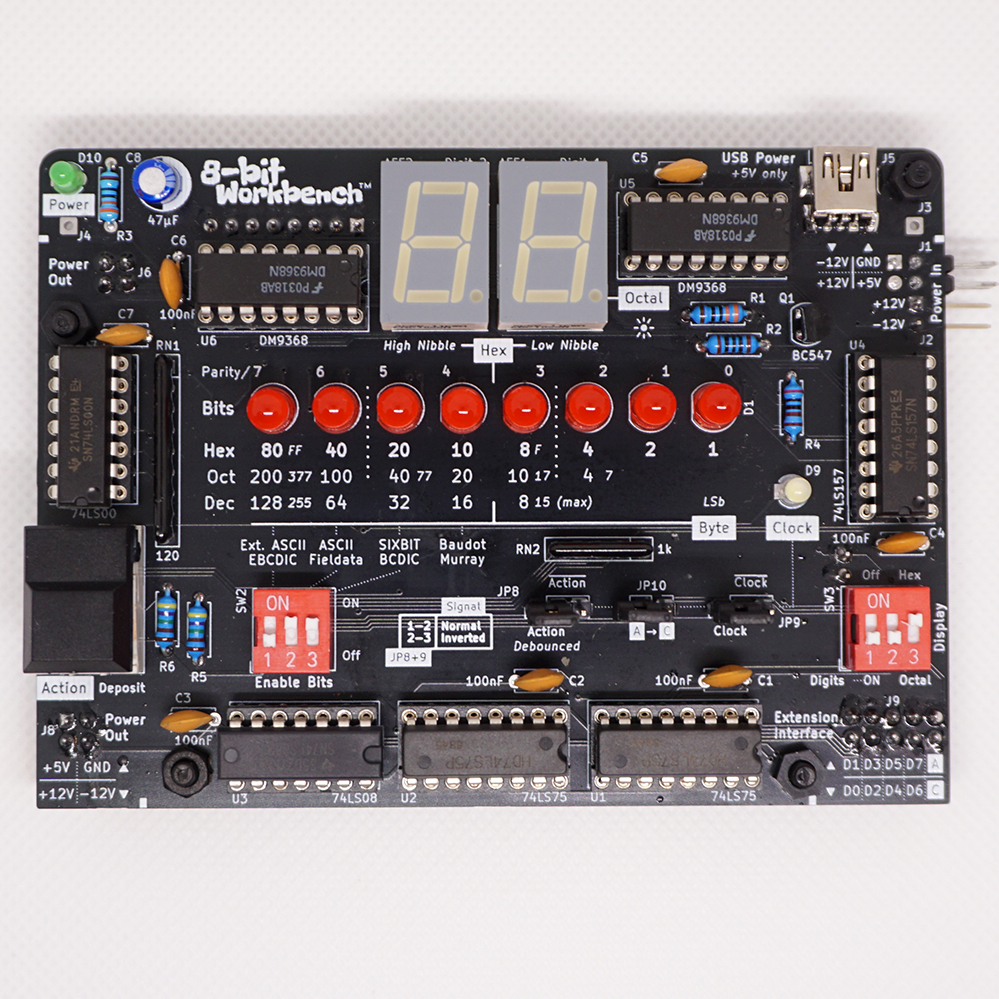
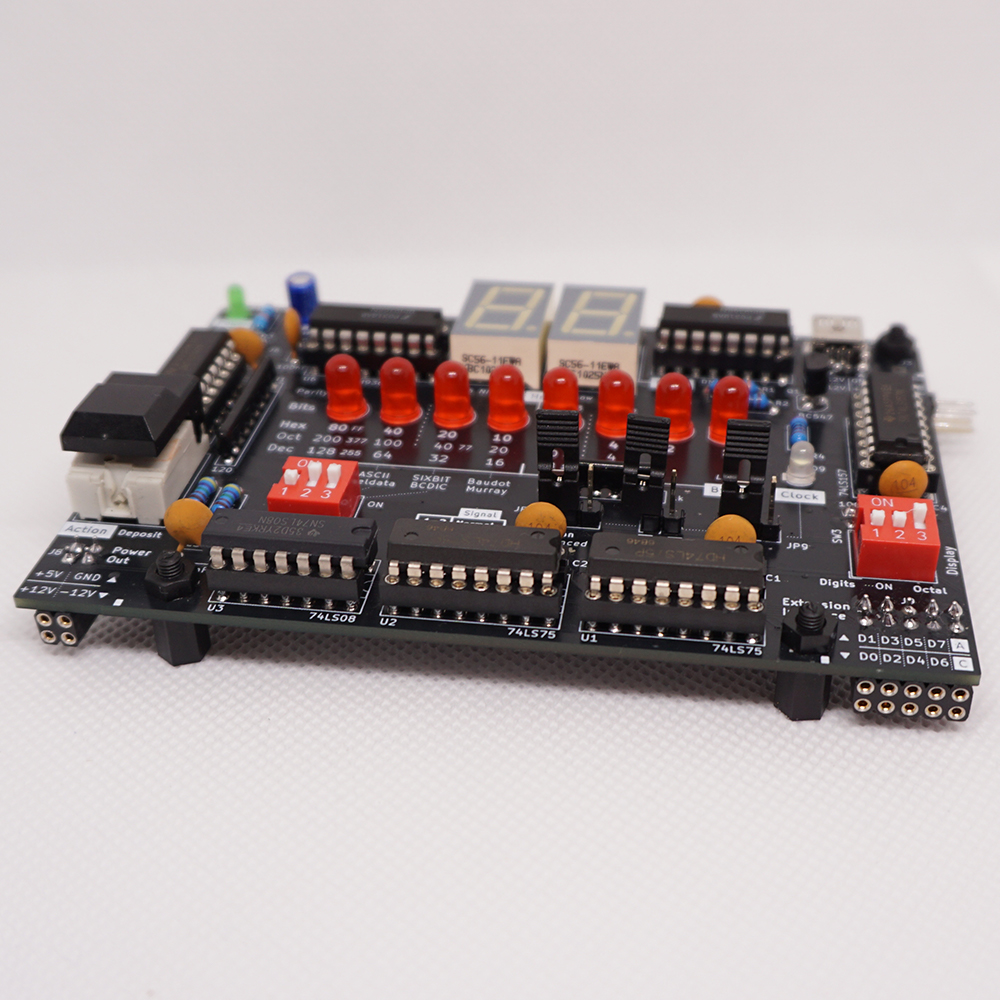
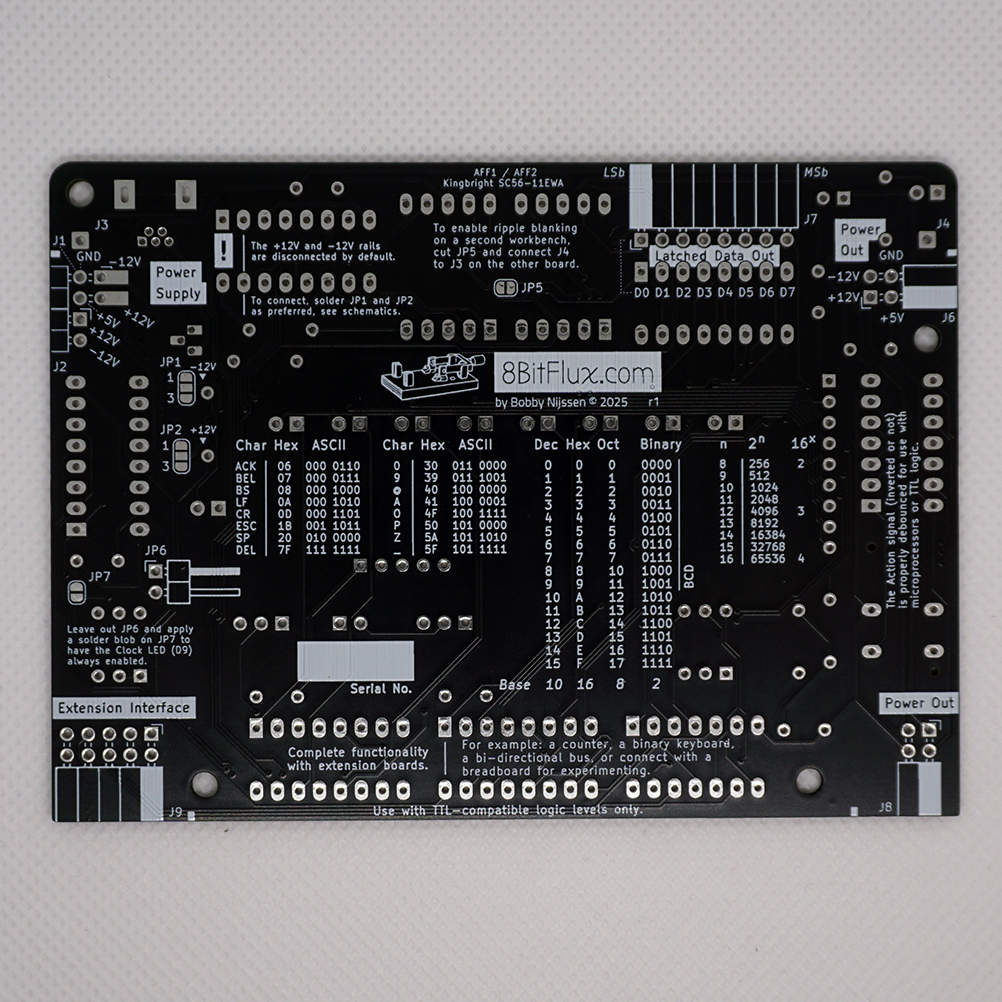
8-bit Workbench™
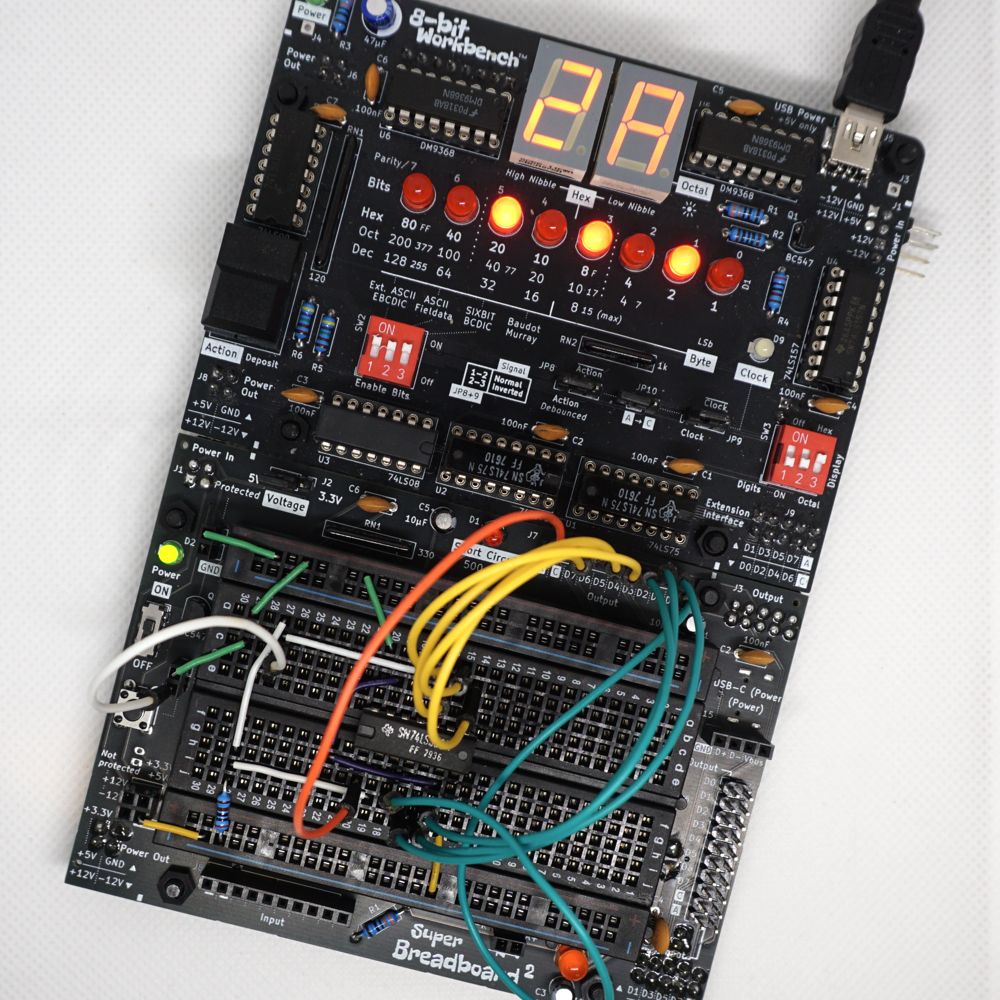
Your companion for (vintage) computer experiments. Display 8 bits using blinkenlights. Learn about logic and see how number systems work. Extend and combine.
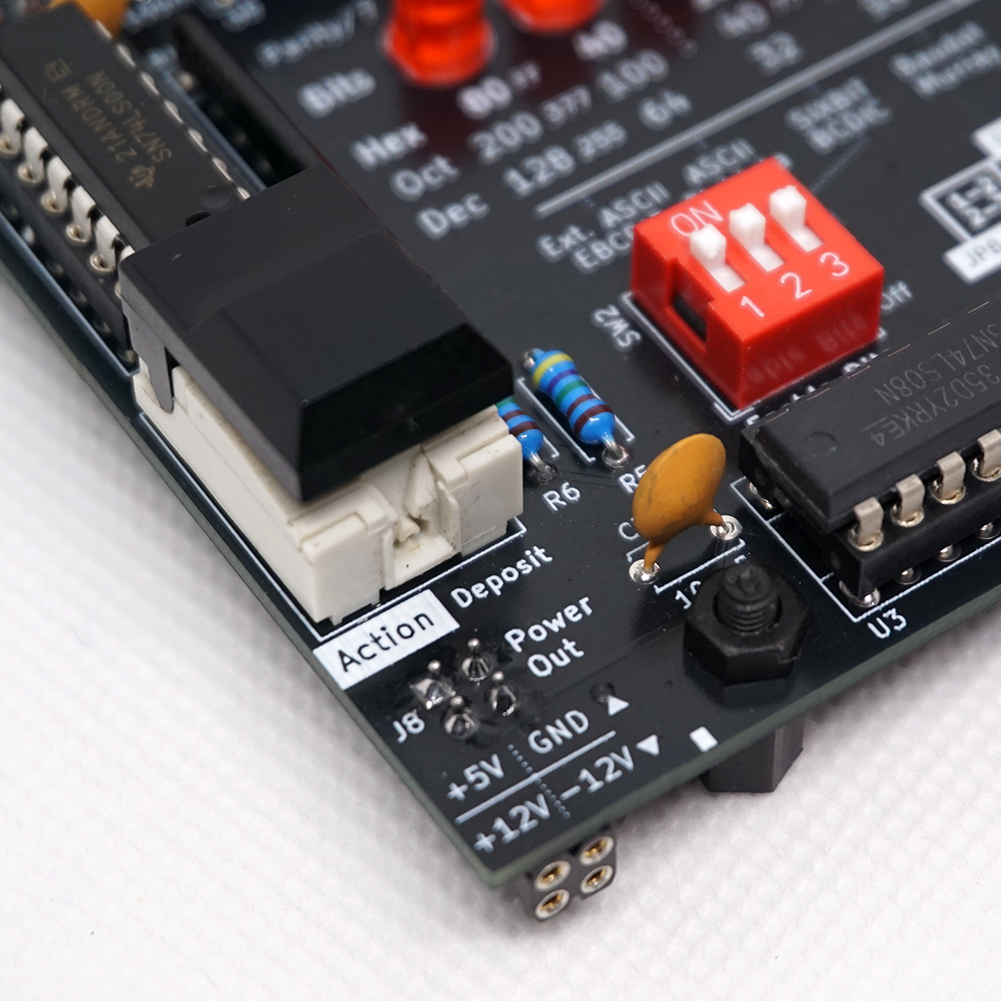
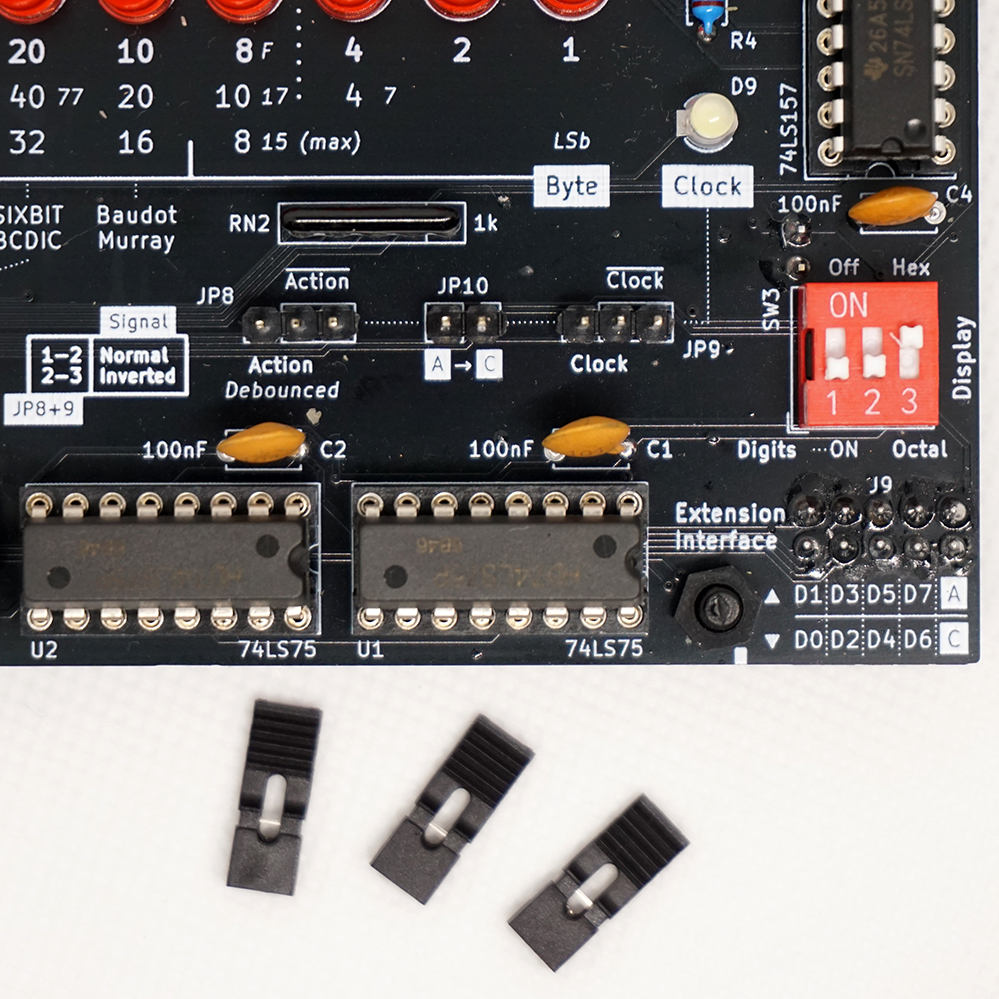
At its core, there is an annotated binary LED-display of 8 bits (one byte). Depending on the type of data, the three most significant bits can be turned off using DIP-switches. Aligned above the bits, two digits show the hex (or octal) representation of it. The board can be powered through a mini USB connector, switch to a custom supply when the +12V and -12V rails are needed as well.
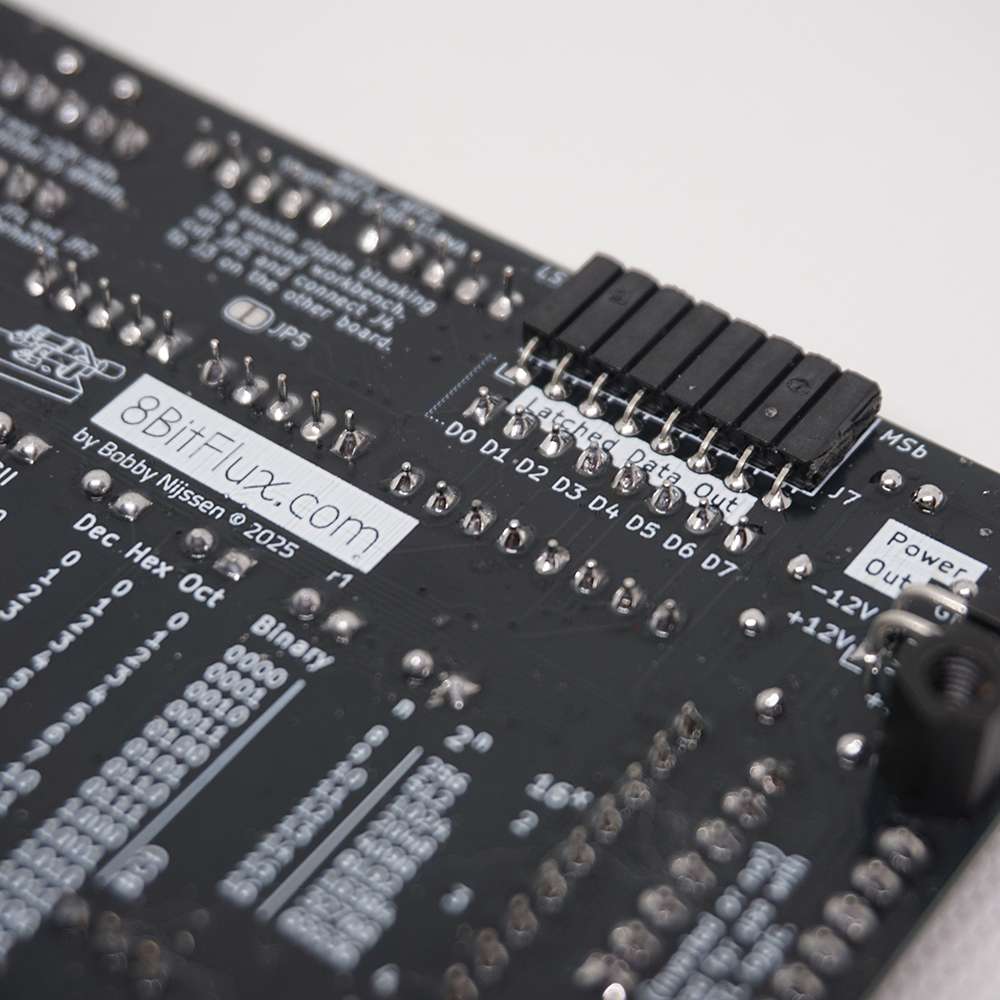
A clicky Digitast action-button provides a properly debounced signal to use with microprocessors or TTL logic. The extension interface exposes the data bus, an action-out and a clock-in. These can be inverted on the board. Mix functionality with extensions or design your own using the KiCad template!
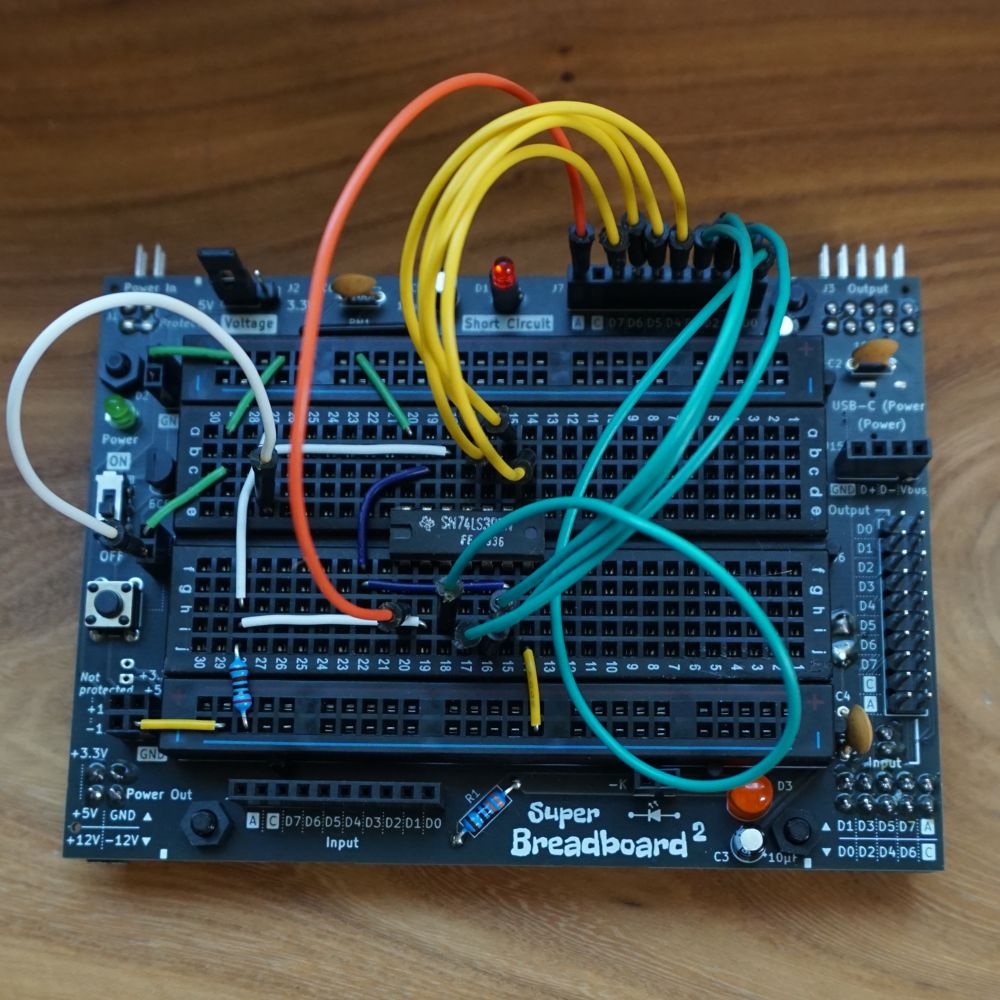
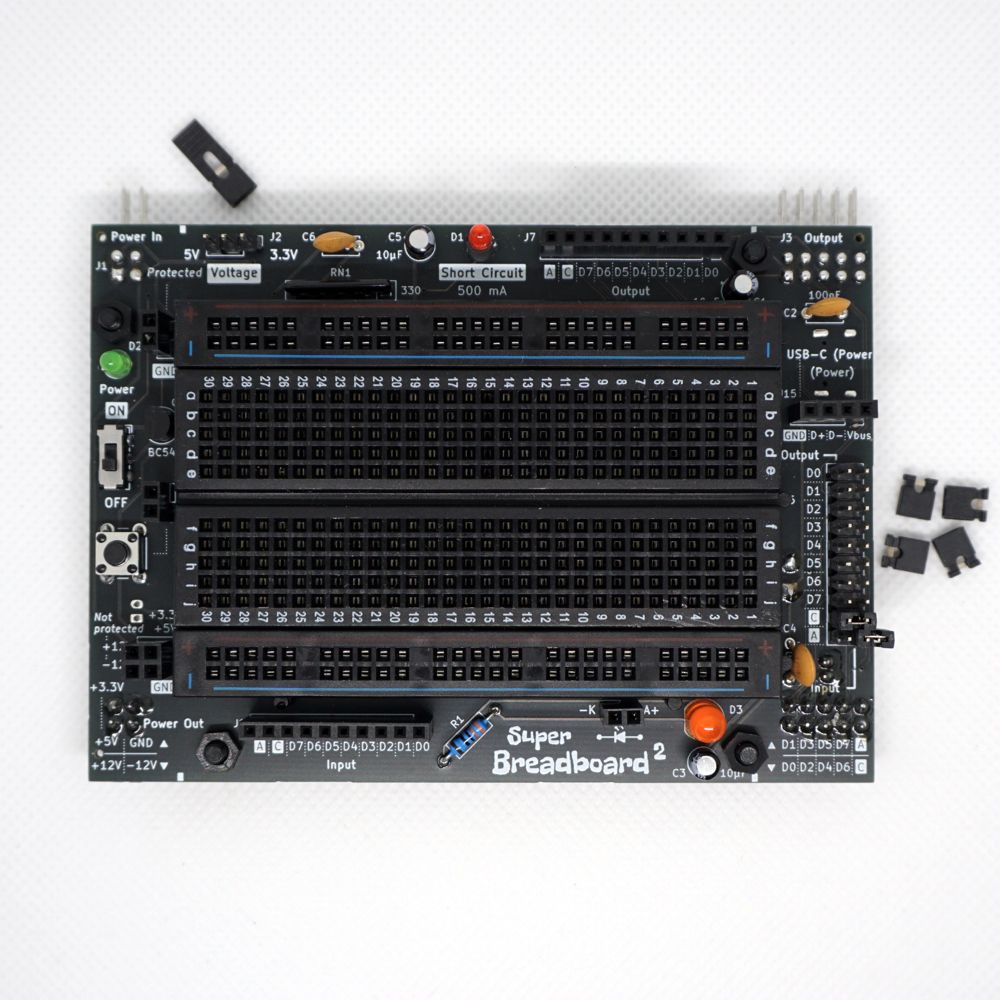
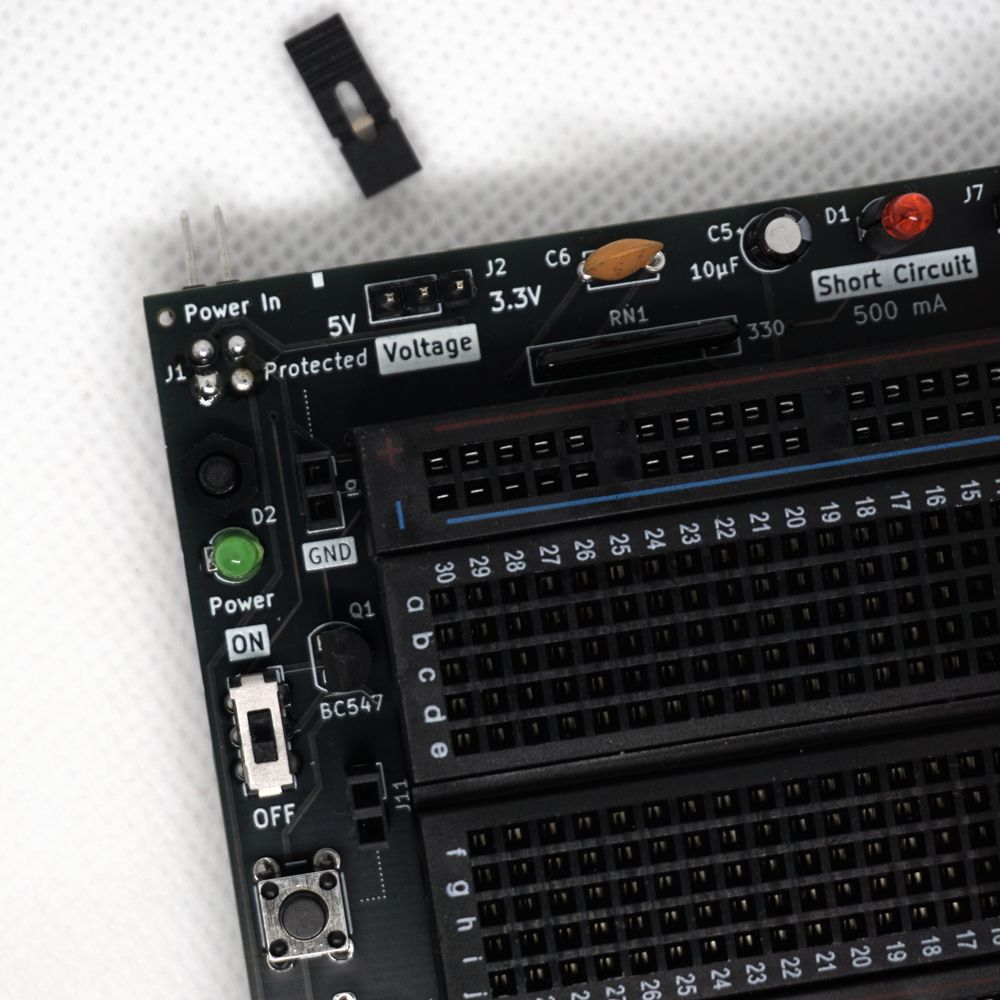
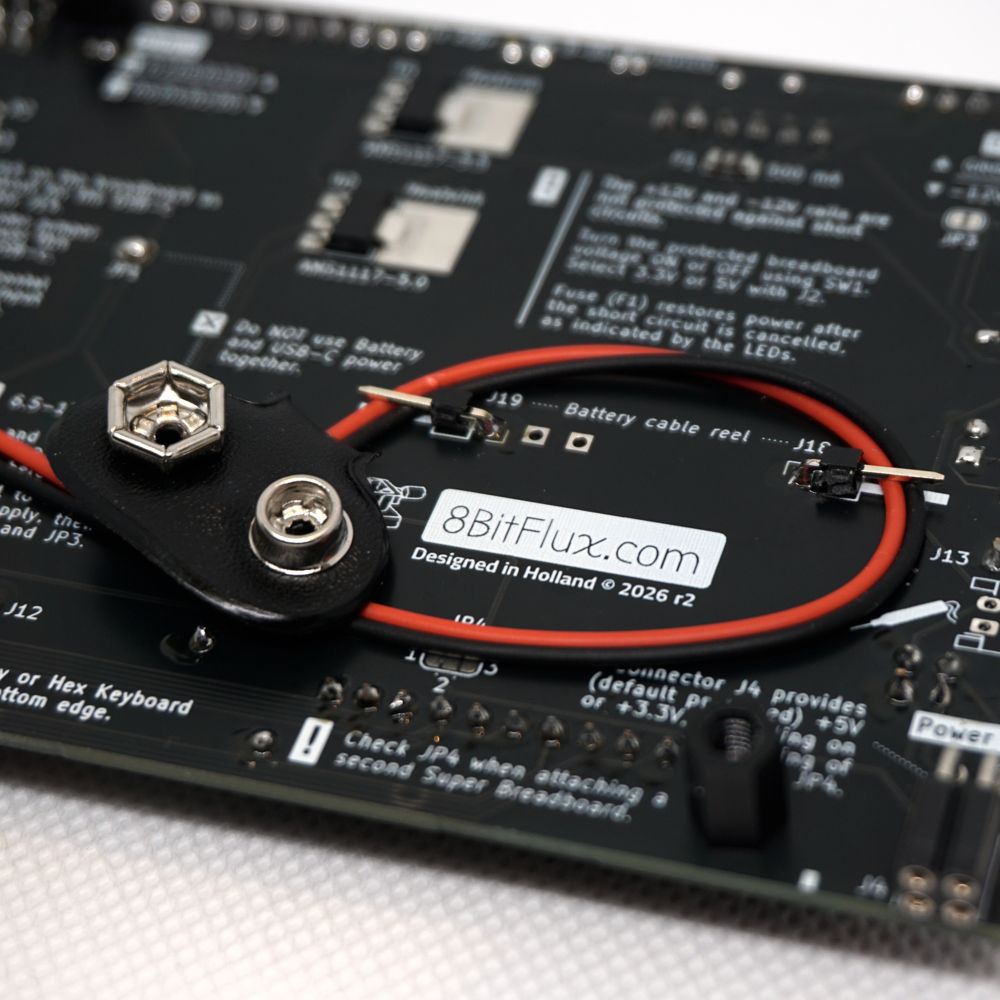
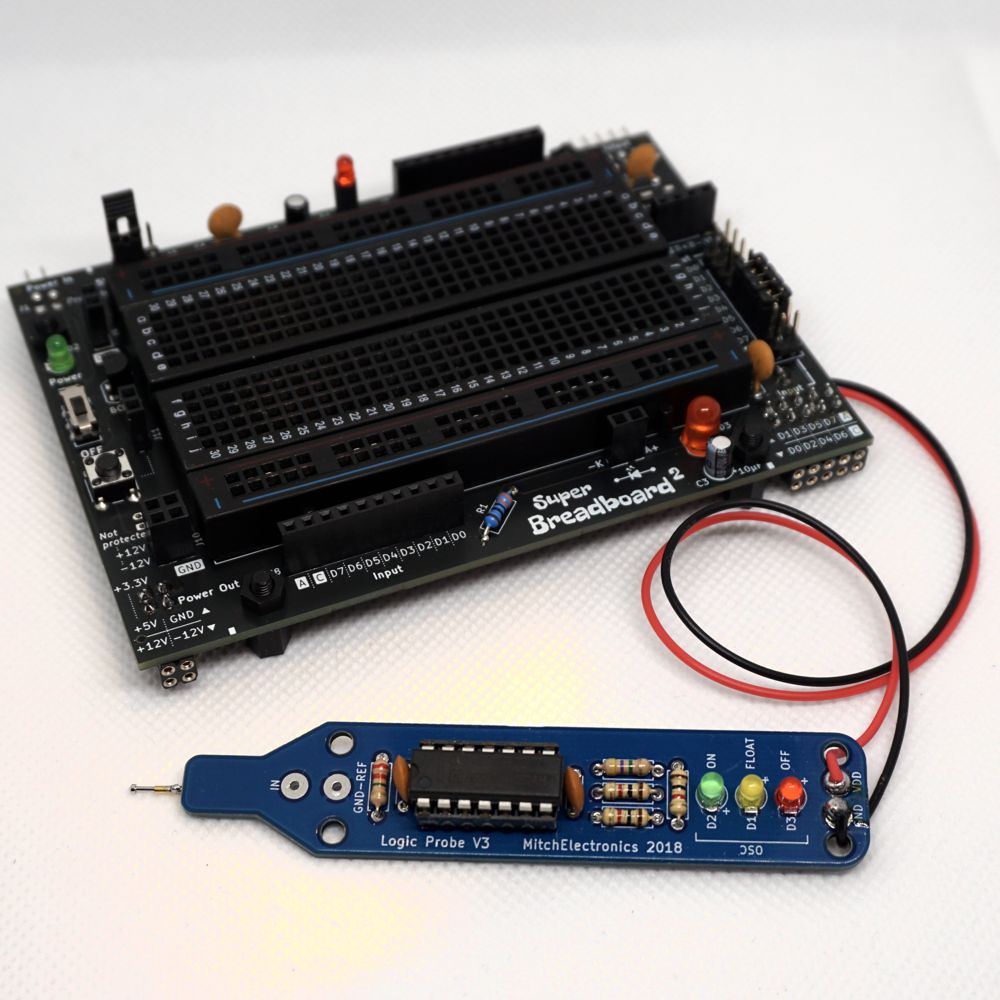
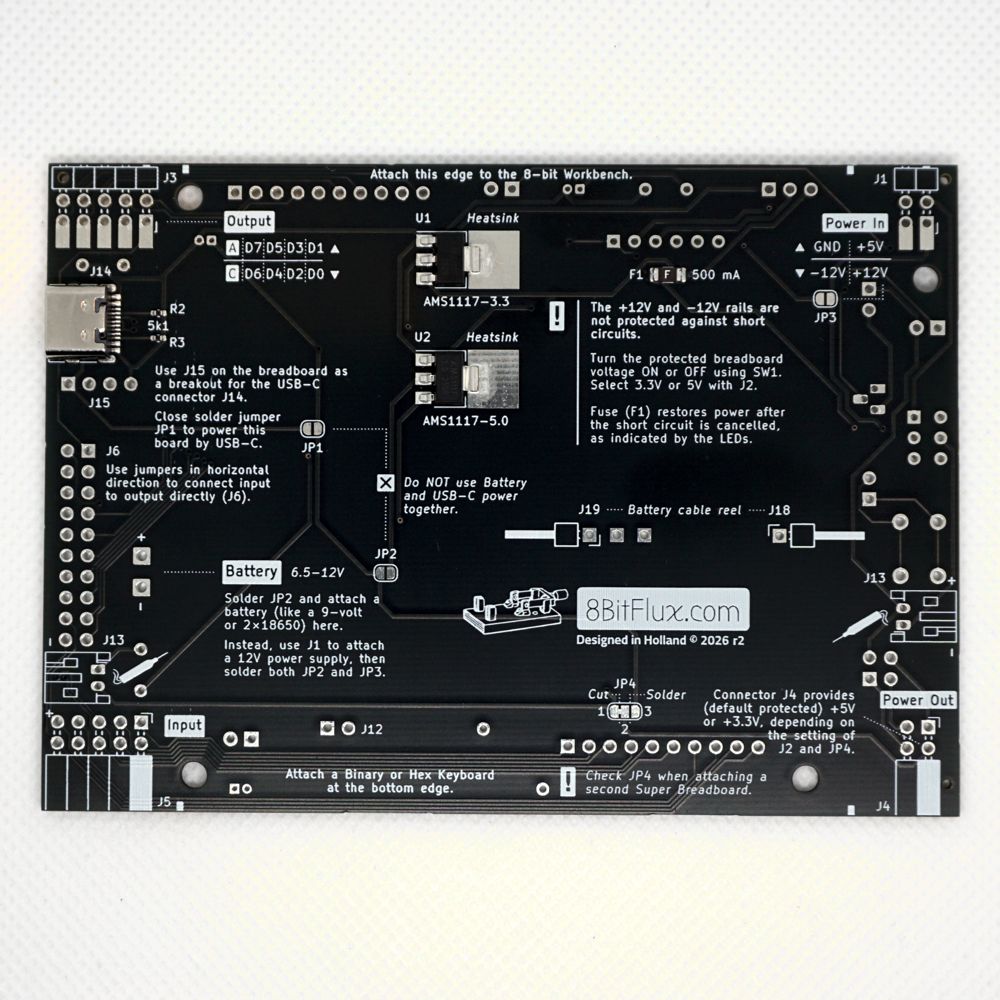
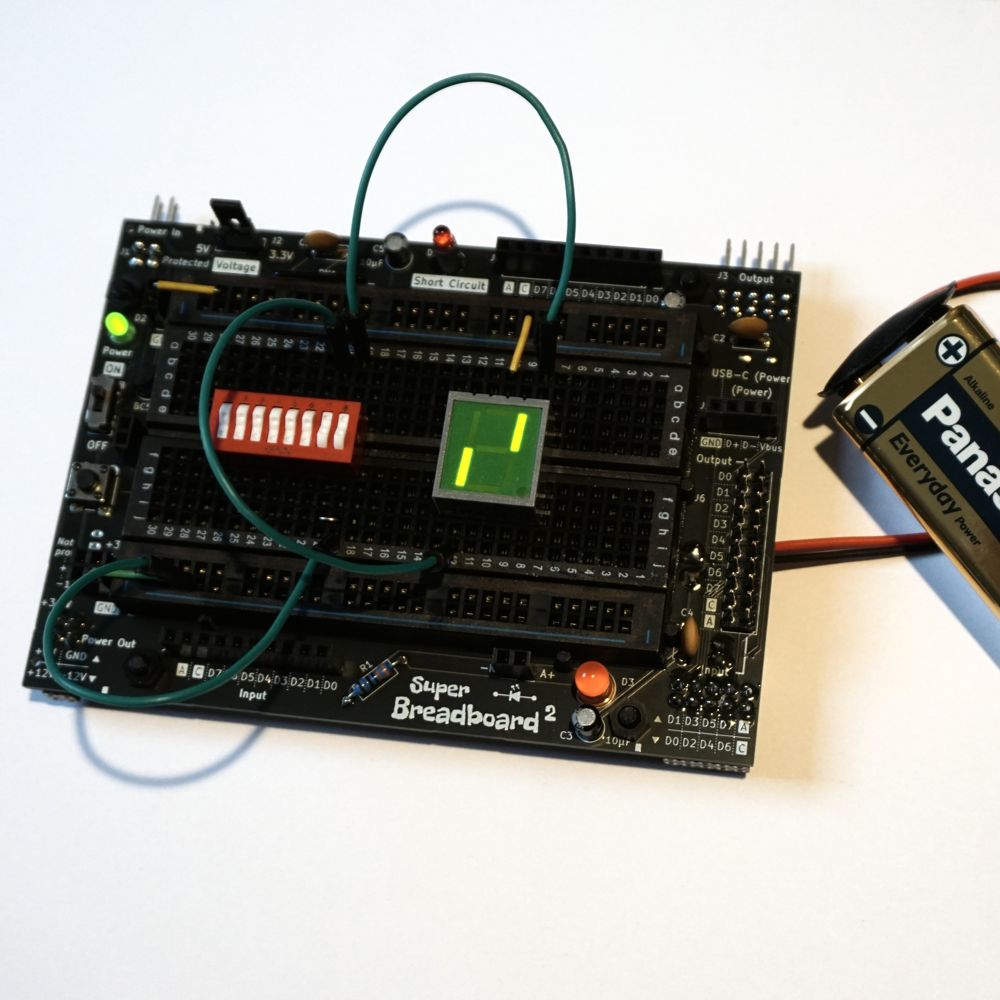
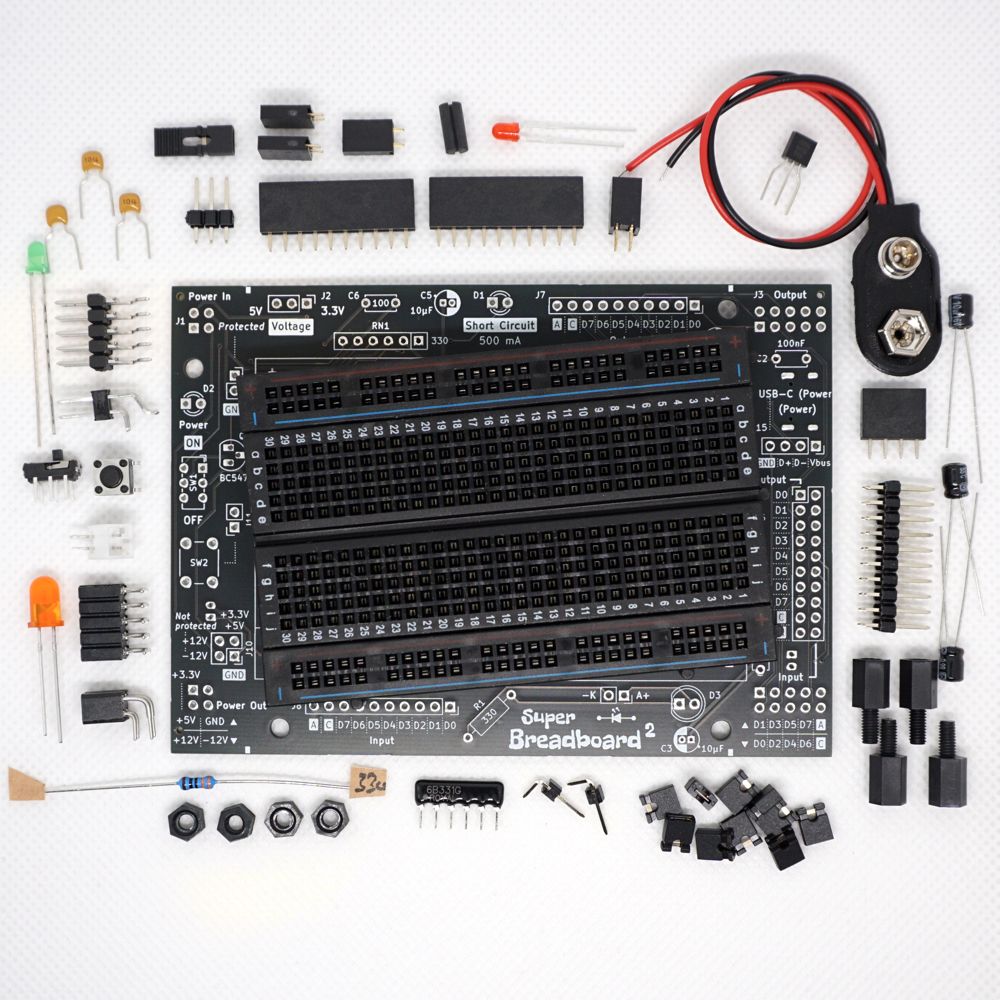
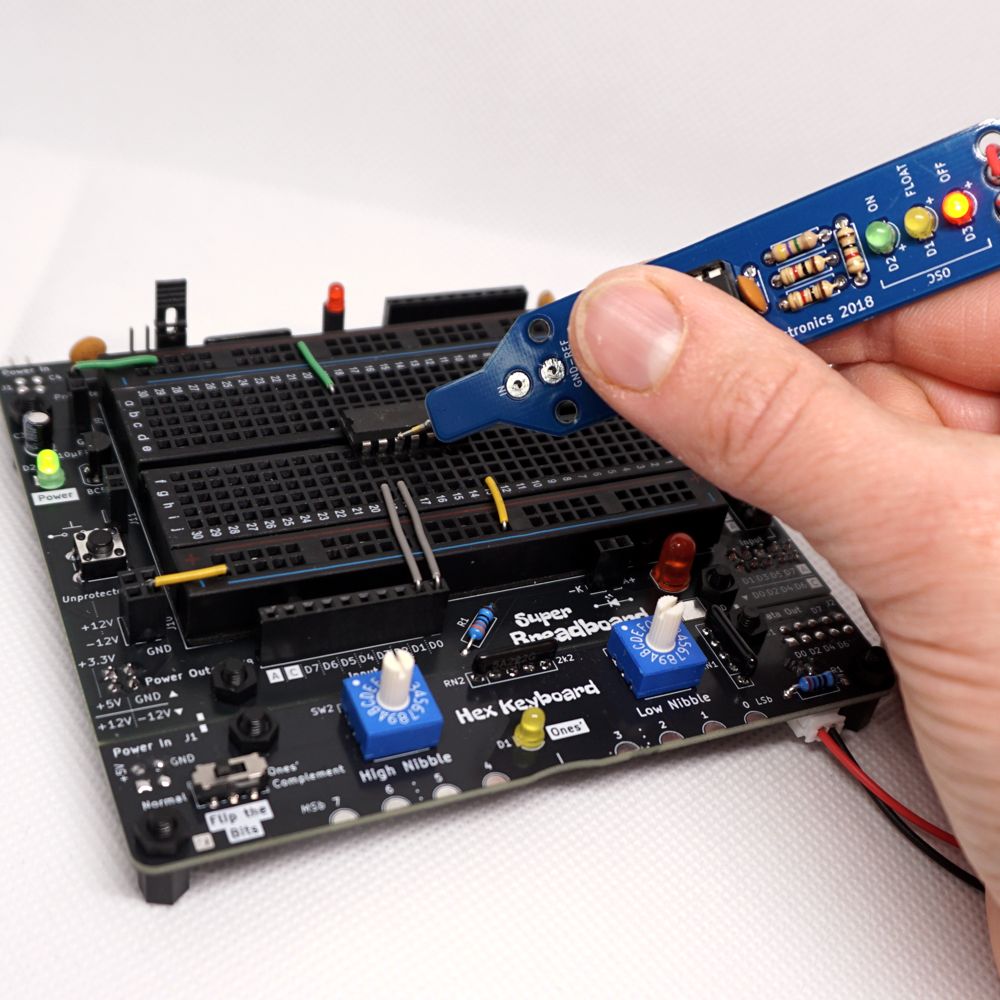
Super Breadboard 2 LP New
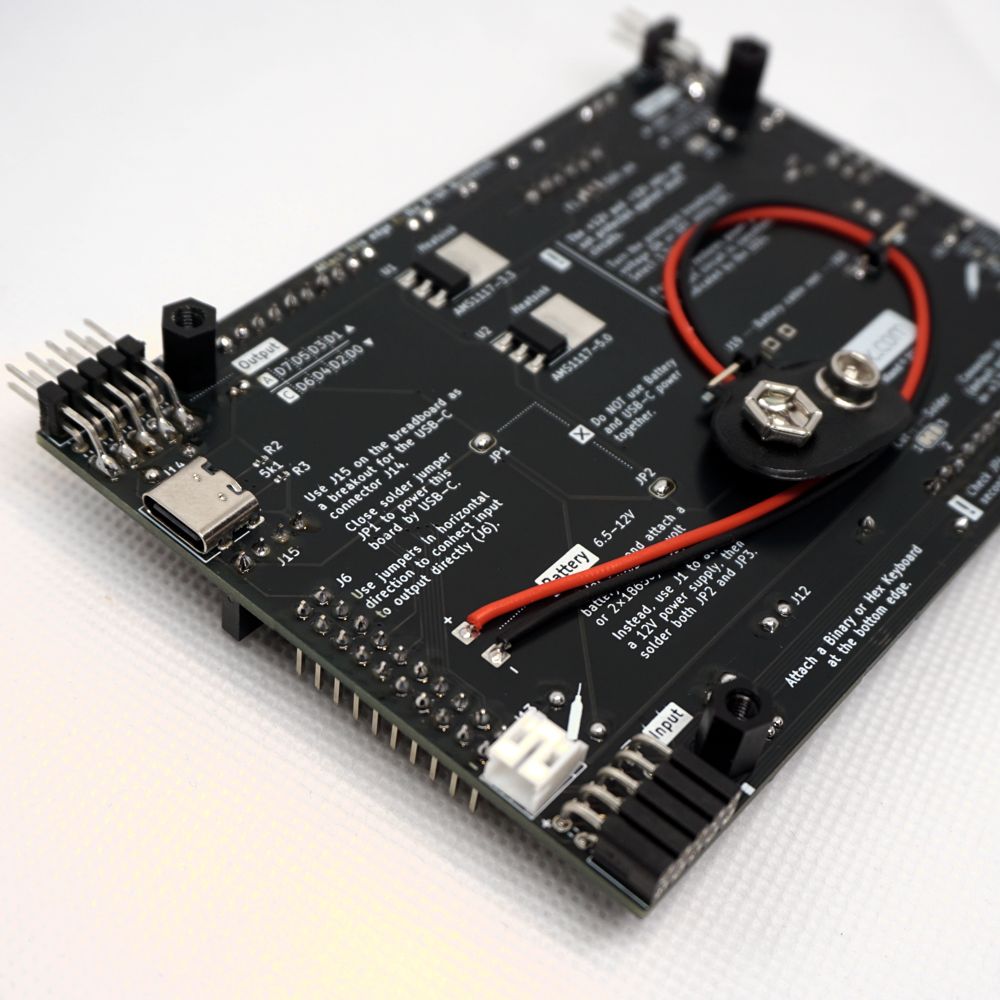
The breadboard on steroids. Enjoy short circuit protection for both +3.3V and +5V. Power it using USB-C or with a 9-volt battery (standalone use). Attach the optional Logic Probe.
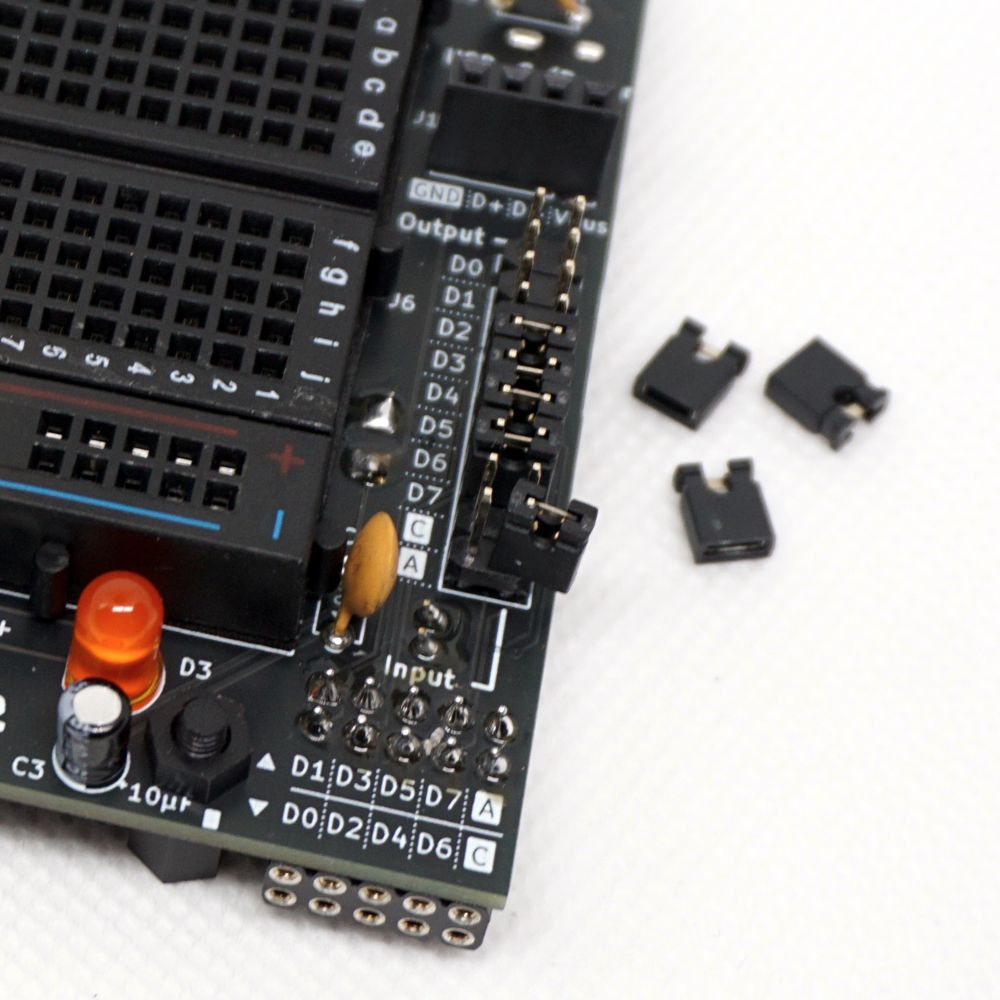
Clearly separates data input and output of a prototype. All signals of the extension interface can be bridged using jumpers. For example: the four high-nibble input-bits can be tied to the output when they are not used on the breadboard. Simple parts are already there: a button and an orange LED (with resistor).
Easily input data and attach the Binary or Hex Keyboard to the bottom edge. The 8-bit Workbench™ fits at the top edge and can display the data-output of a prototype. This adds even more voltage-rails and an action-signal. The USB-C port can act as a breakout as well. Super Breadboards can be chained to do larger experiments and can propagate their short circuit protection downwards.
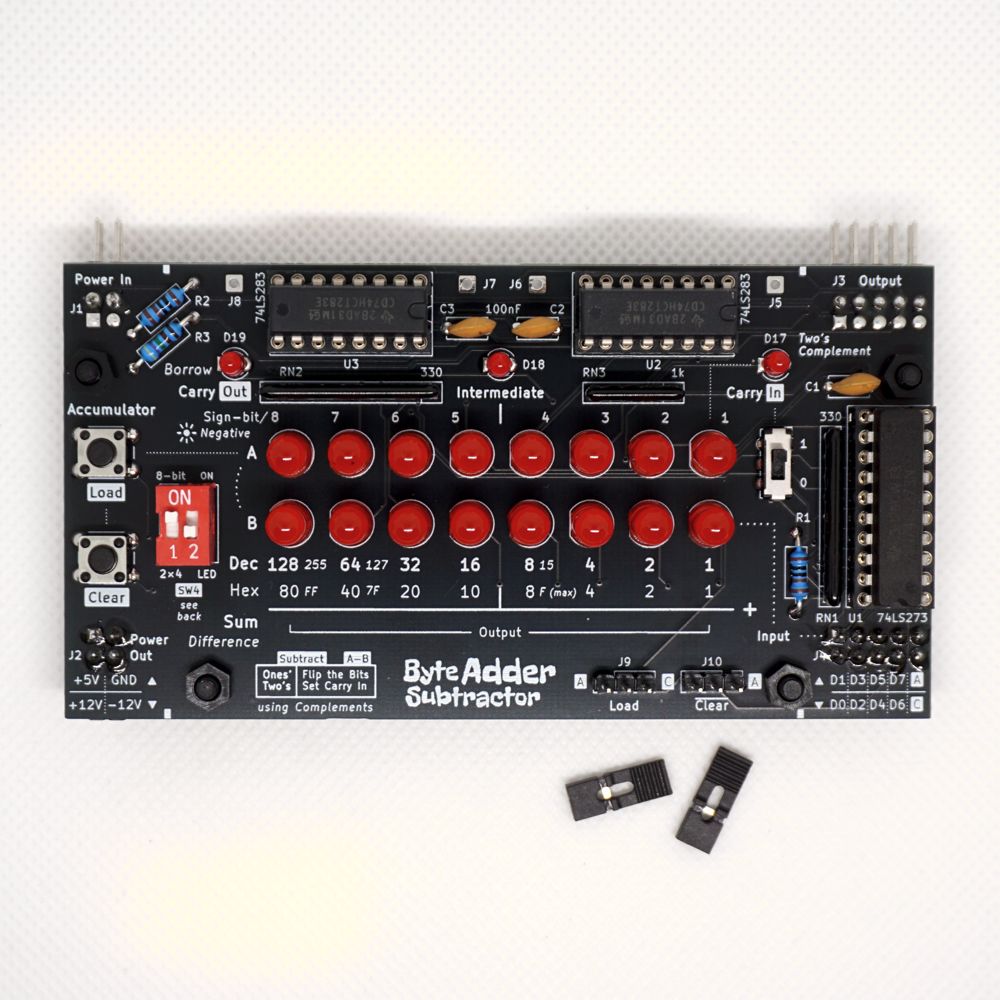
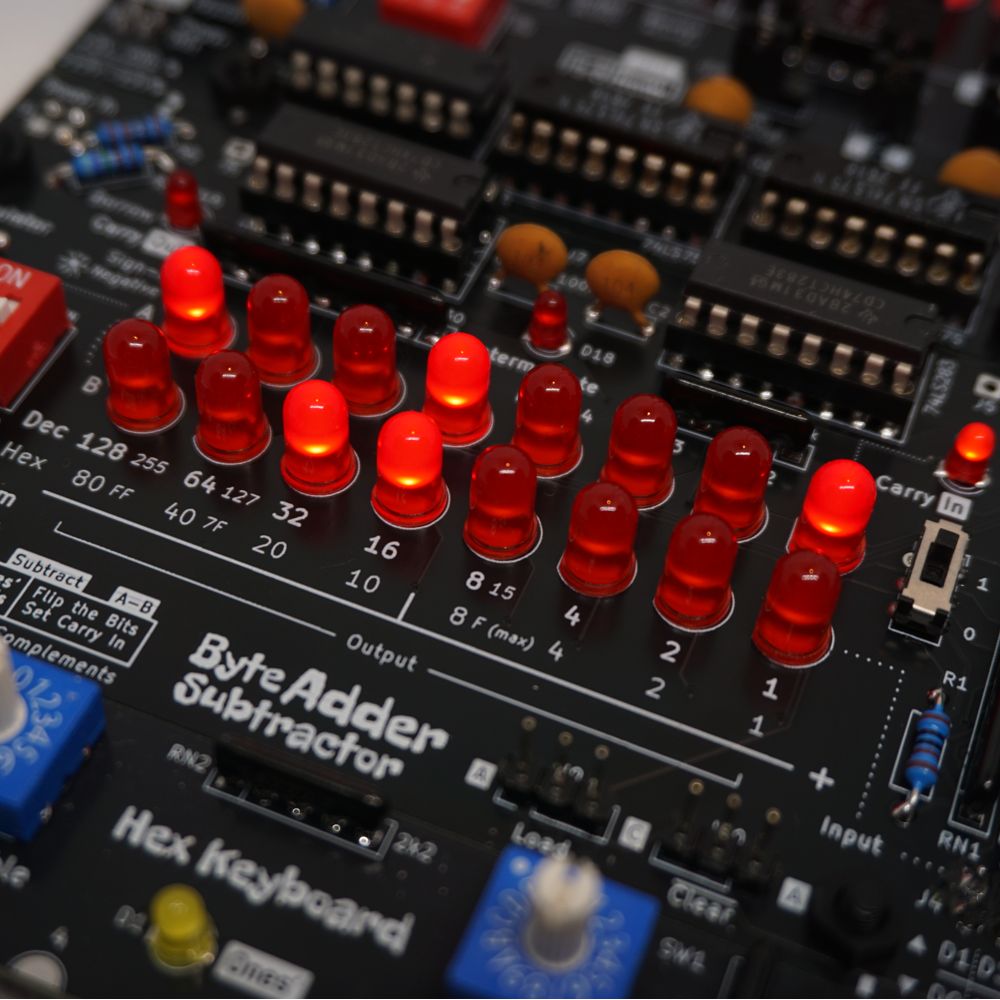
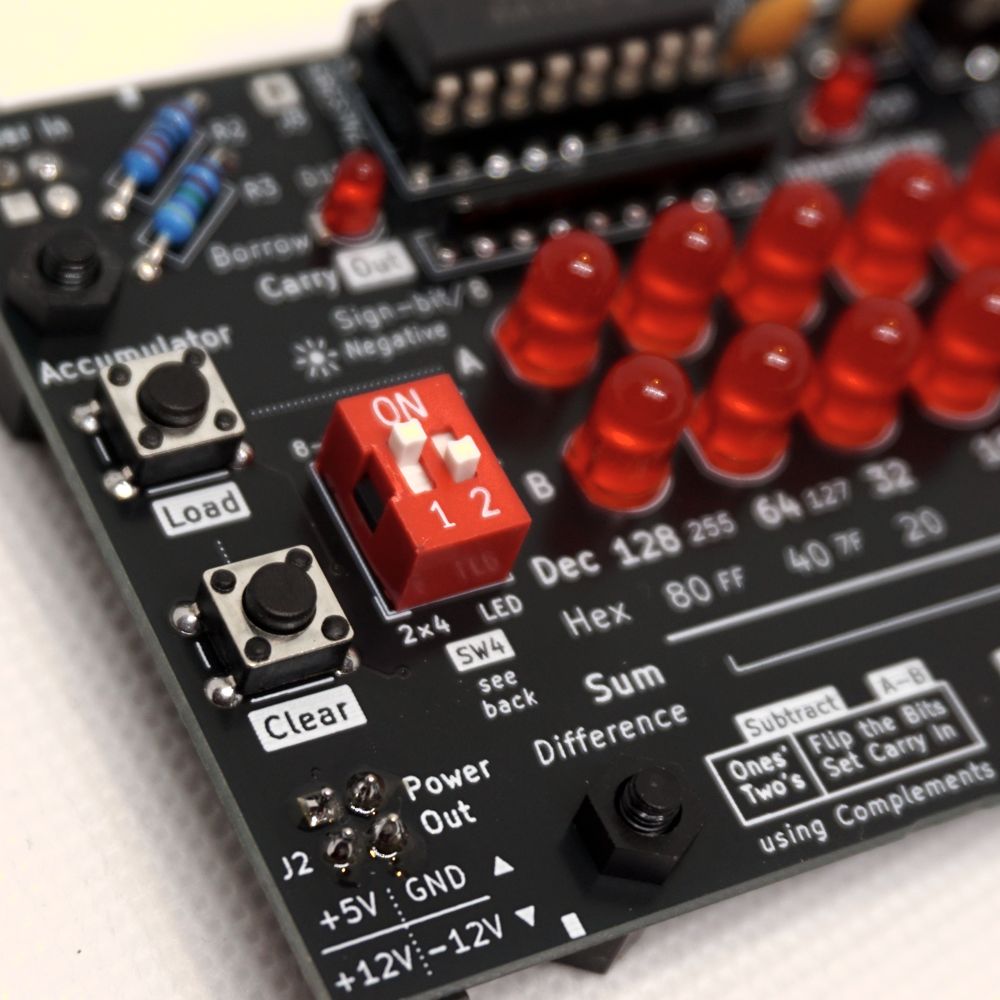
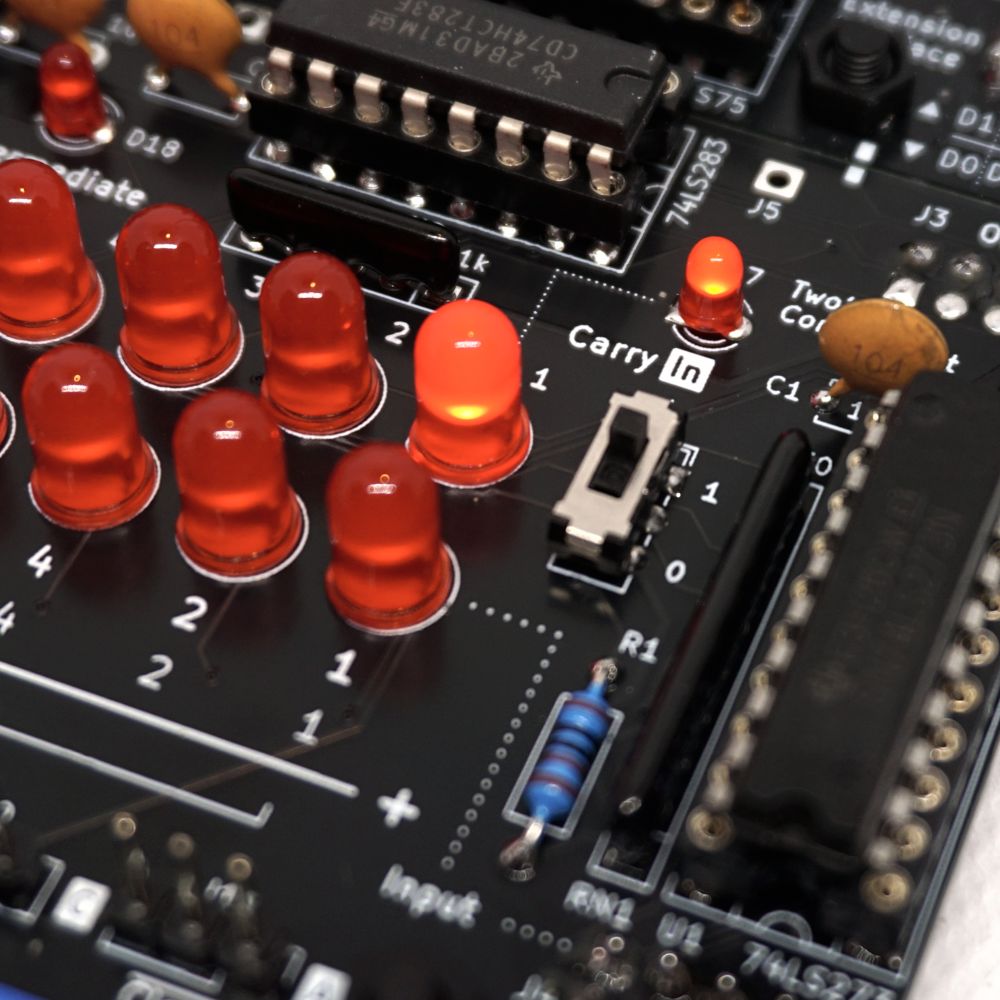
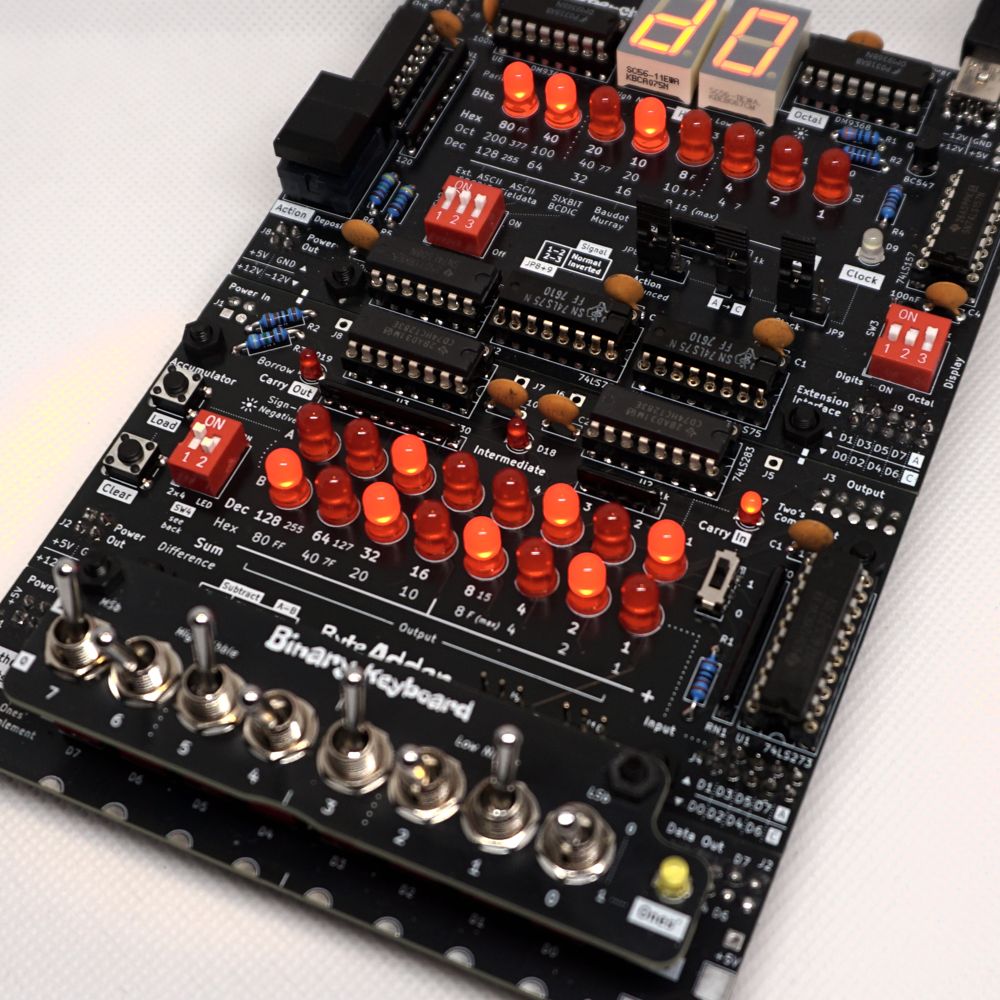
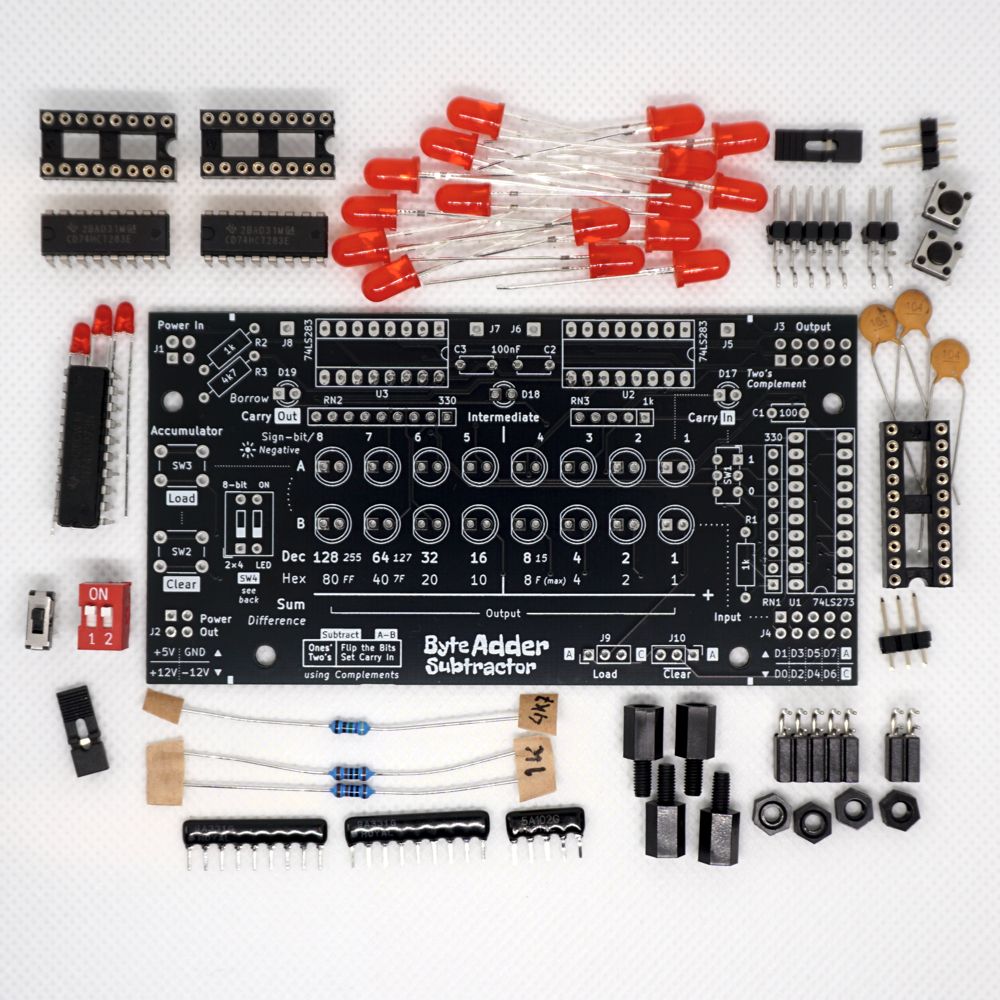
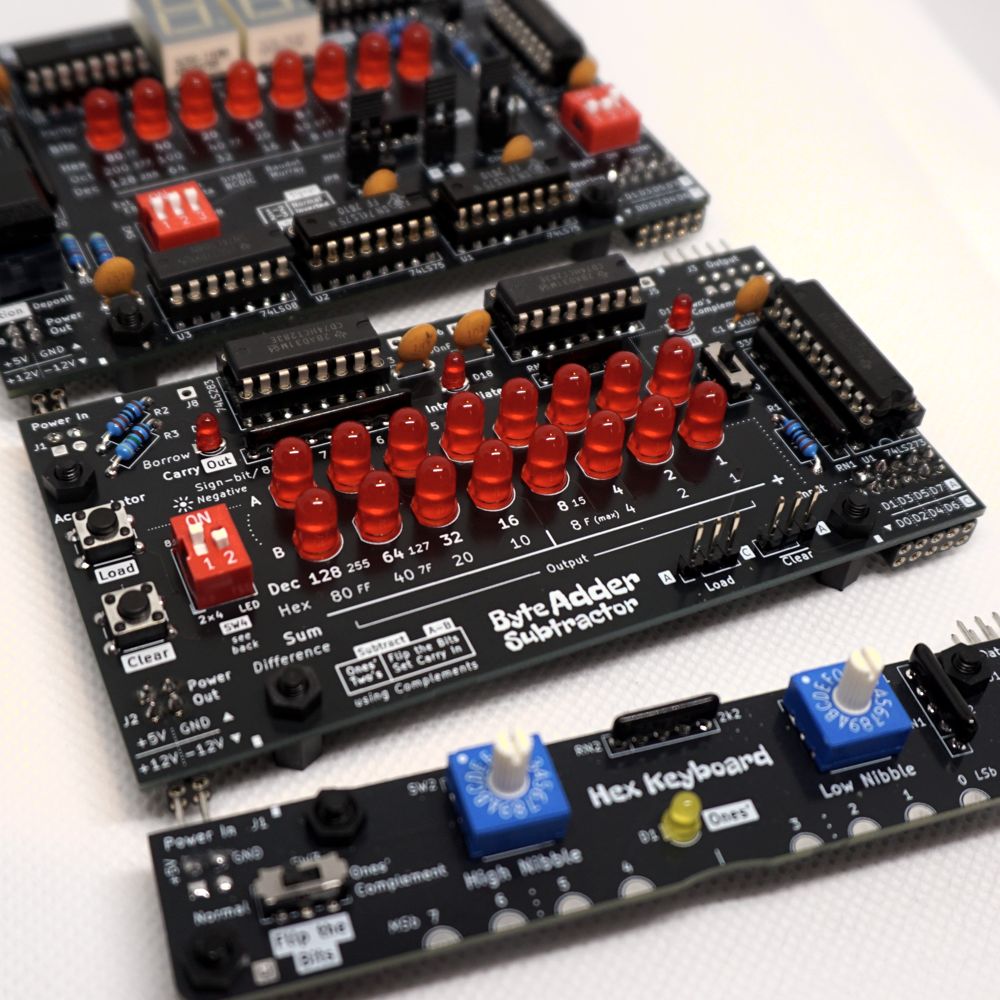
Byte Adder Subtractor New
An 8-bit full adder, with accumulator to store one operand. Do binary addition and subtraction, together with the 8-bit Workbench™ and a Binary (or Hex) Keyboard.
Gain understanding of the inner workings of an Arithmetic Logic Unit (ALU), one of the building blocks of processors. Control the one-byte storage of the accumulator using the load and clear buttons. Get feeling with the adder-concept, all carries are visualized using small LEDs. While the carry-in can be set using the slide switch, the carry-out LED indicates a byte overflow.
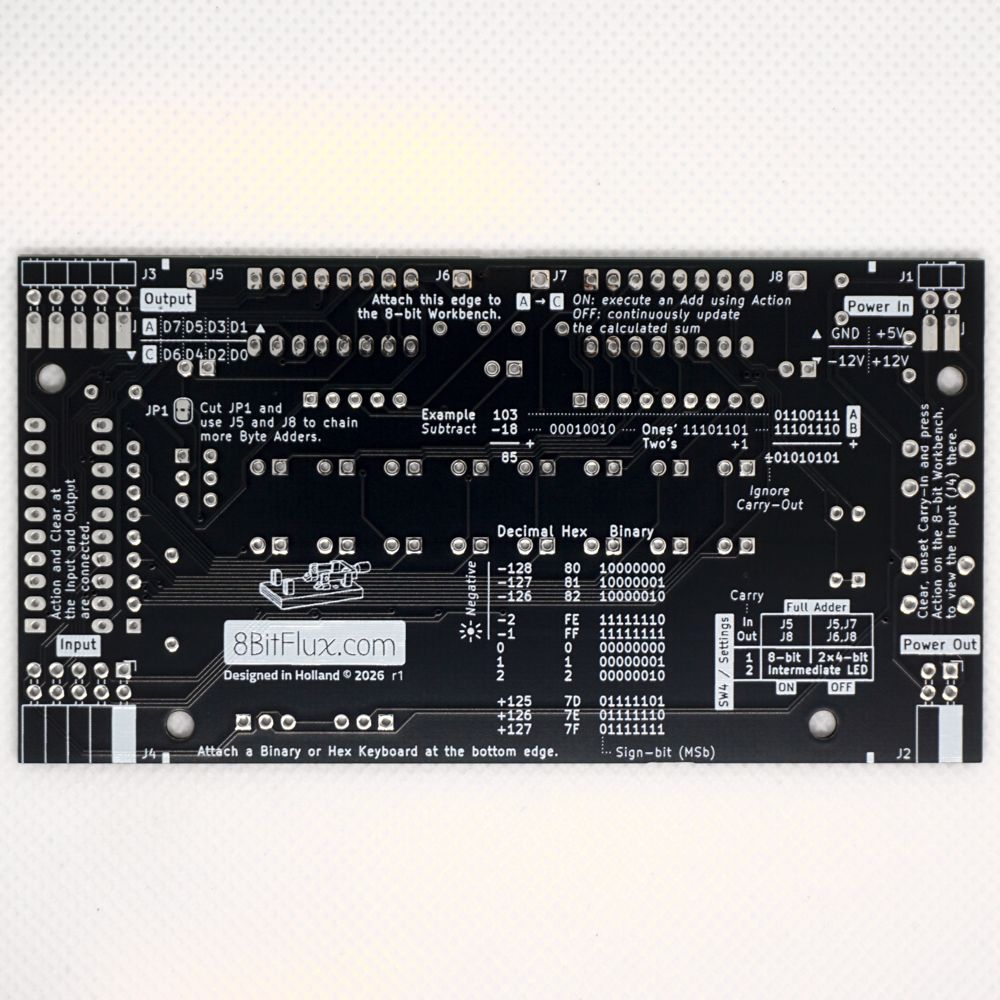
Subtraction can be done using the method of complements, as explained in the Quick Start. Jumpers can be set to externalize control of the accumulator, i.e. tie load and clear to the action- or clock-signal. Use the DIP-switch to turn off the intermediate-carry or separate the adder into two 4-bit adders.
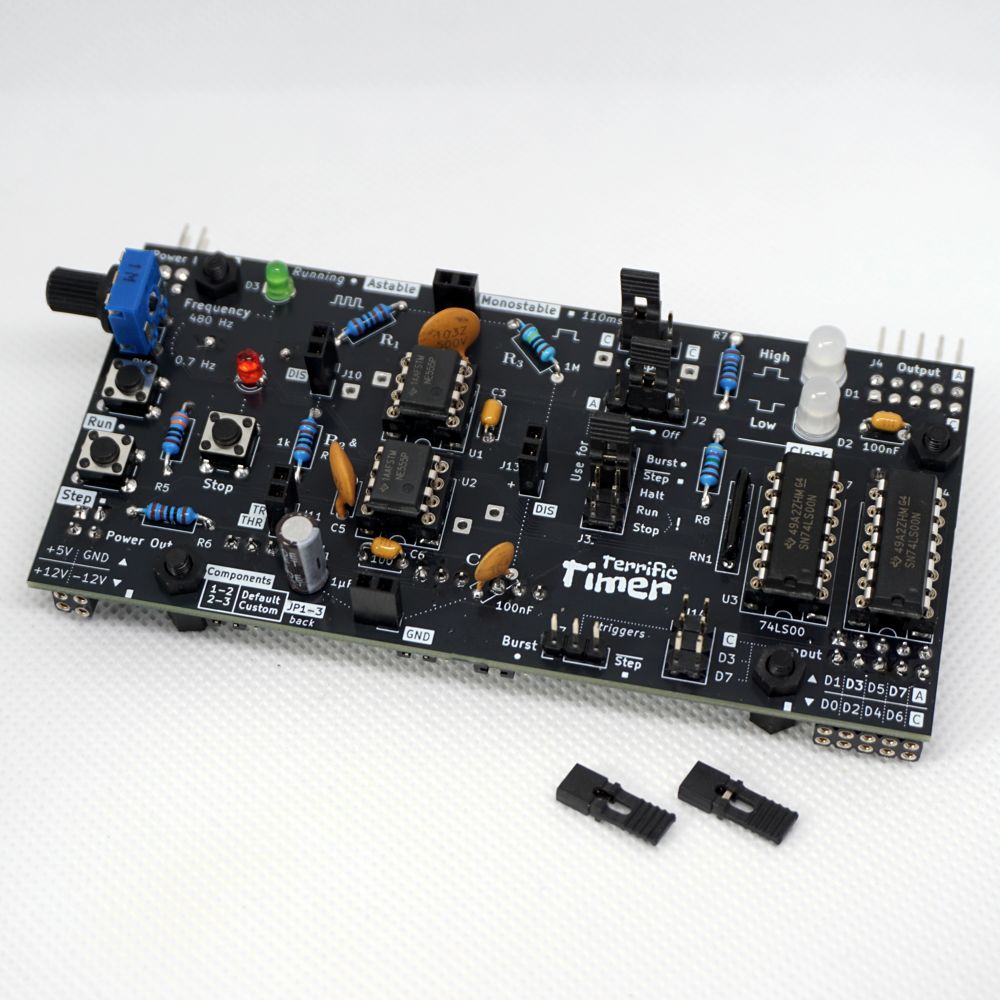
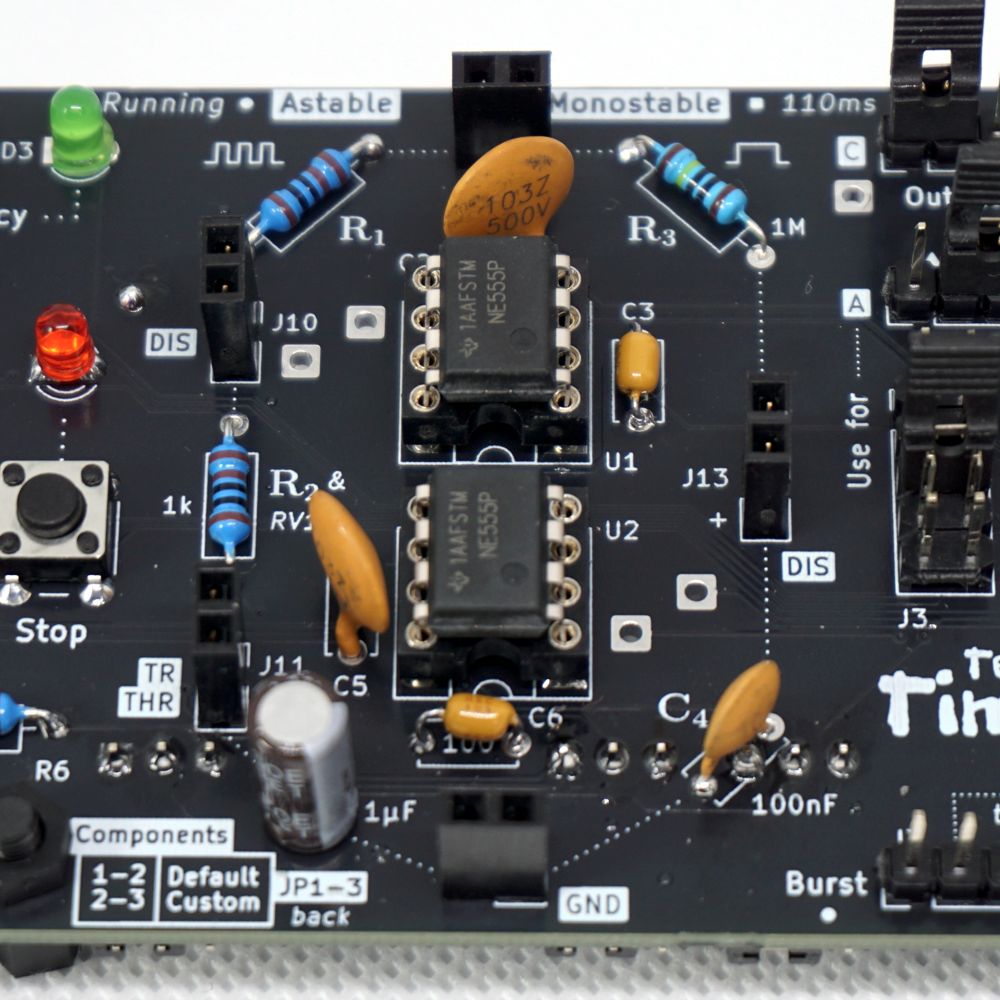
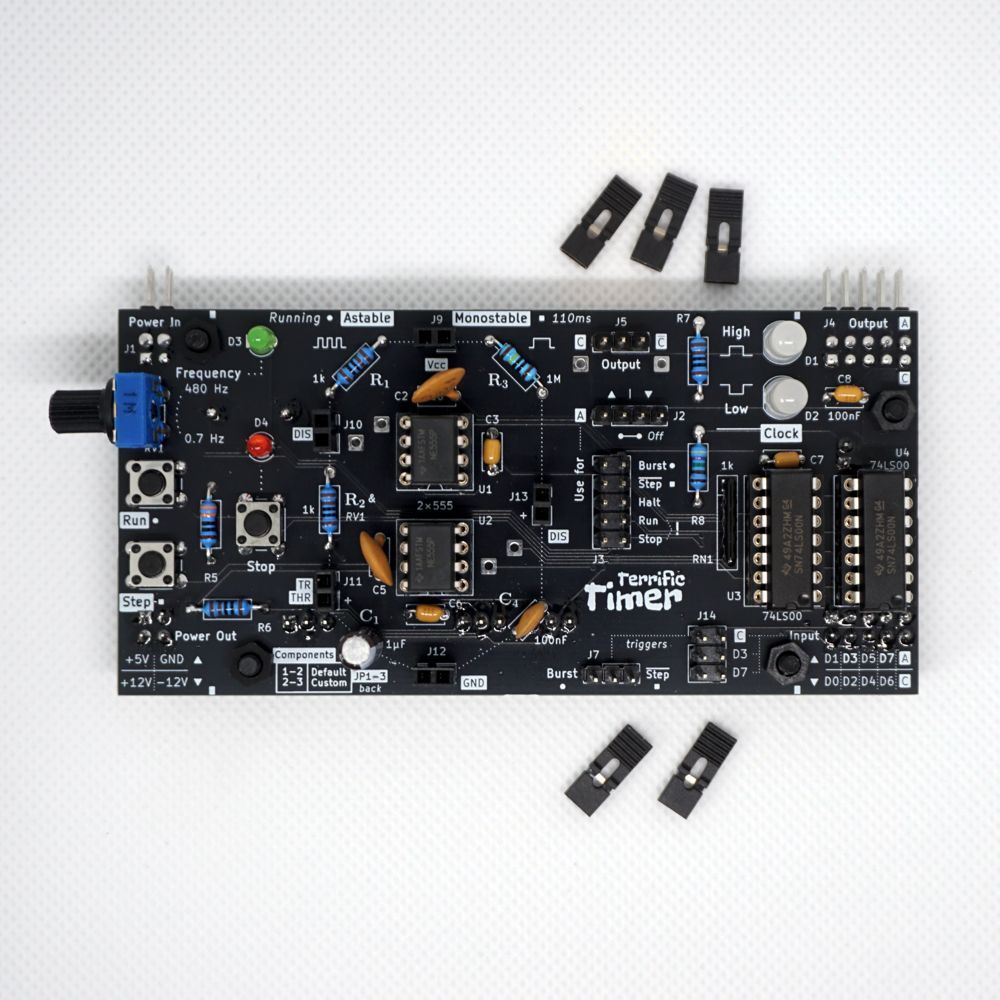
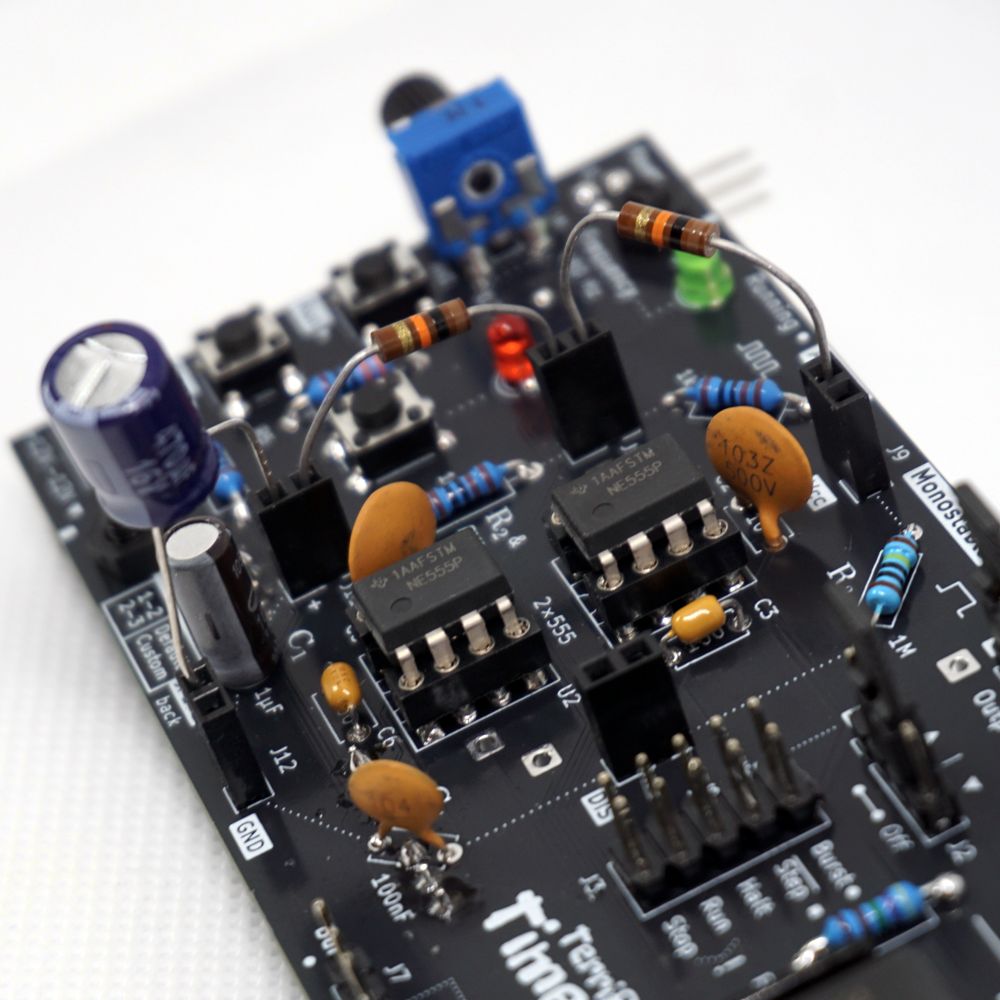
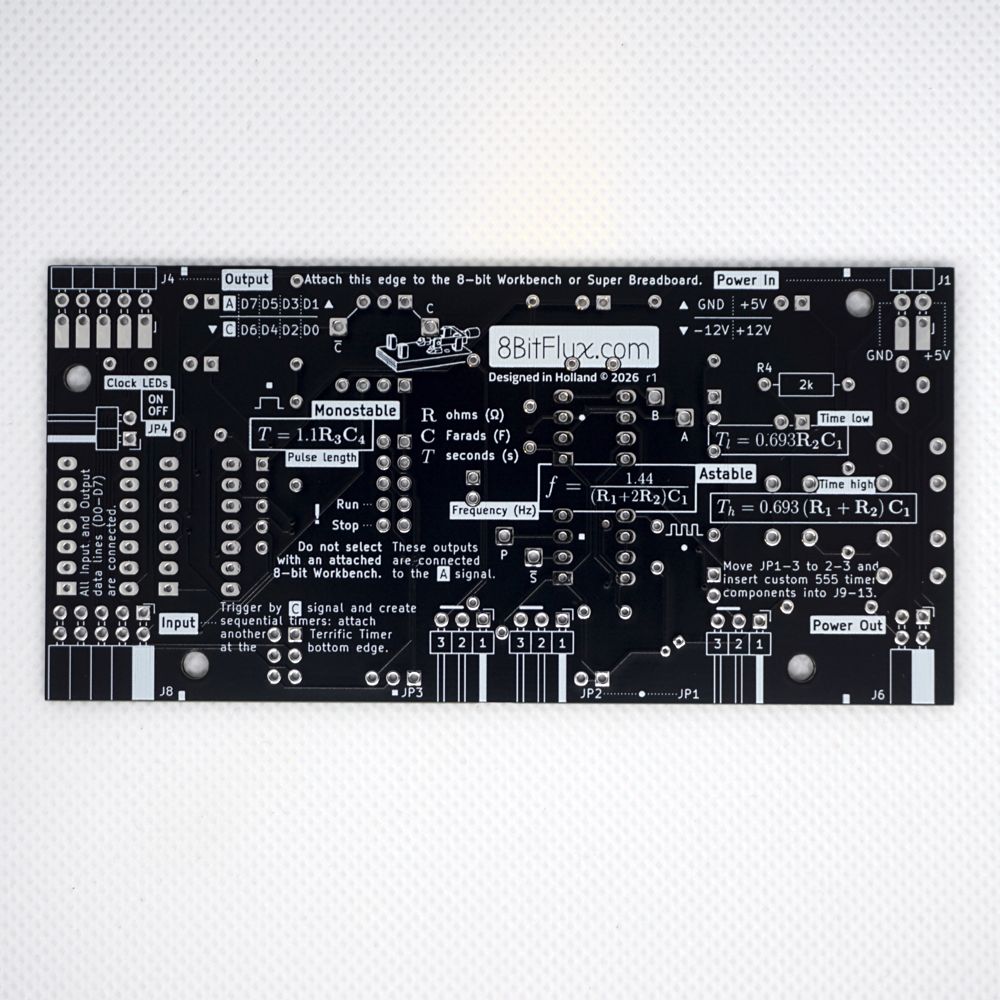
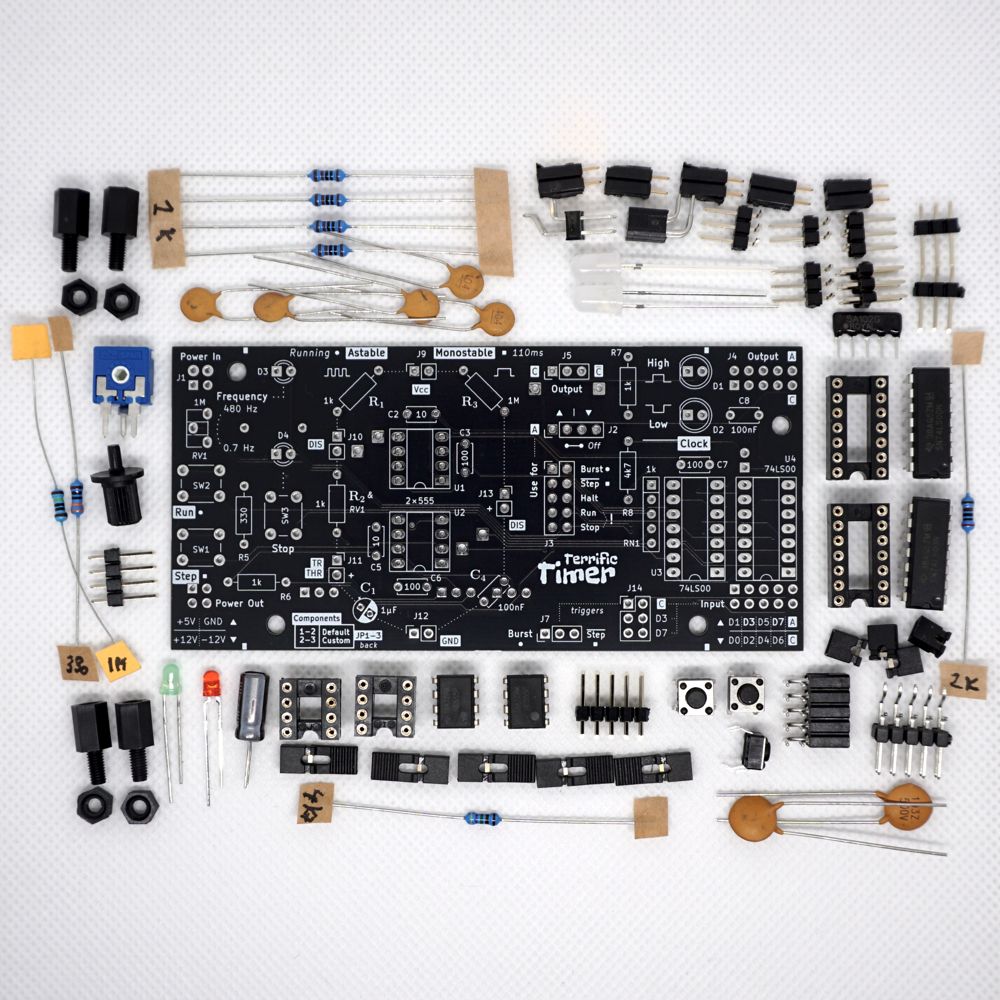
Terrific Timer
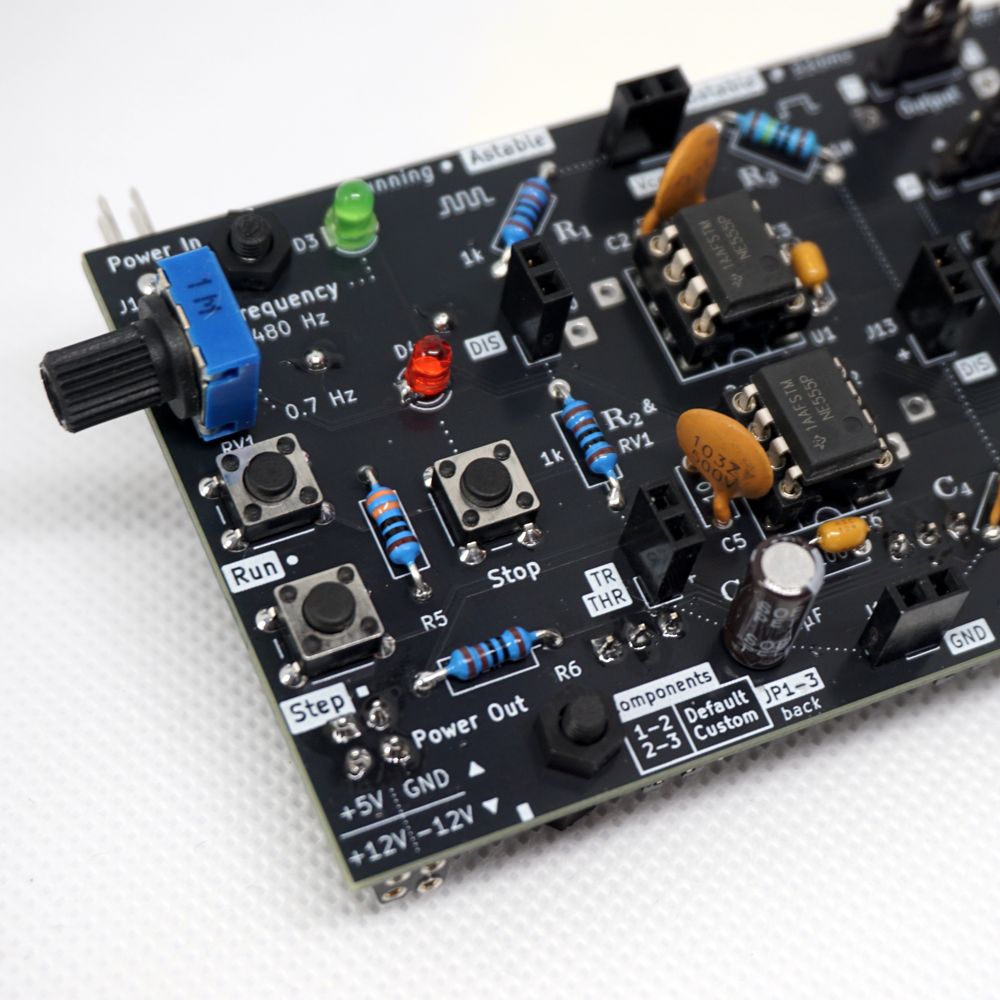
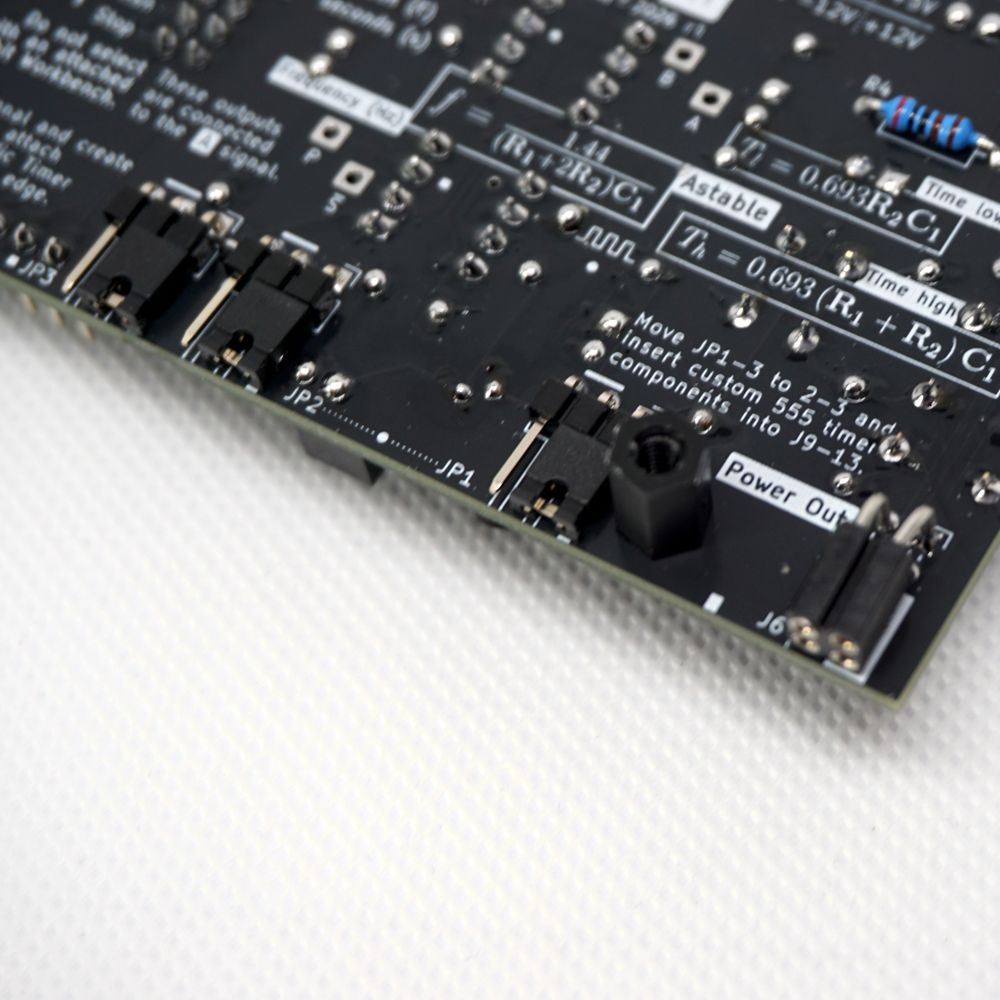
A versatile clock board that provides an adjustable astable clock (0.7 - 480 Hz) and a monostable pulse (110 ms). Insert your own 555-timer parts to customize its use.
Explore one of the most popular and widely used ICs: the 555-timer. Two of them are on this board, one for each mode of operation. A bistable latch enables start and stop of the clock (astable mode). Turn the frequency dial to adjust the speed. When stopped, a step button generates a pulse (monostable mode). Insert your own parts (capacitors and resistors) and be free to customize either mode.
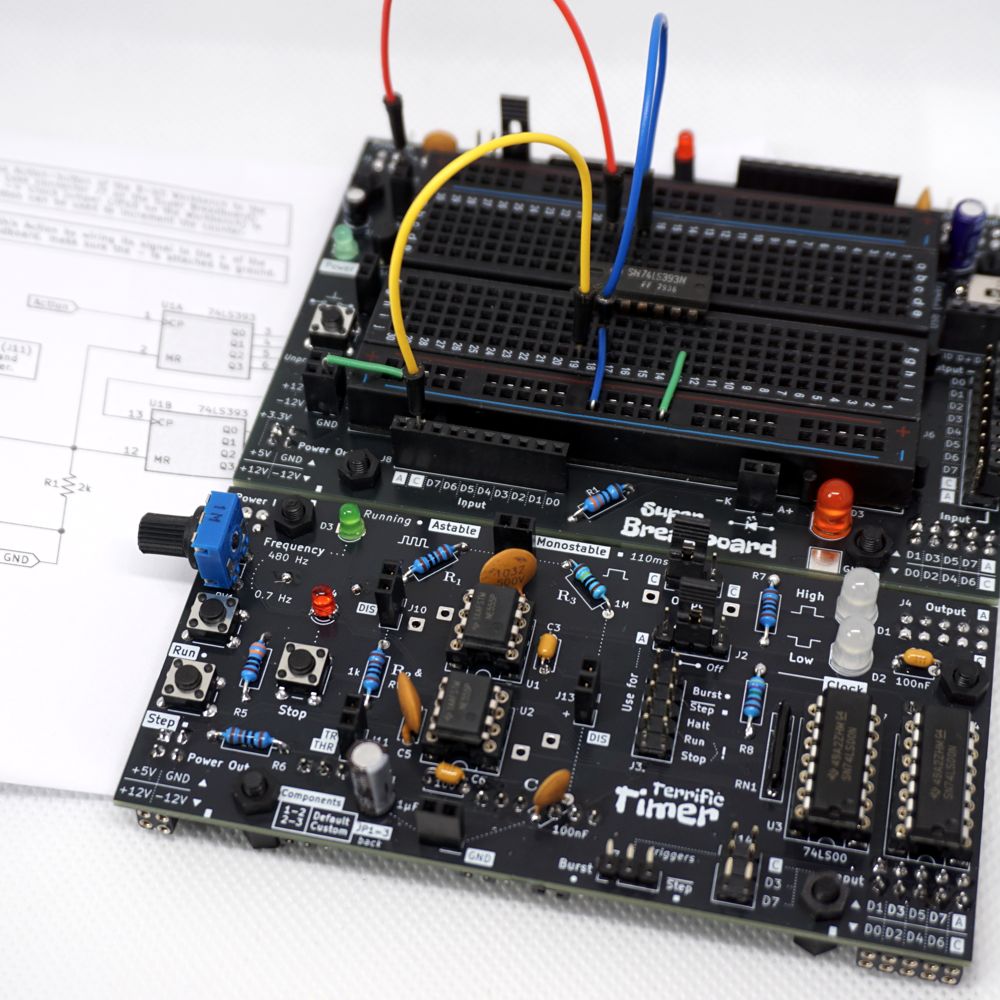
Link the action-button of the 8-bit Workbench™ to create an astable-burst or just halt the clock. Attach a Super Breadboard 2 and use clock-output in prototyping (e.g. create a counter with a 74LS393). Create sequential timers by using a second board as trigger-input. Why not create your own computer with it?

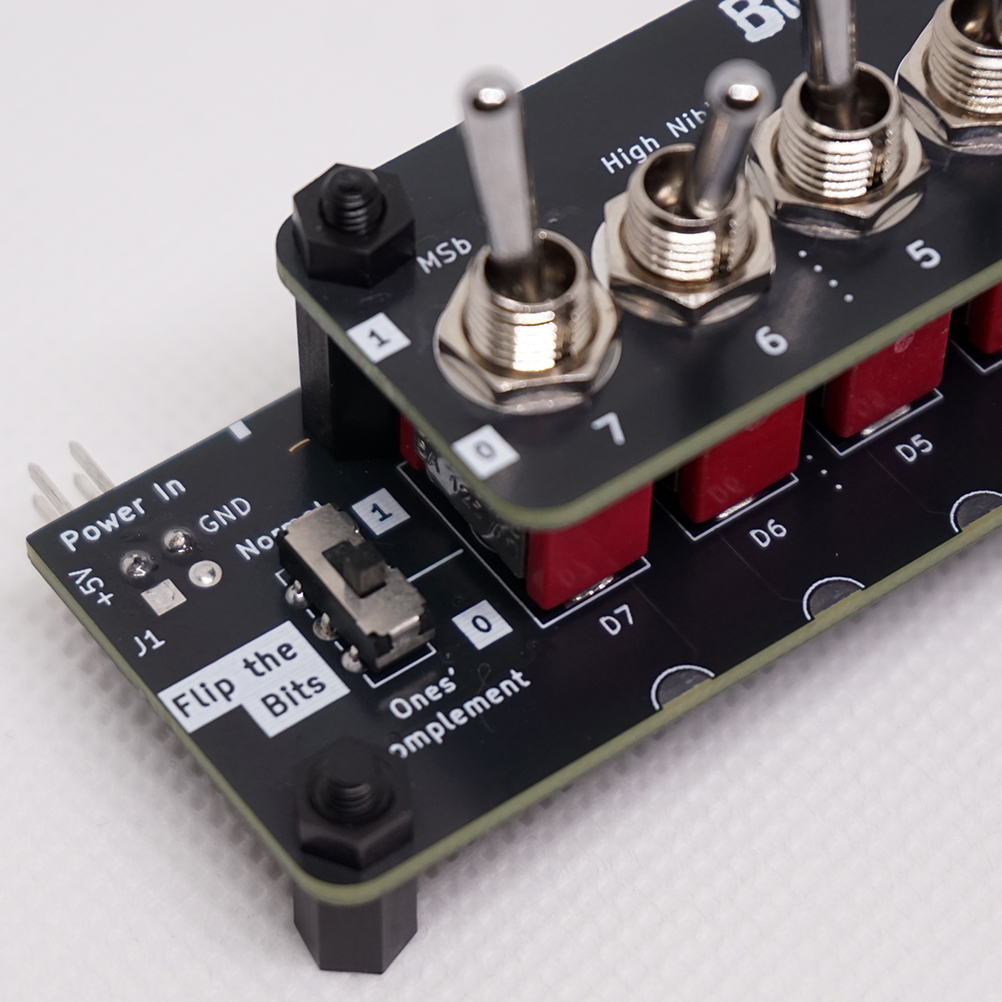
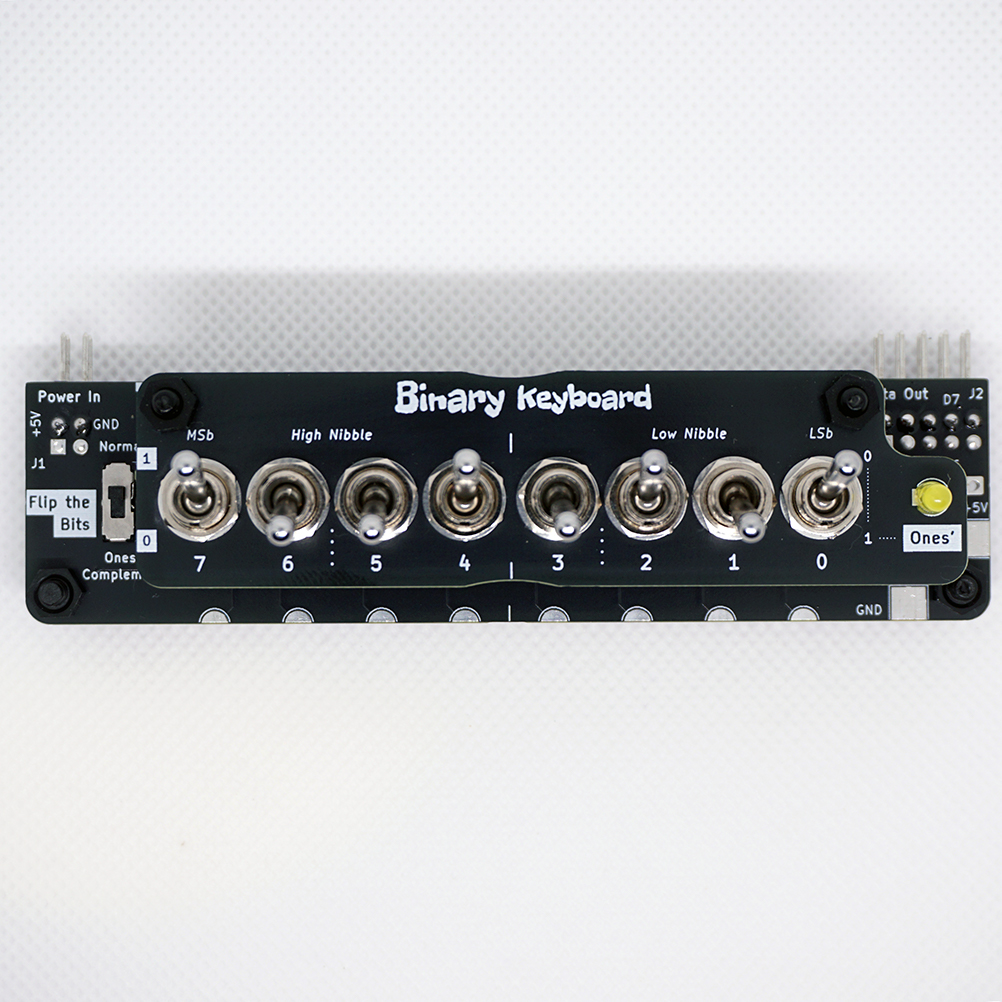
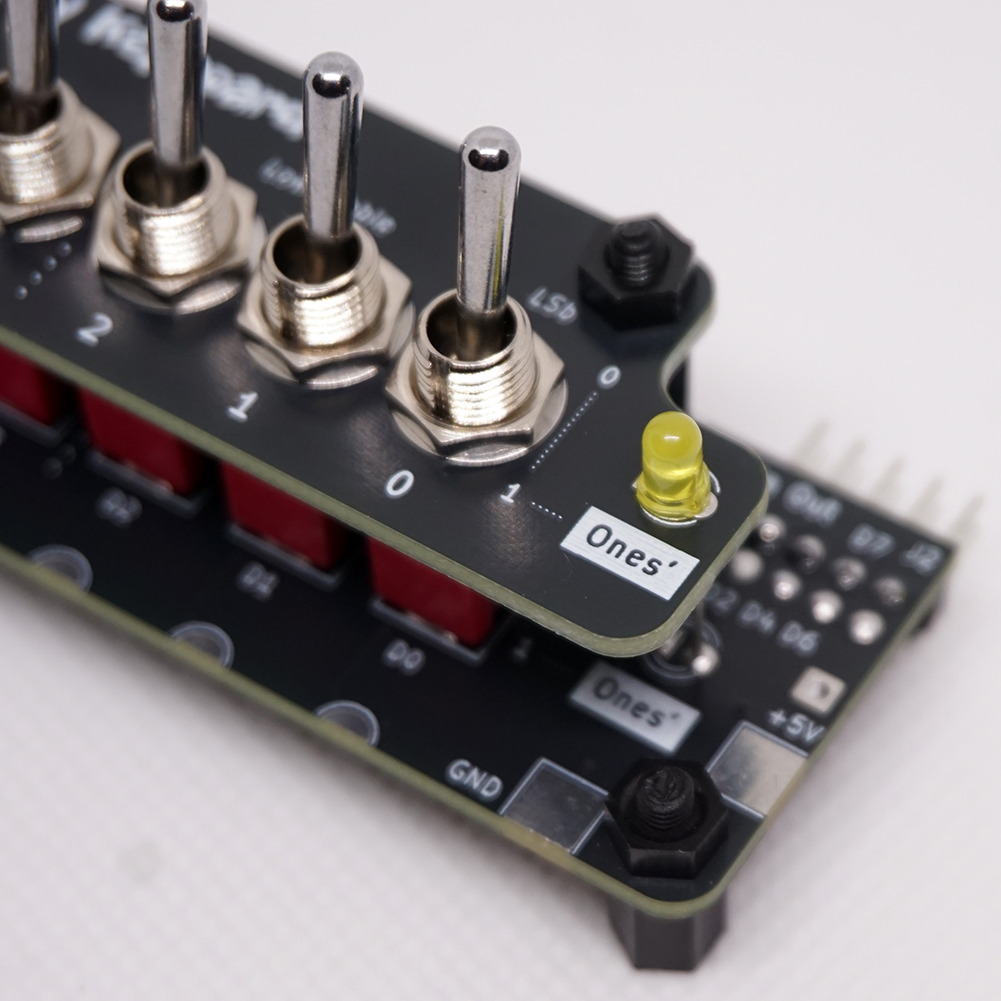
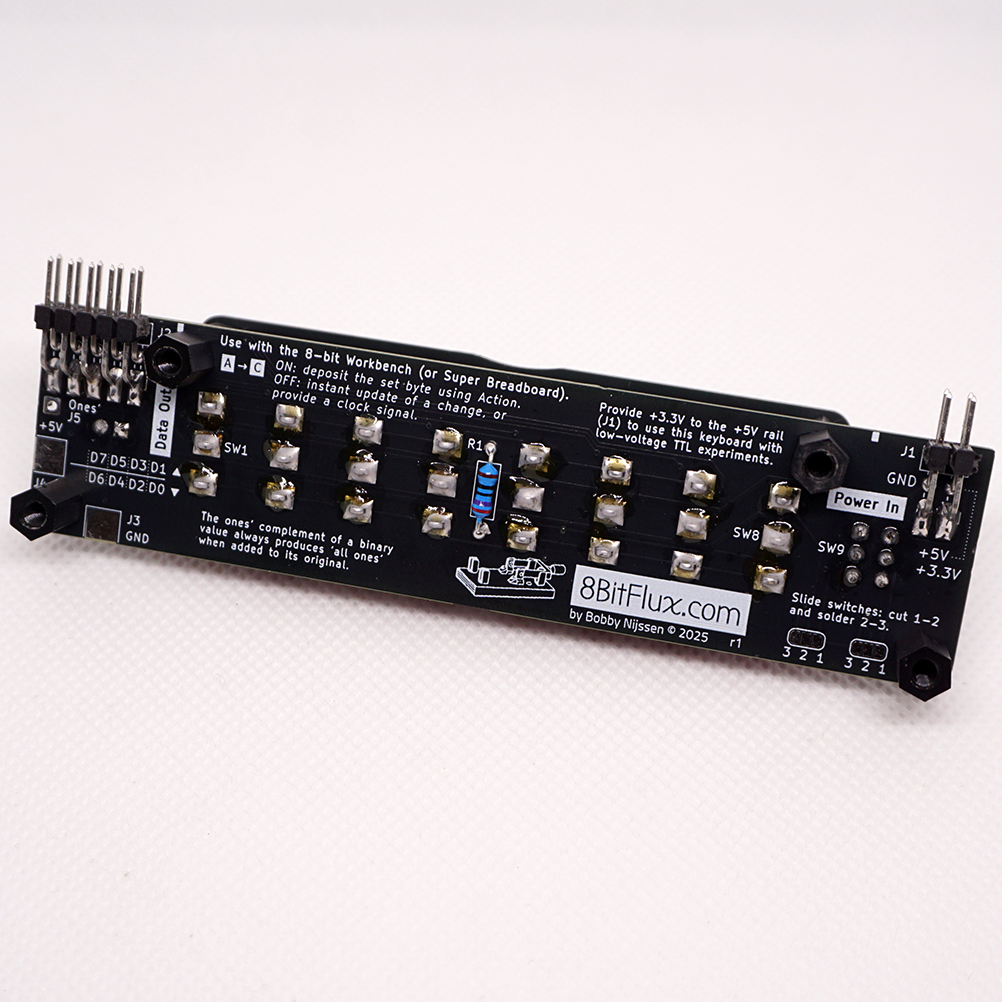
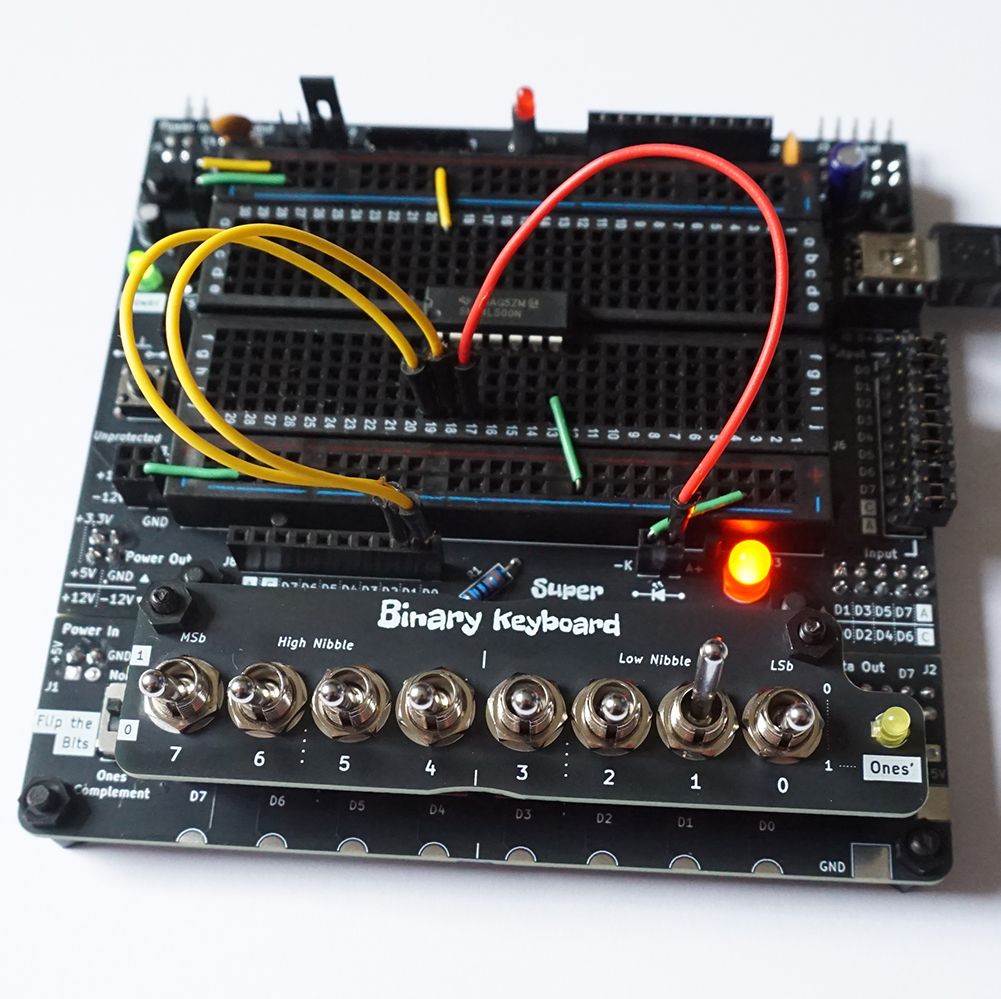
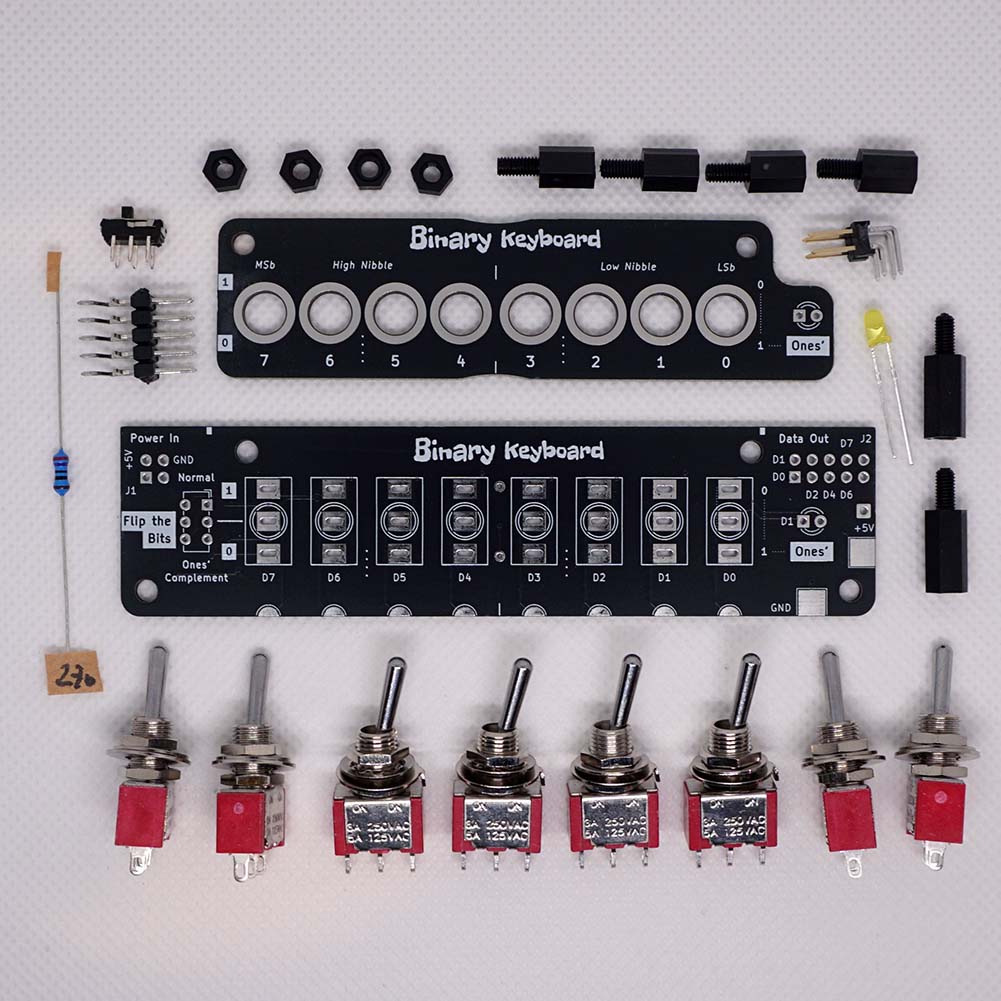
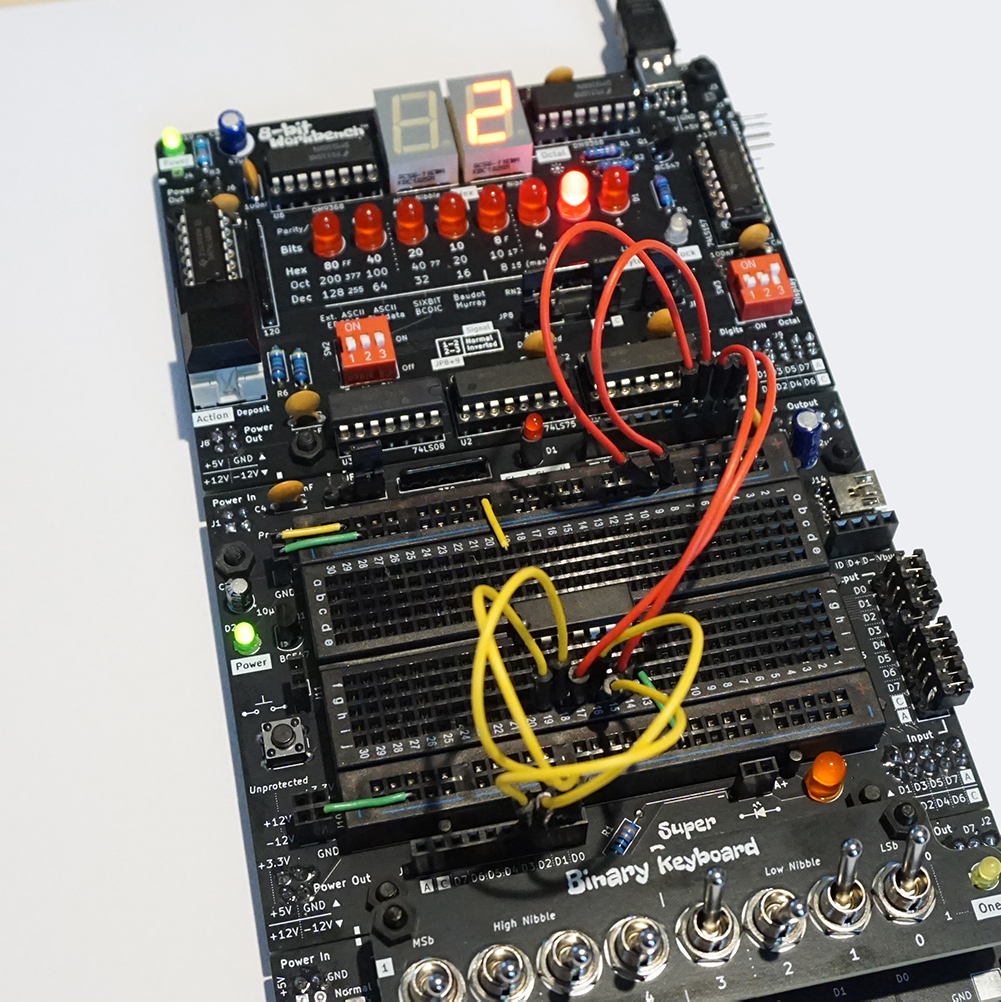
Binary Keyboard LP
Straight from the 70s, it adds the retro toggling experience to your experiments. All switches are fossilized in a double-decker design 🚌 with a front panel.
A neat 8-bit toggle keyboard (one byte) to extend the 8-bit Workbench™: use the action-button to deposit the toggled byte and see its hexadecimal or octal representation right away. Besides this, the keyboard comes in handy on itself using your own breadboard or Arduino. The board design supports slide switches as well, if preferred.
Use the little switch on the lower deck to flip the bits in an instance. The ones' complement of the set byte is then active as output, as shown by a LED. Clip on the Logic Probe and check bit voltage levels, or measure your prototype-in-construction on an attached Super Breadboard 2.
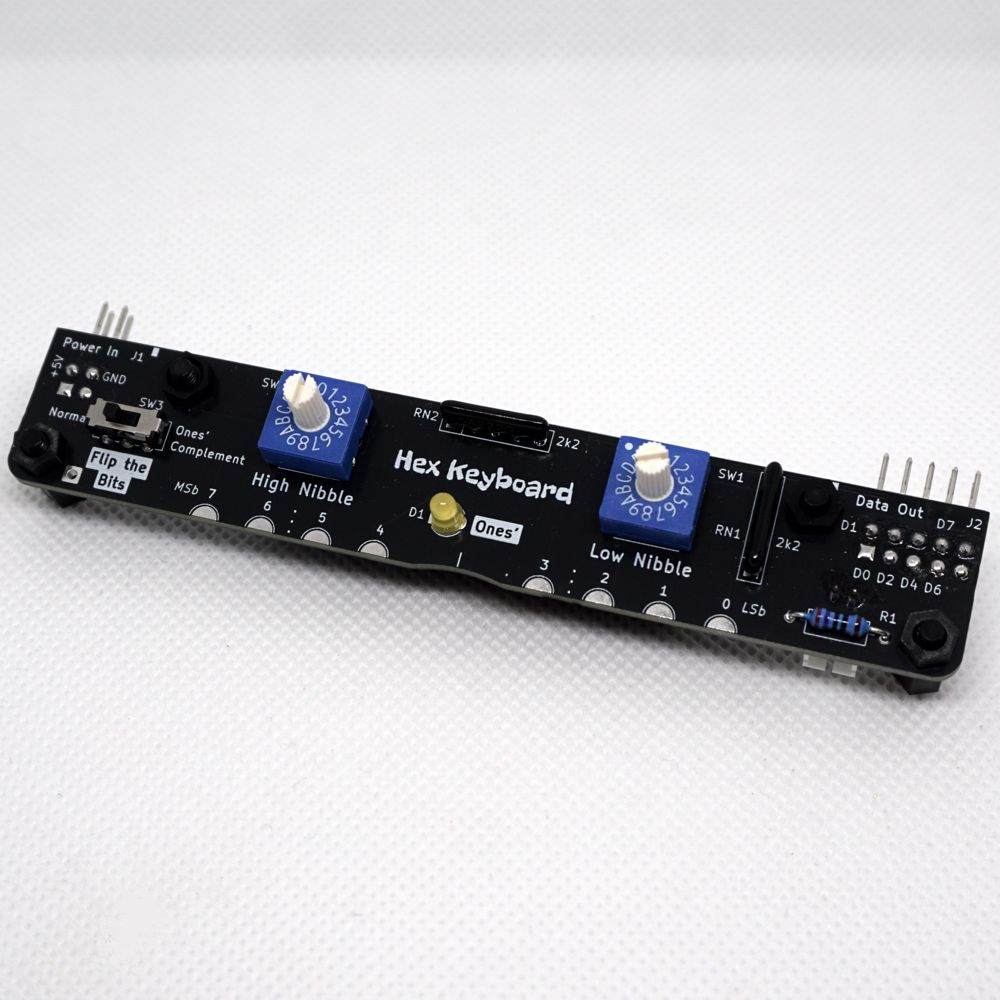
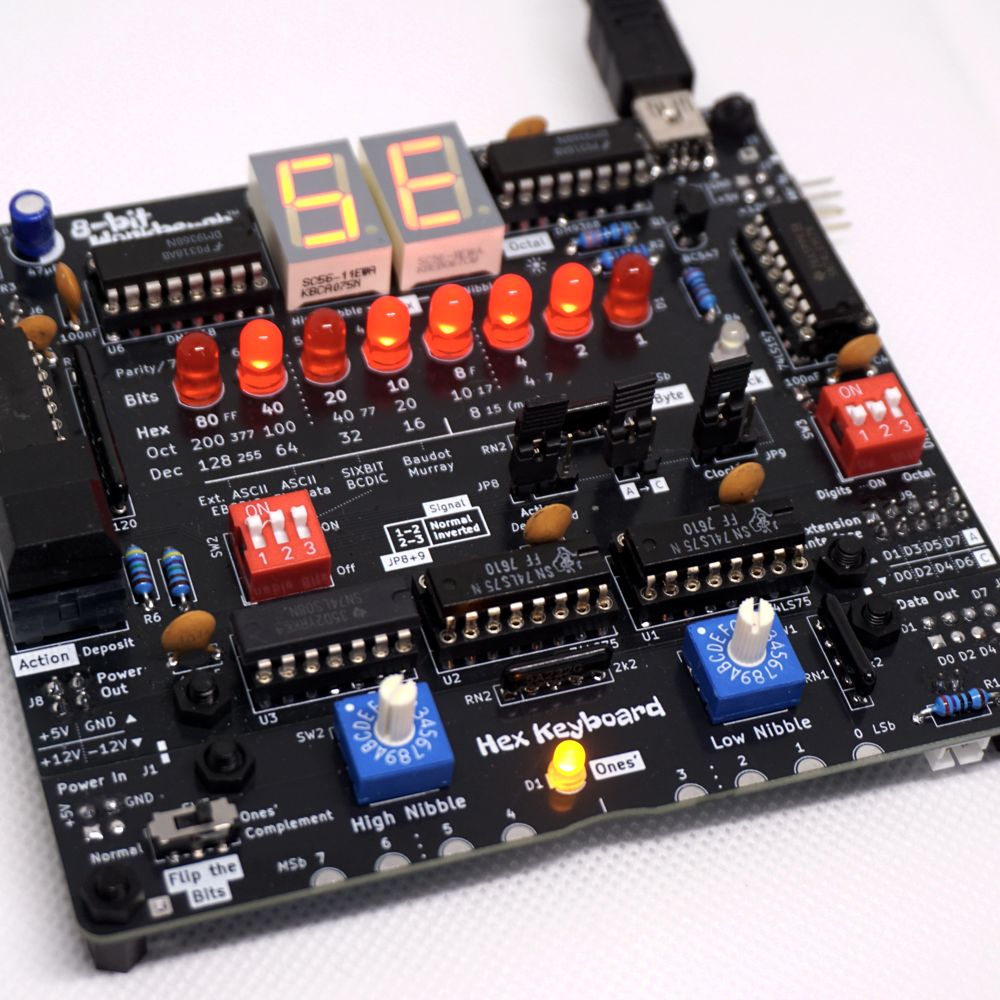
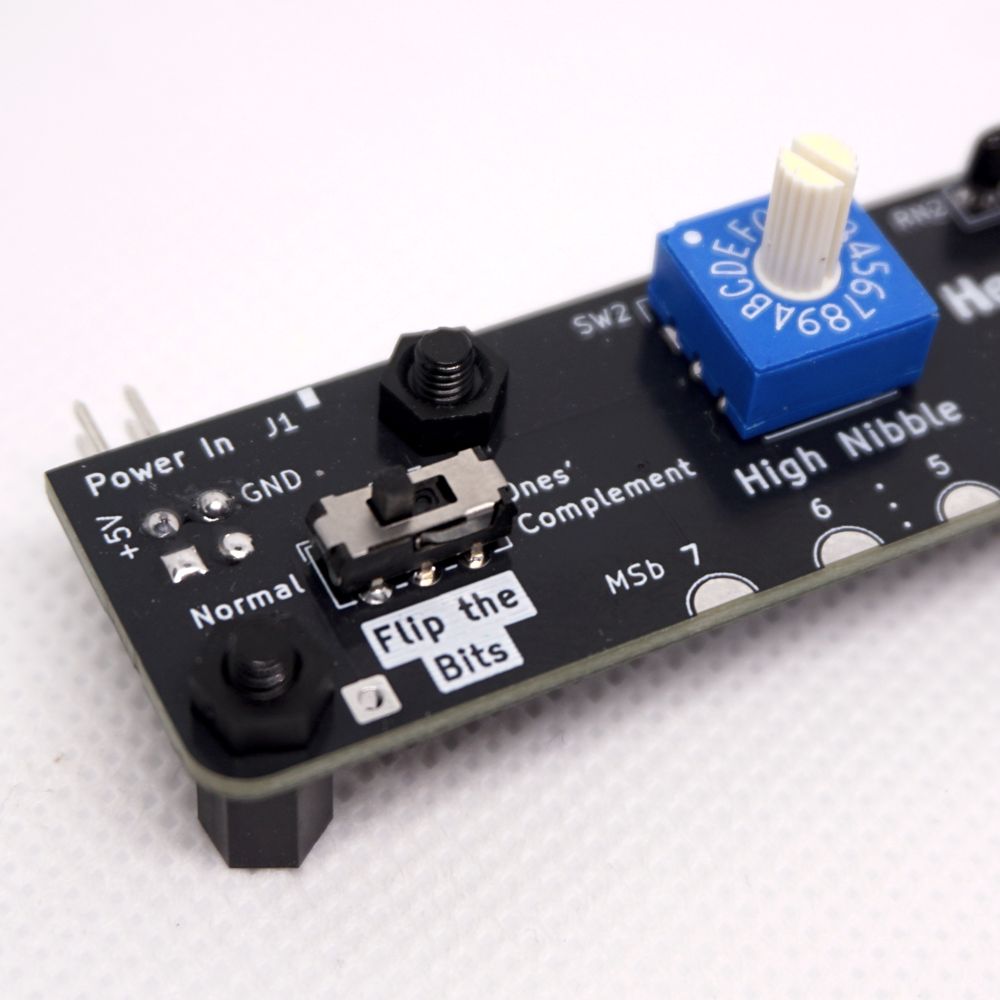
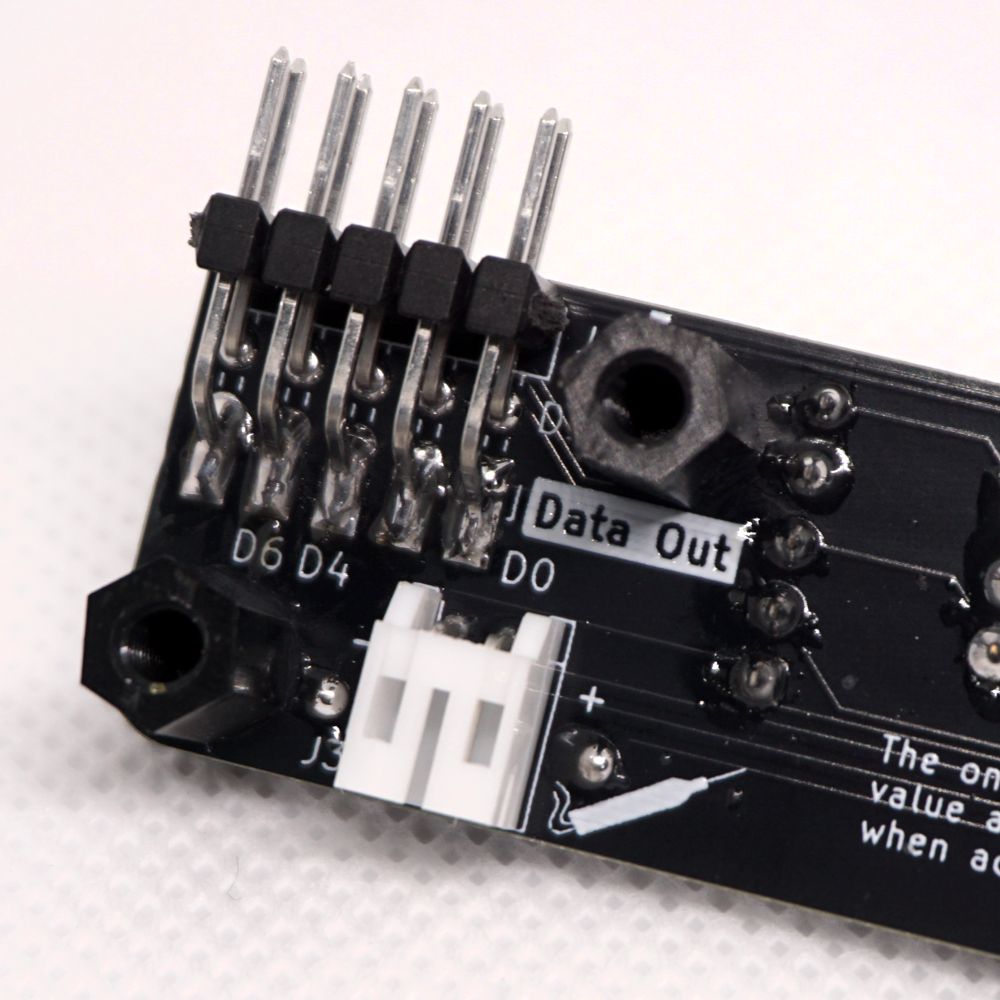
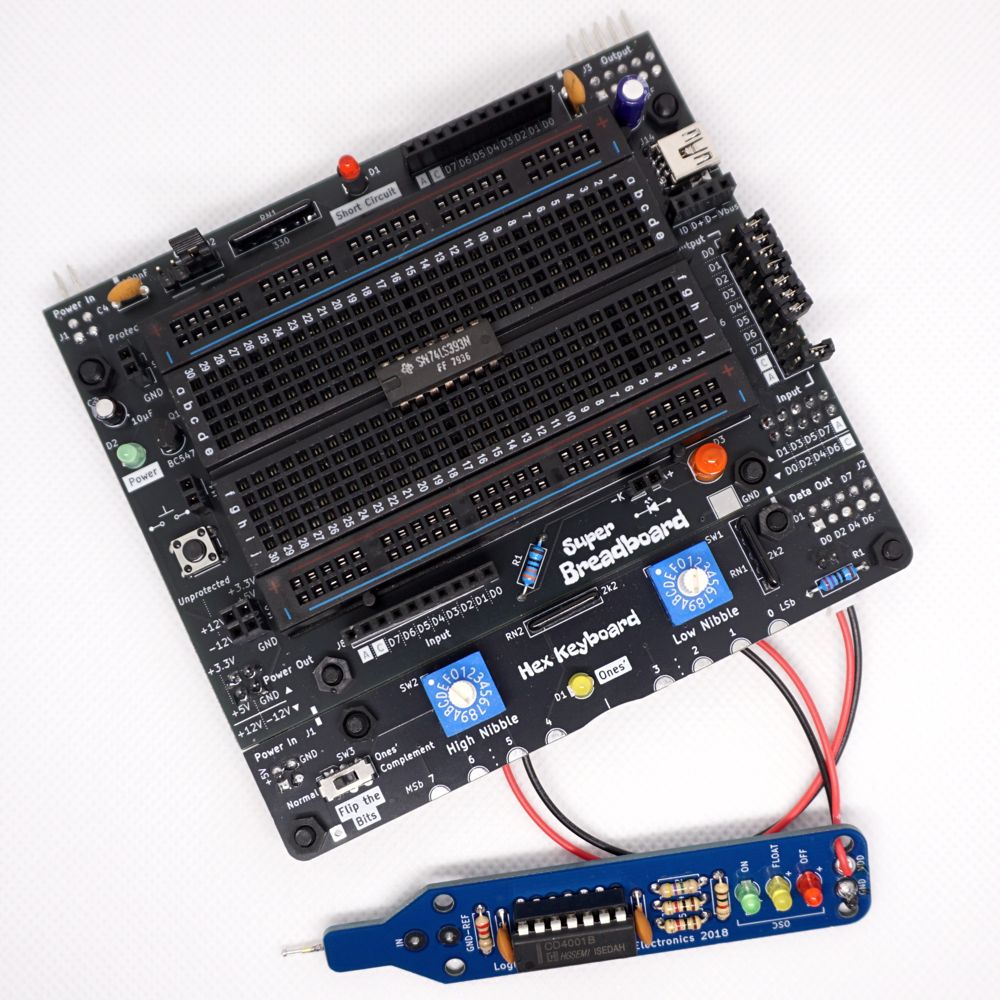
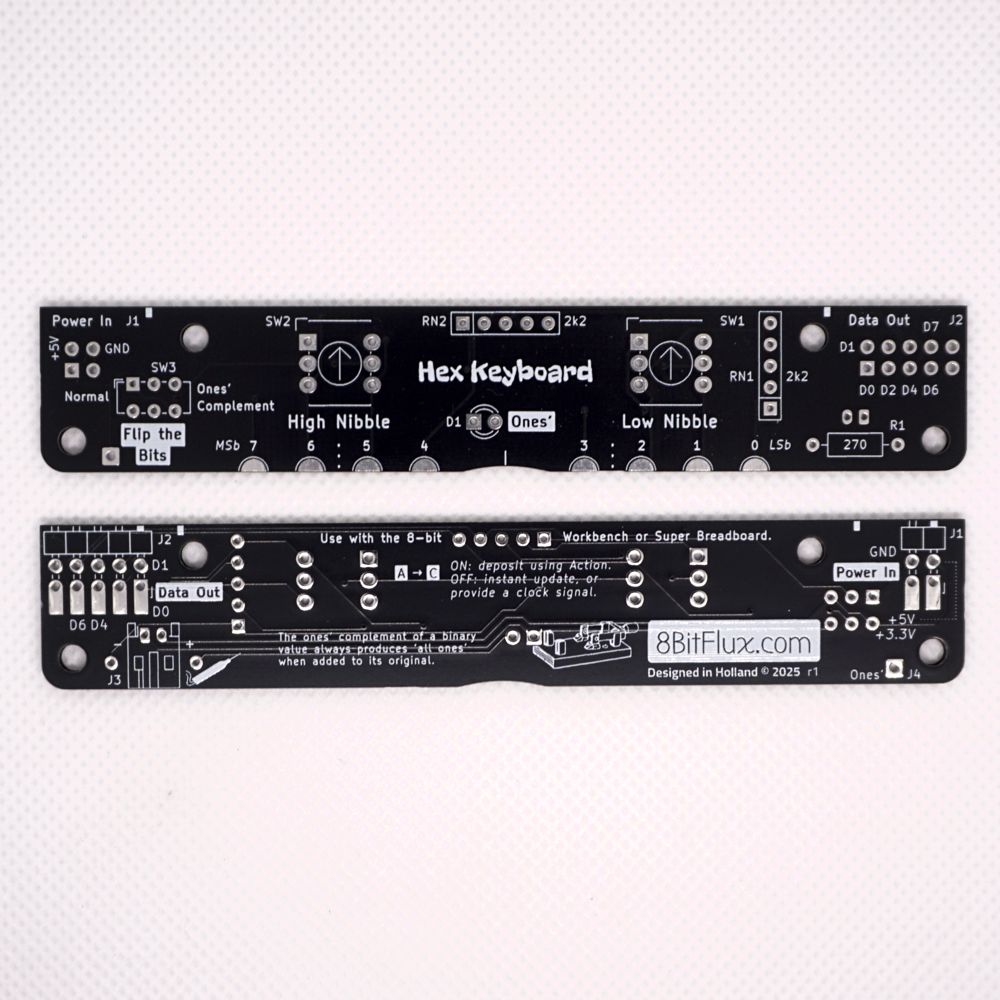
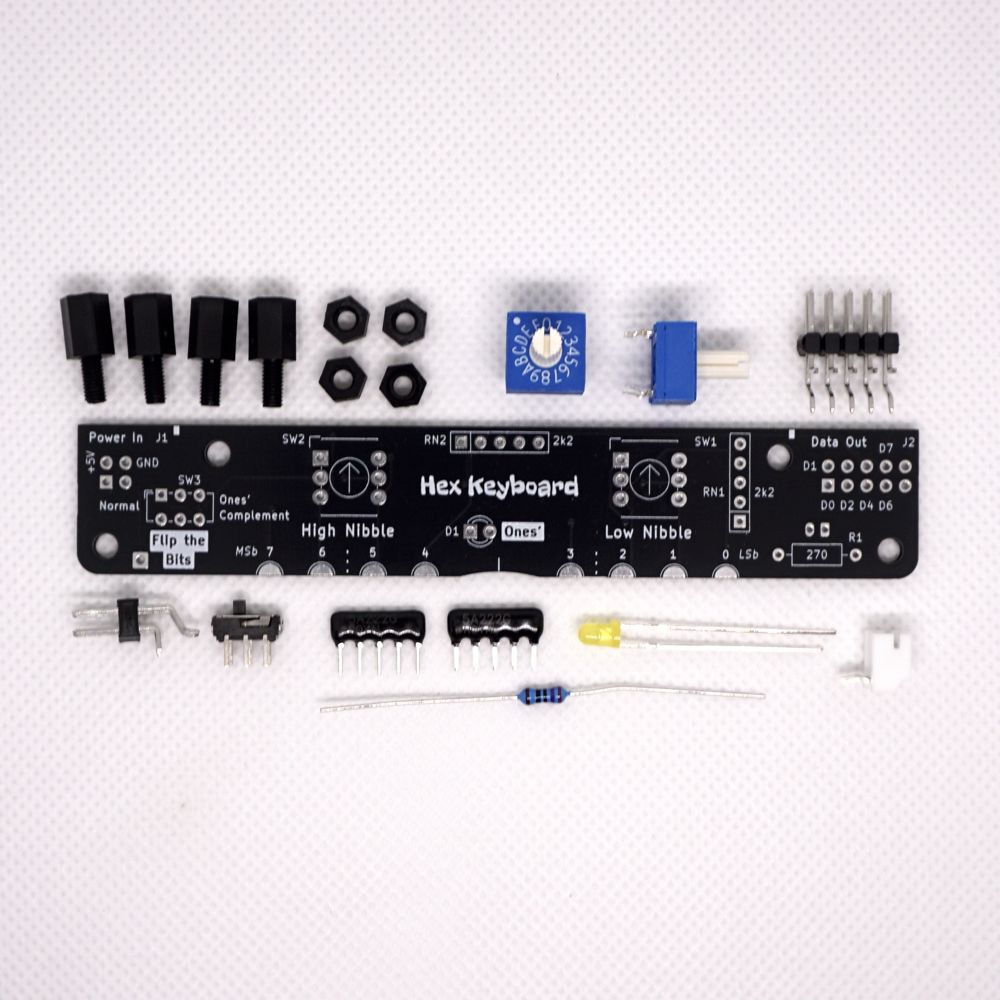

Hex Keyboard LP
Turn-in a hexadecimal code (0-F) for the high- and the low-nibble. The output, a full byte (8-bits), can then be used with attached experiments. Supports the Logic Probe.
Two sixteen-position rotary switches can be used to select one value out of the 256 possibilities (00-FF). Use the small switch to flip the bits, i.e. create the ones' complement of the active value. The data (being 8 bits) is on the output and ready to be used in the attached experiment.
Connect to the 8-bit Workbench™ to see the binary and octal representation of the hex value that is active. Combine with a Super Breadboard 2 and get easy hex-input for prototyping. With an optional Logic Probe, check the logic values (high, low or float) in your circuit with ease.
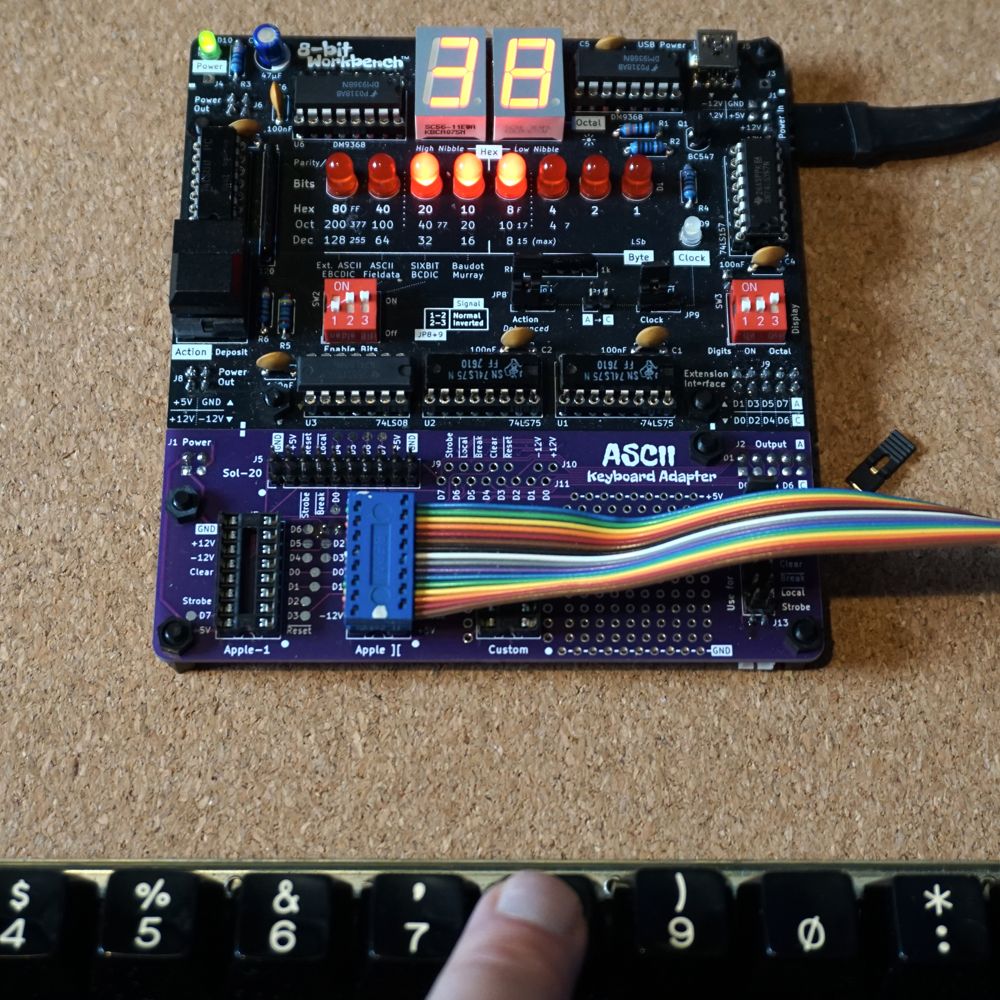
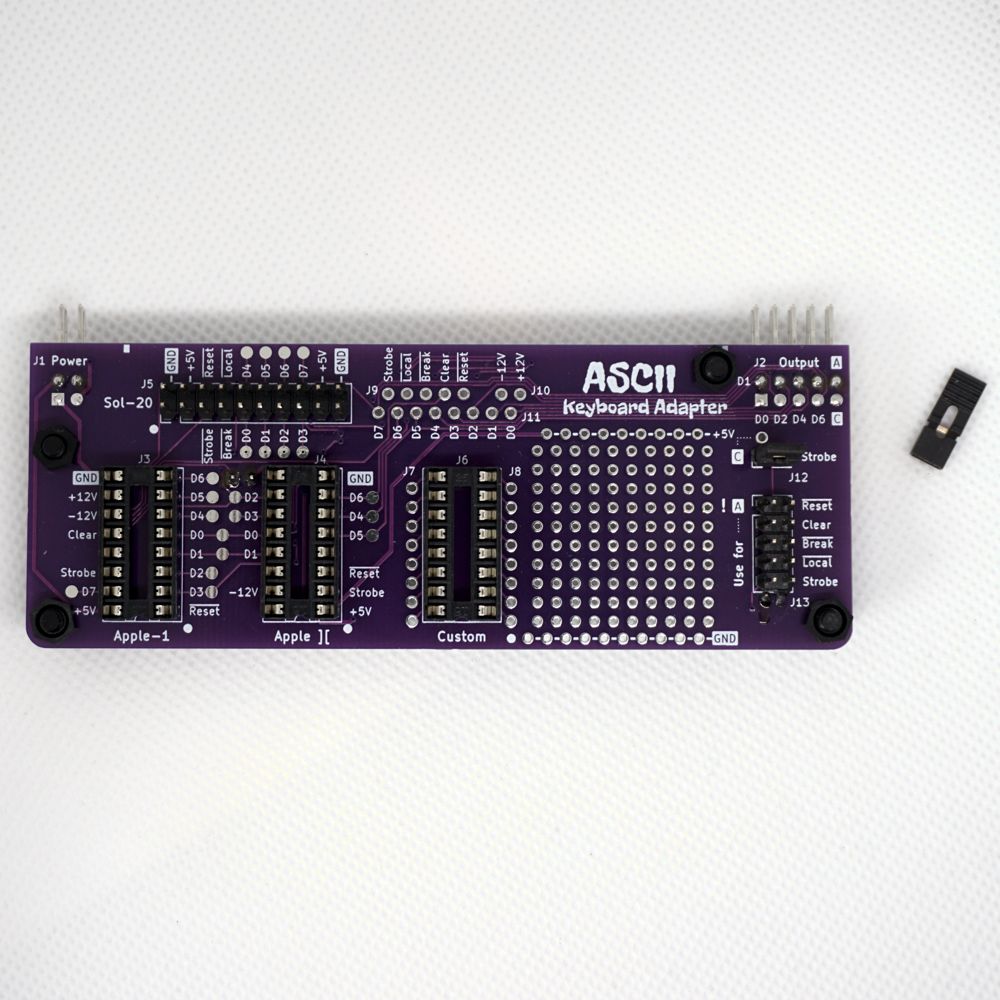
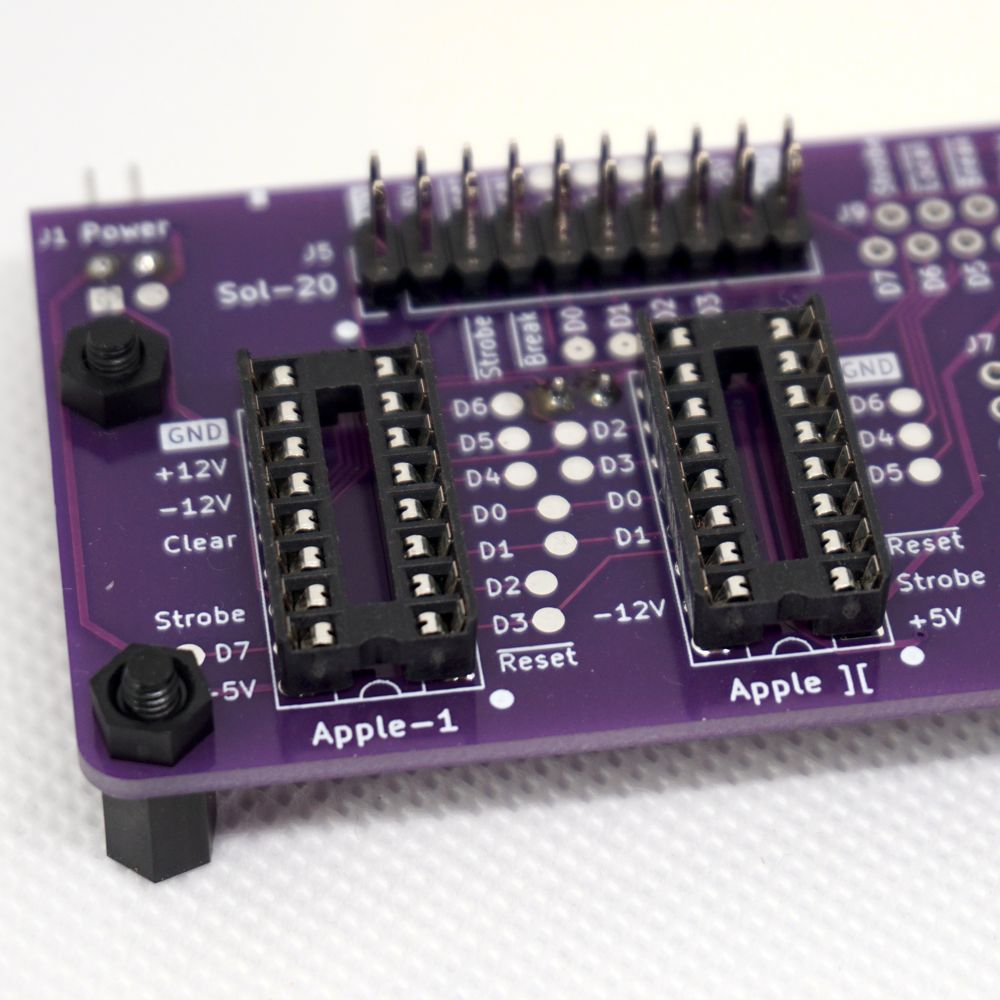
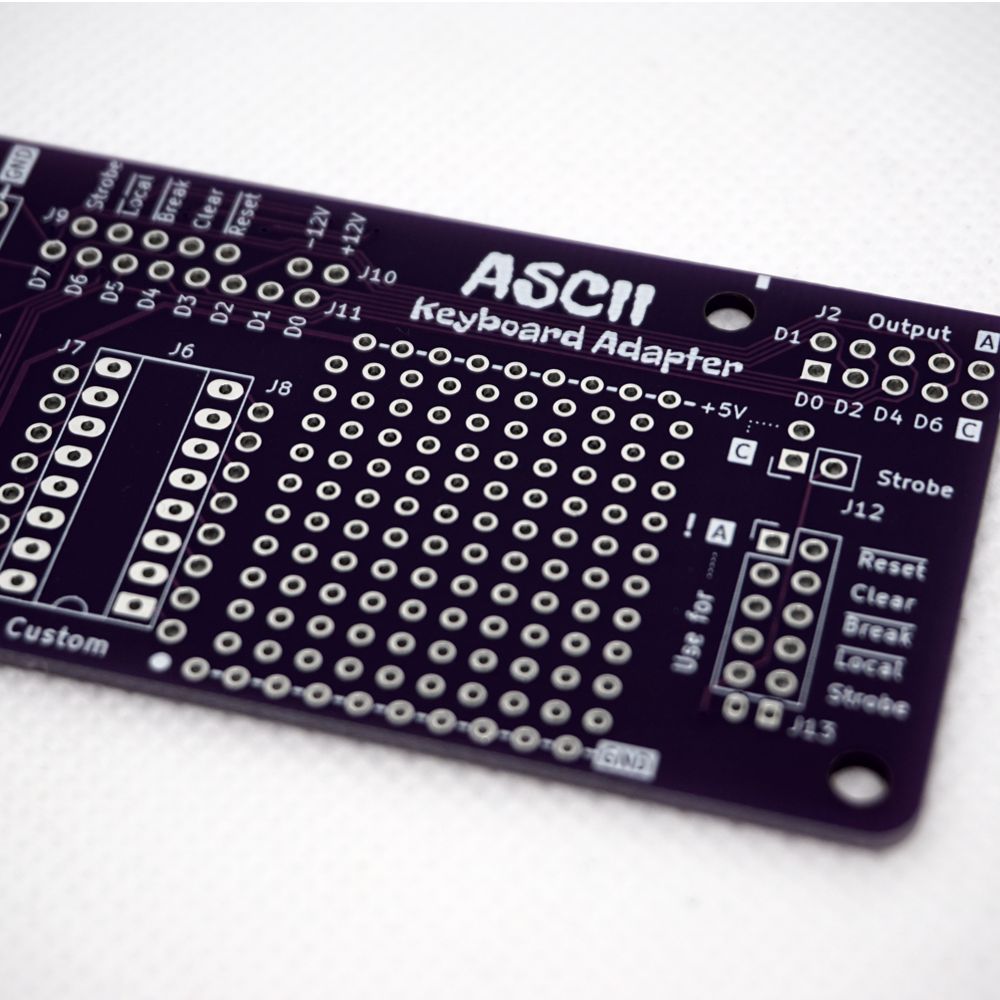
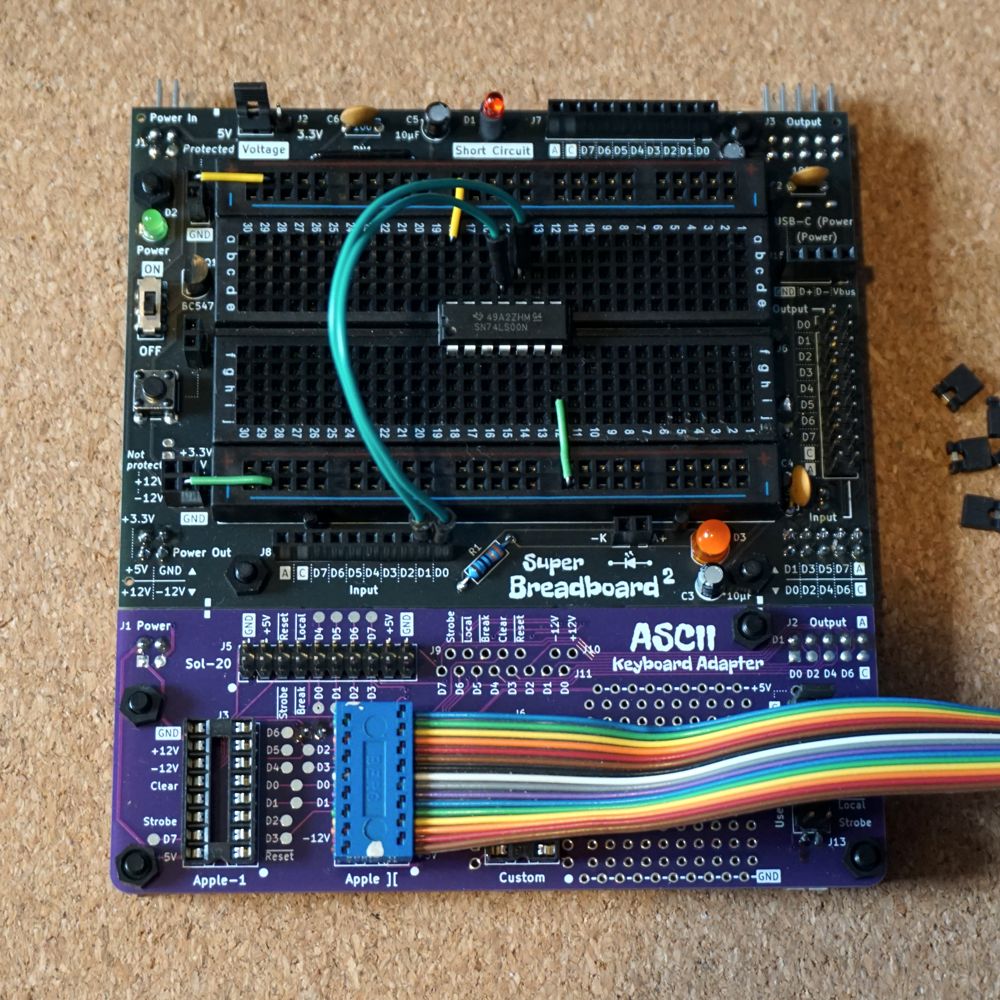

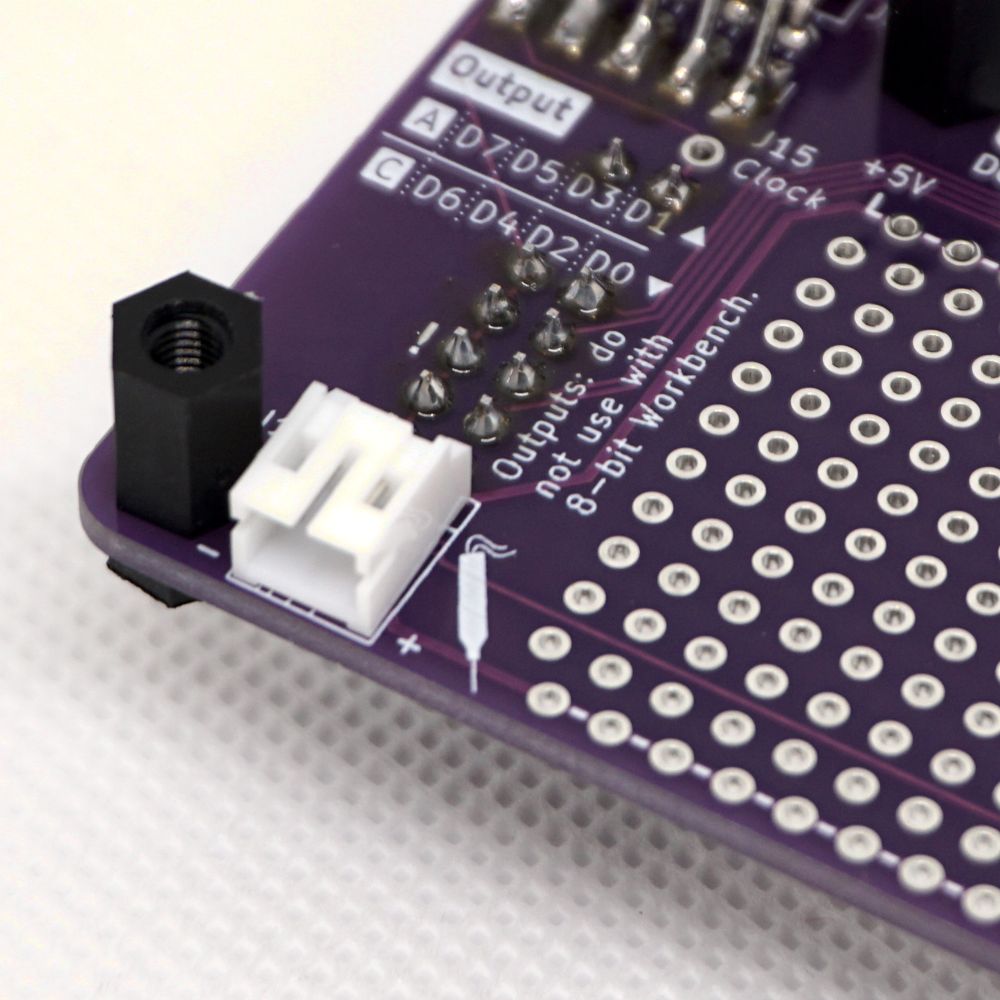
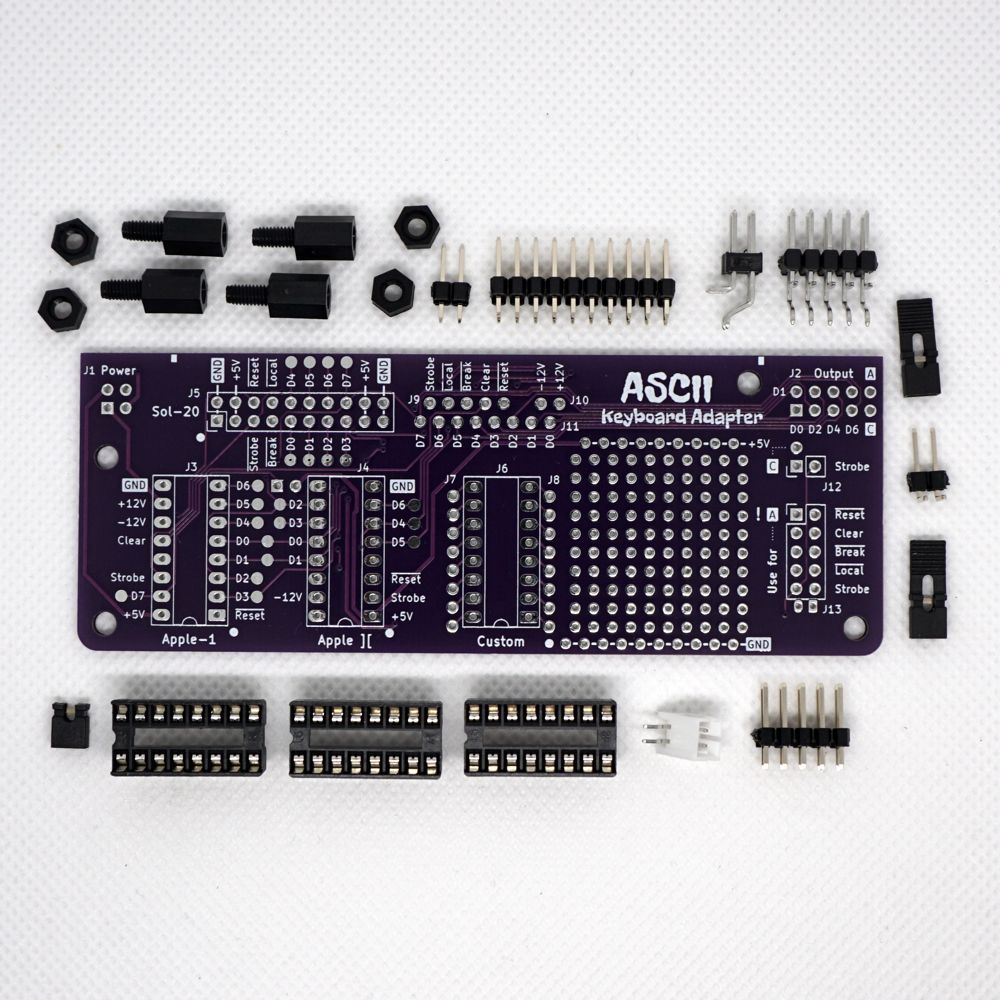
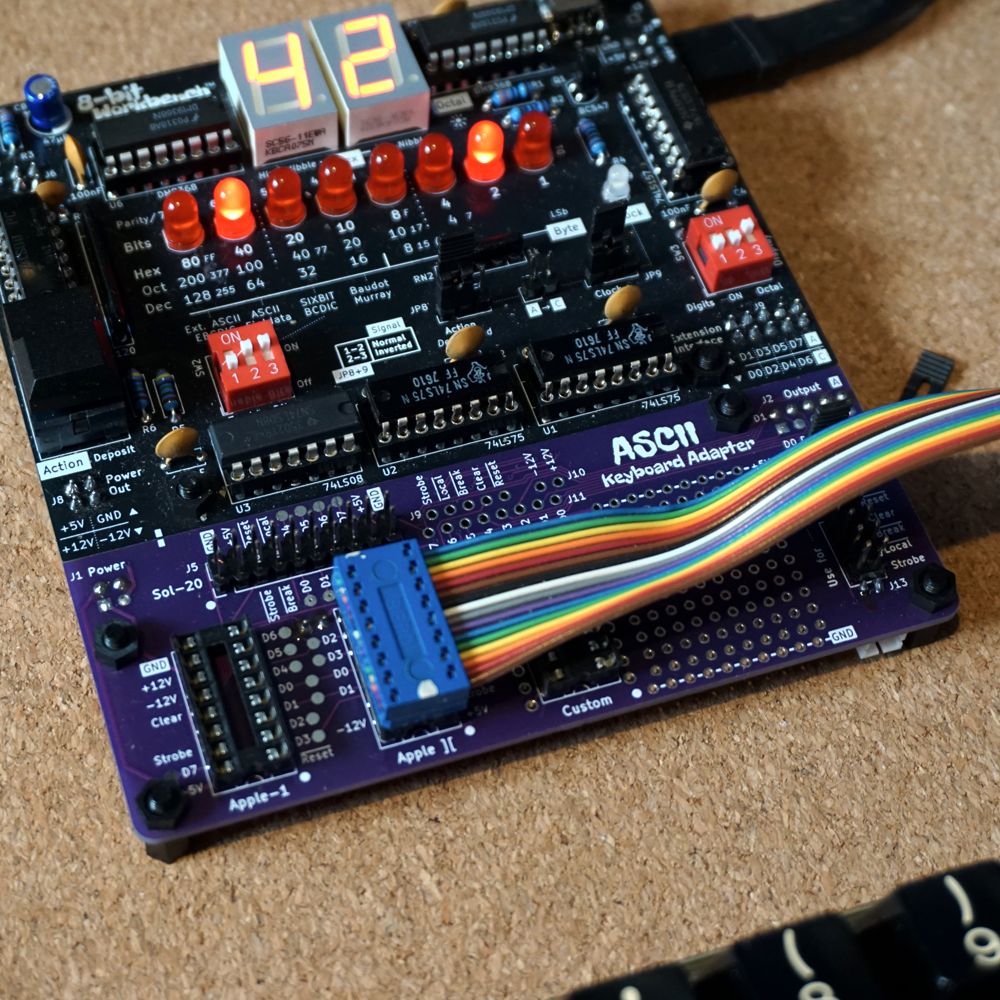
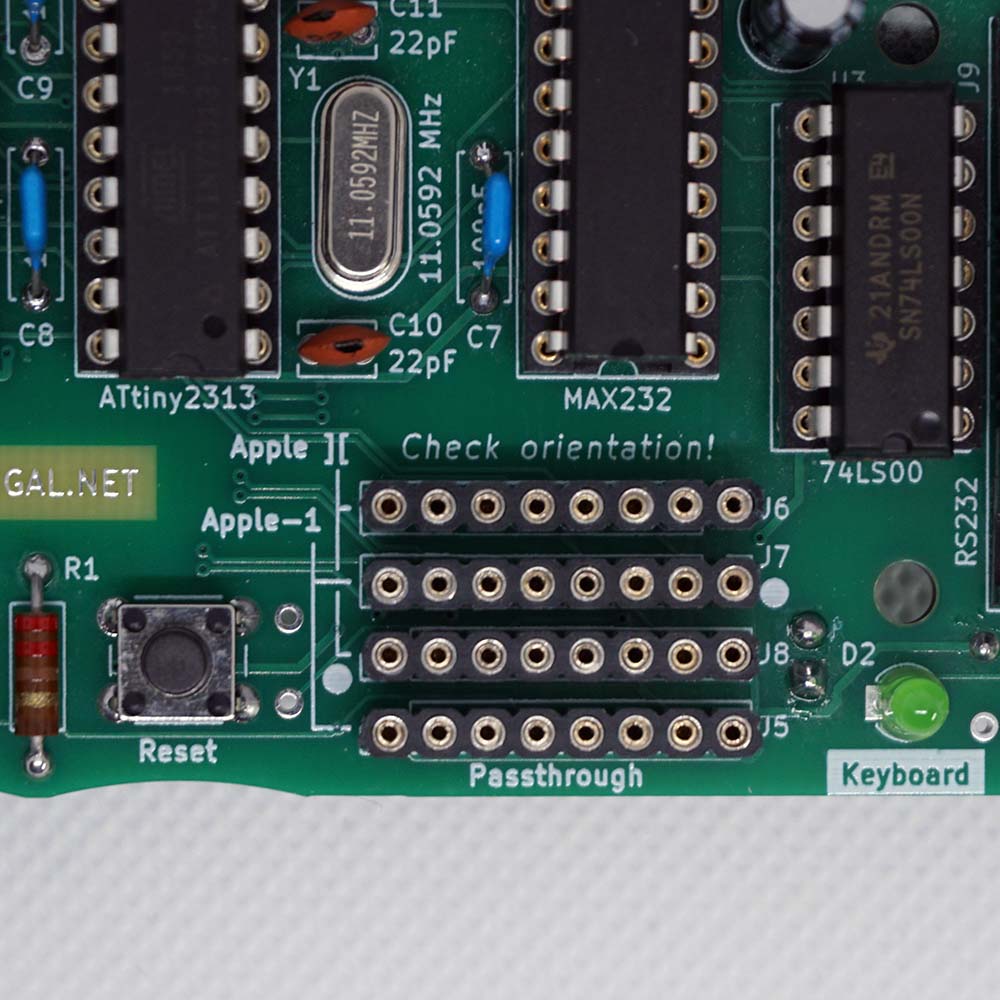
ASCII Keyboard Adapter LP New
Connect a parallel ASCII Keyboard to an 8-bit Workbench™ or a Super Breadboard 2. With annotated keyboard sockets and a proto-area where you can add components!
Hook up a old computer keyboard (e.g. from an Apple ][ or a Sol-20) and test it, do conversion experiments or just see how things work. Getting excited? Strip off the high nibble of the ASCII code (use the proto-area) and use a vintage keyboard as input device for the Byte Adder Subtractor.
Depending on the connected keyboard, a power supply is needed that supplies -12V or +12V. Special keyboard buttons (like reset or break) can be tied to the action-signal. The strobe can be jumpered to the clock. Attach the Logic Probe option, check the logic values (high, low or float) with ease.
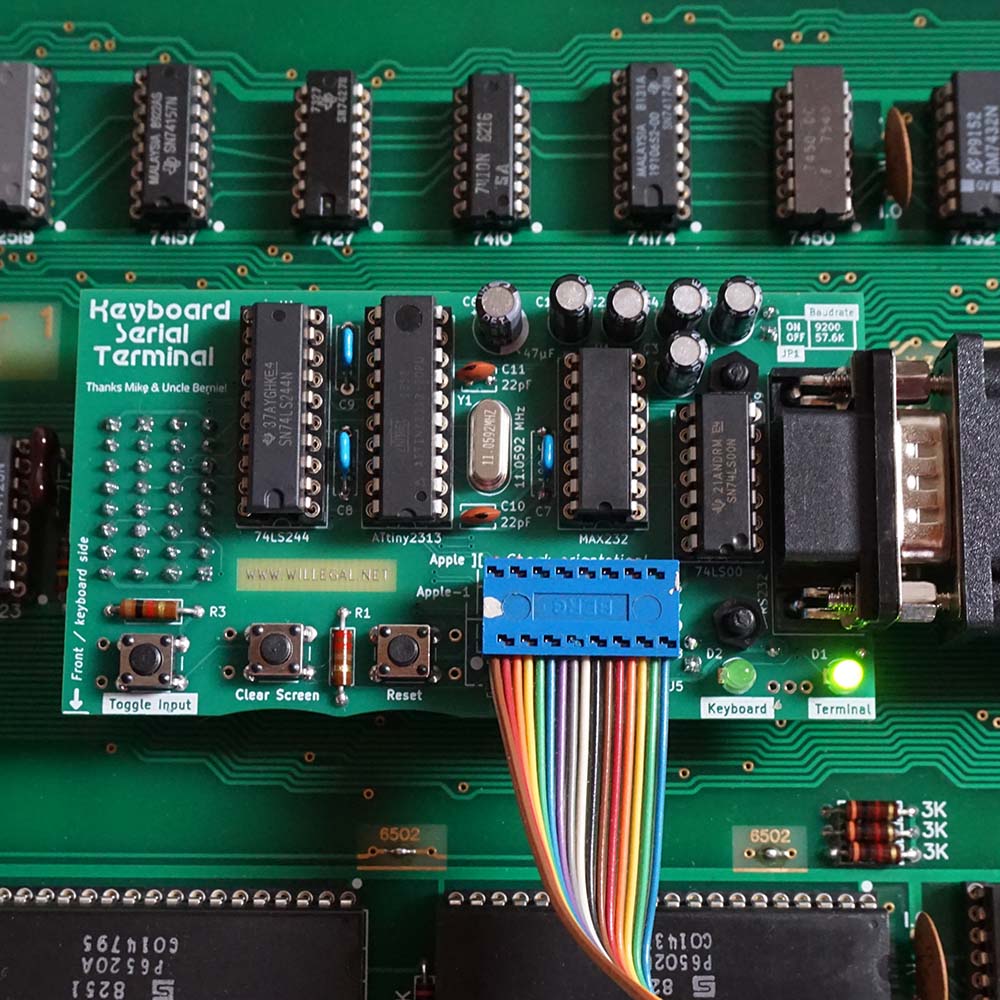
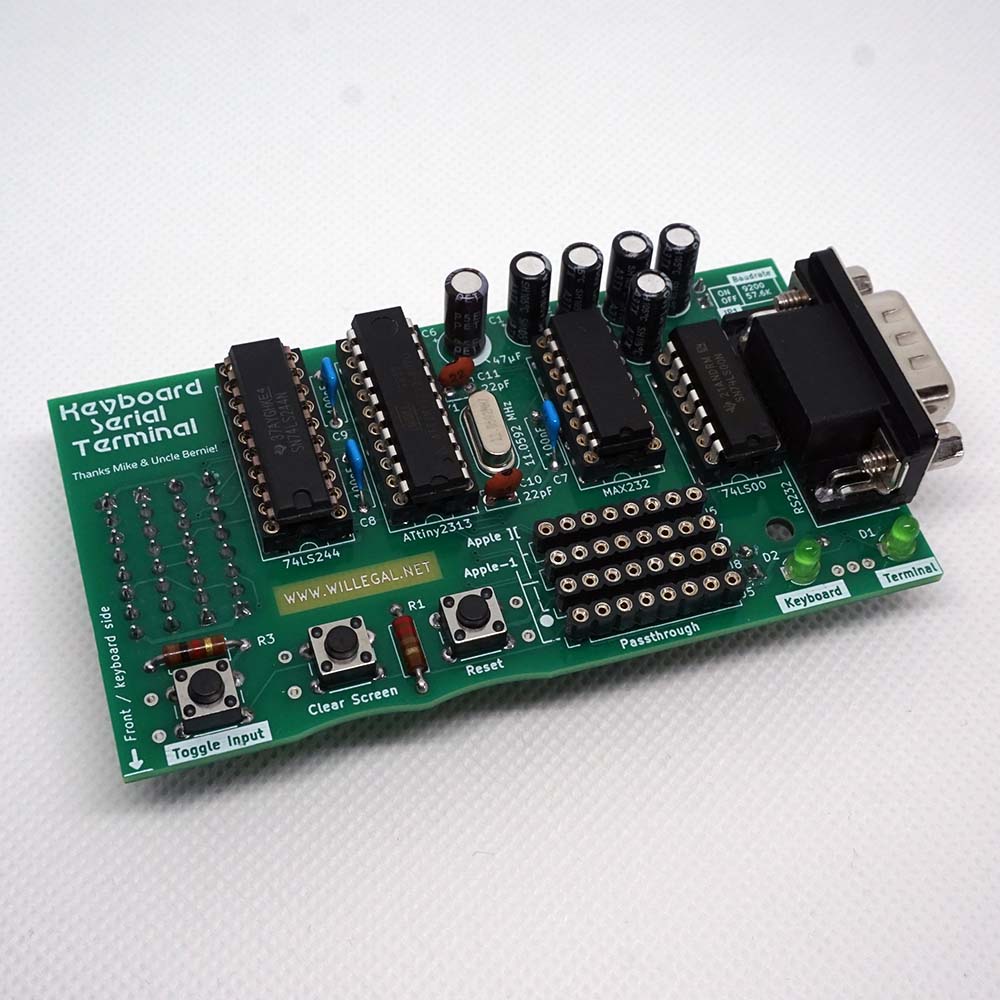
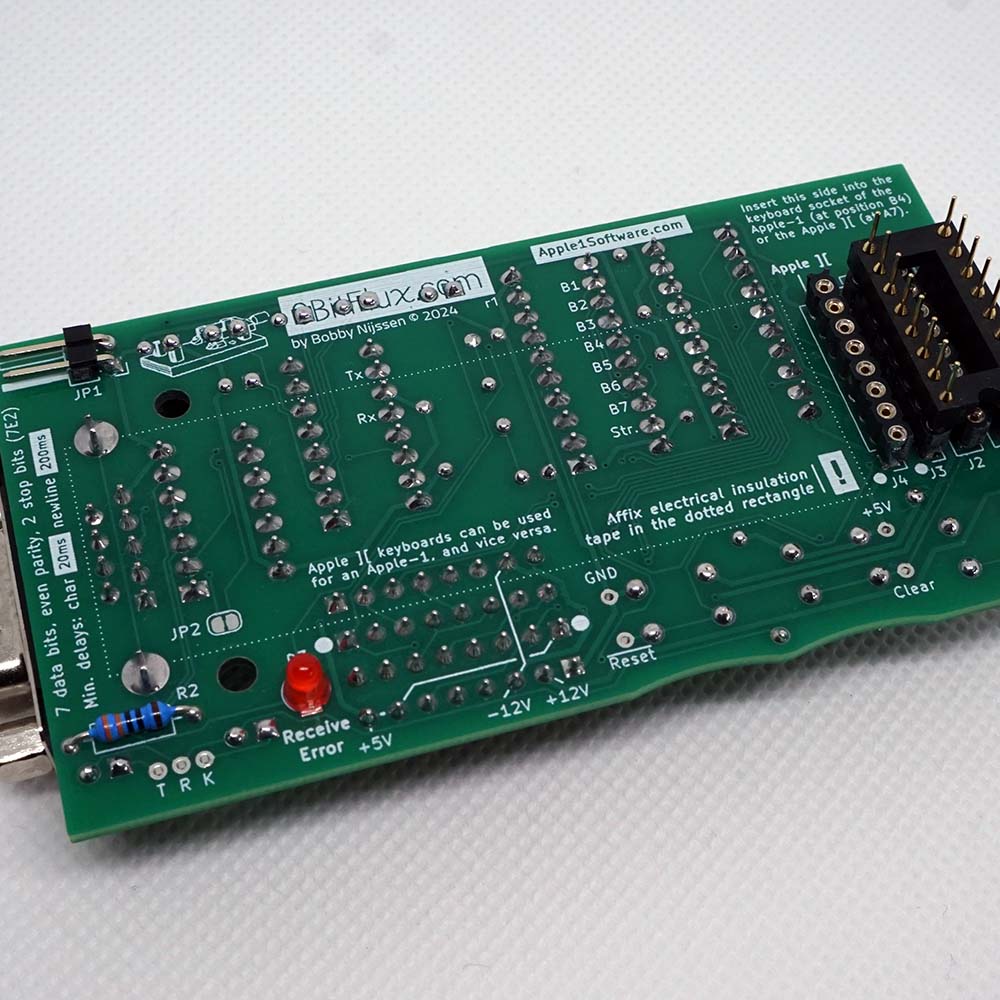
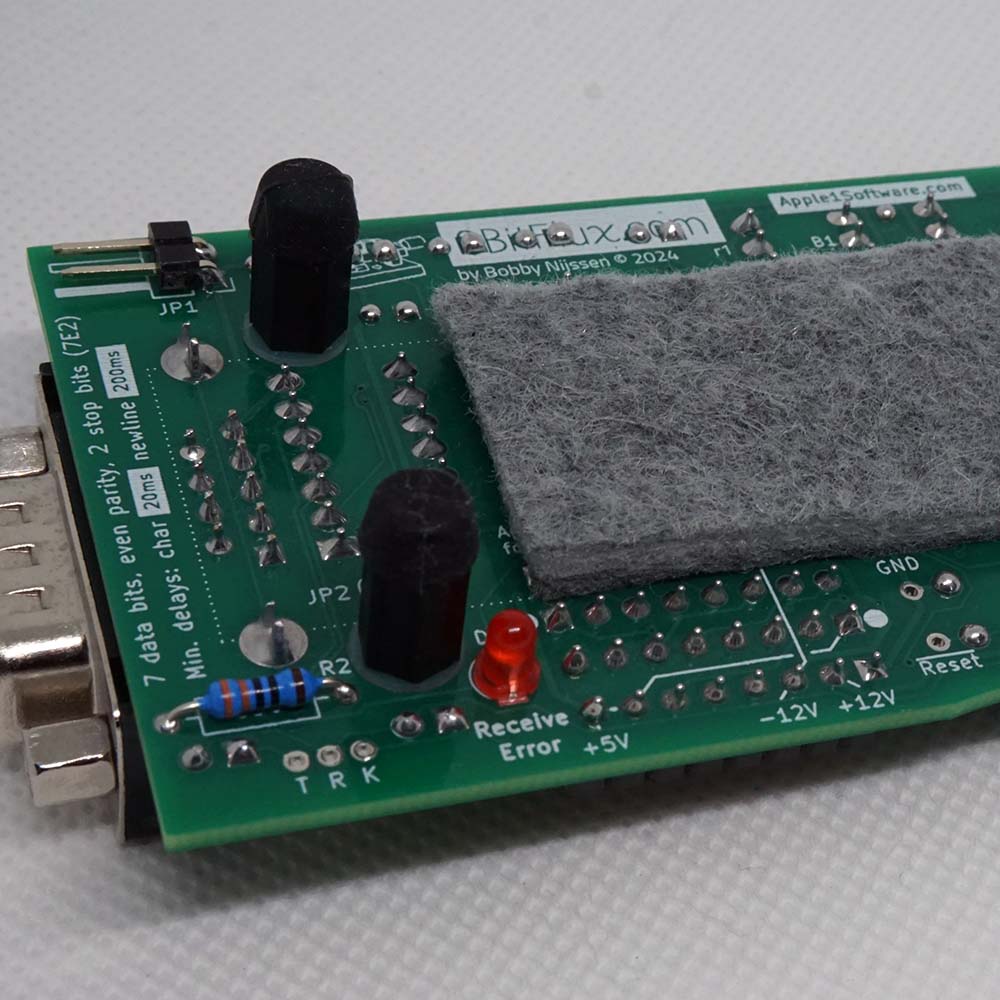
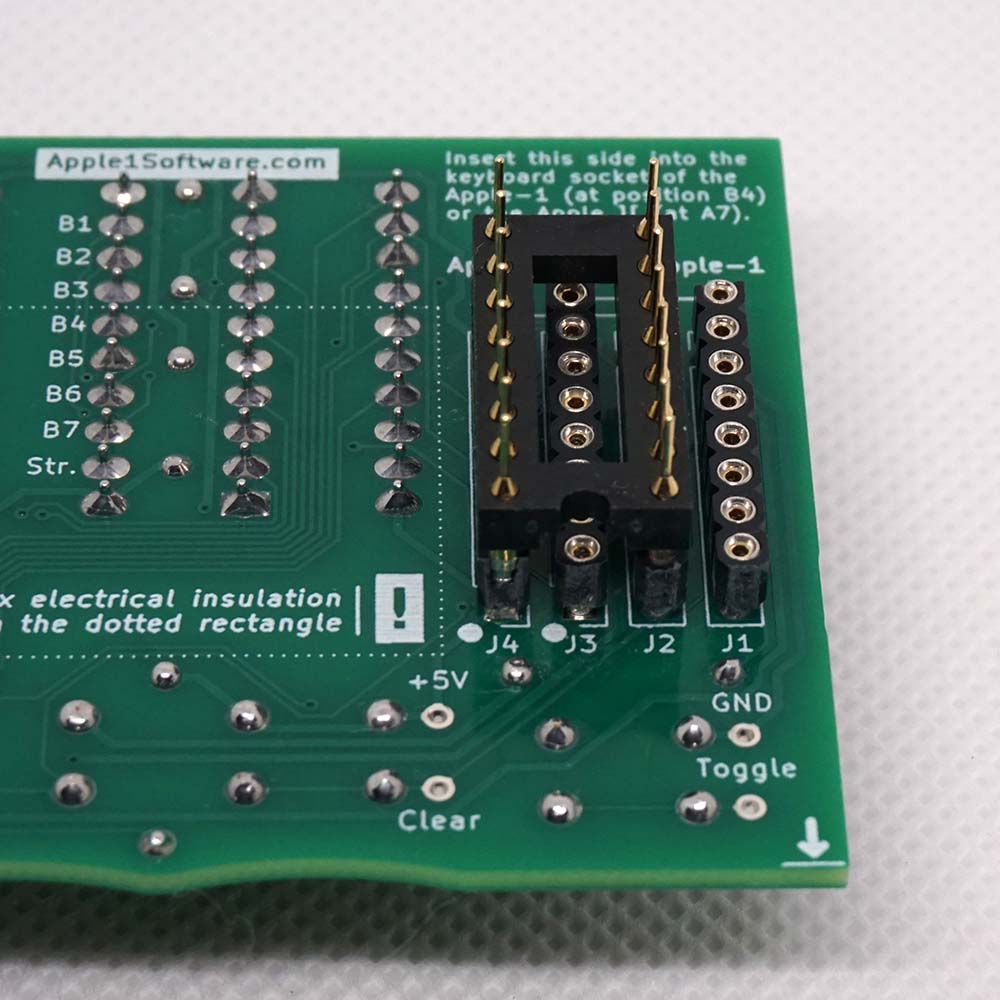
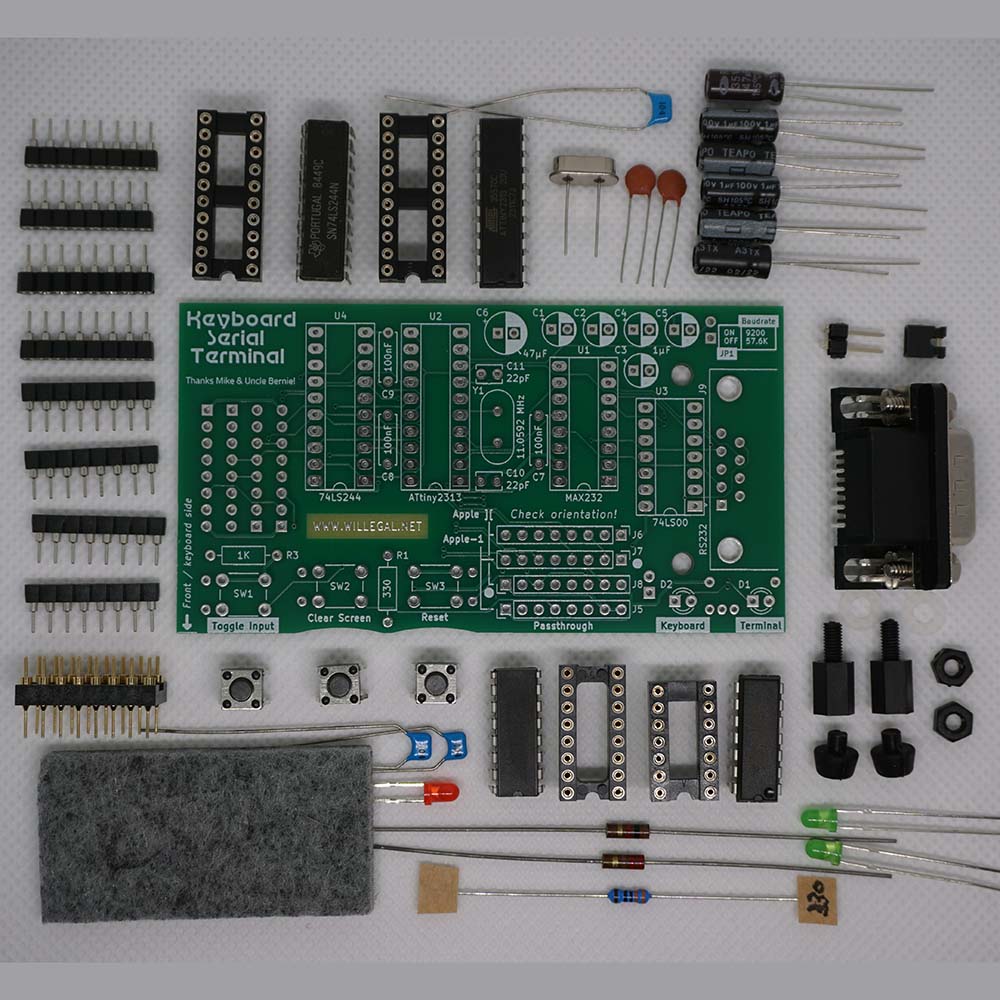
Keyboard Serial Terminal New content
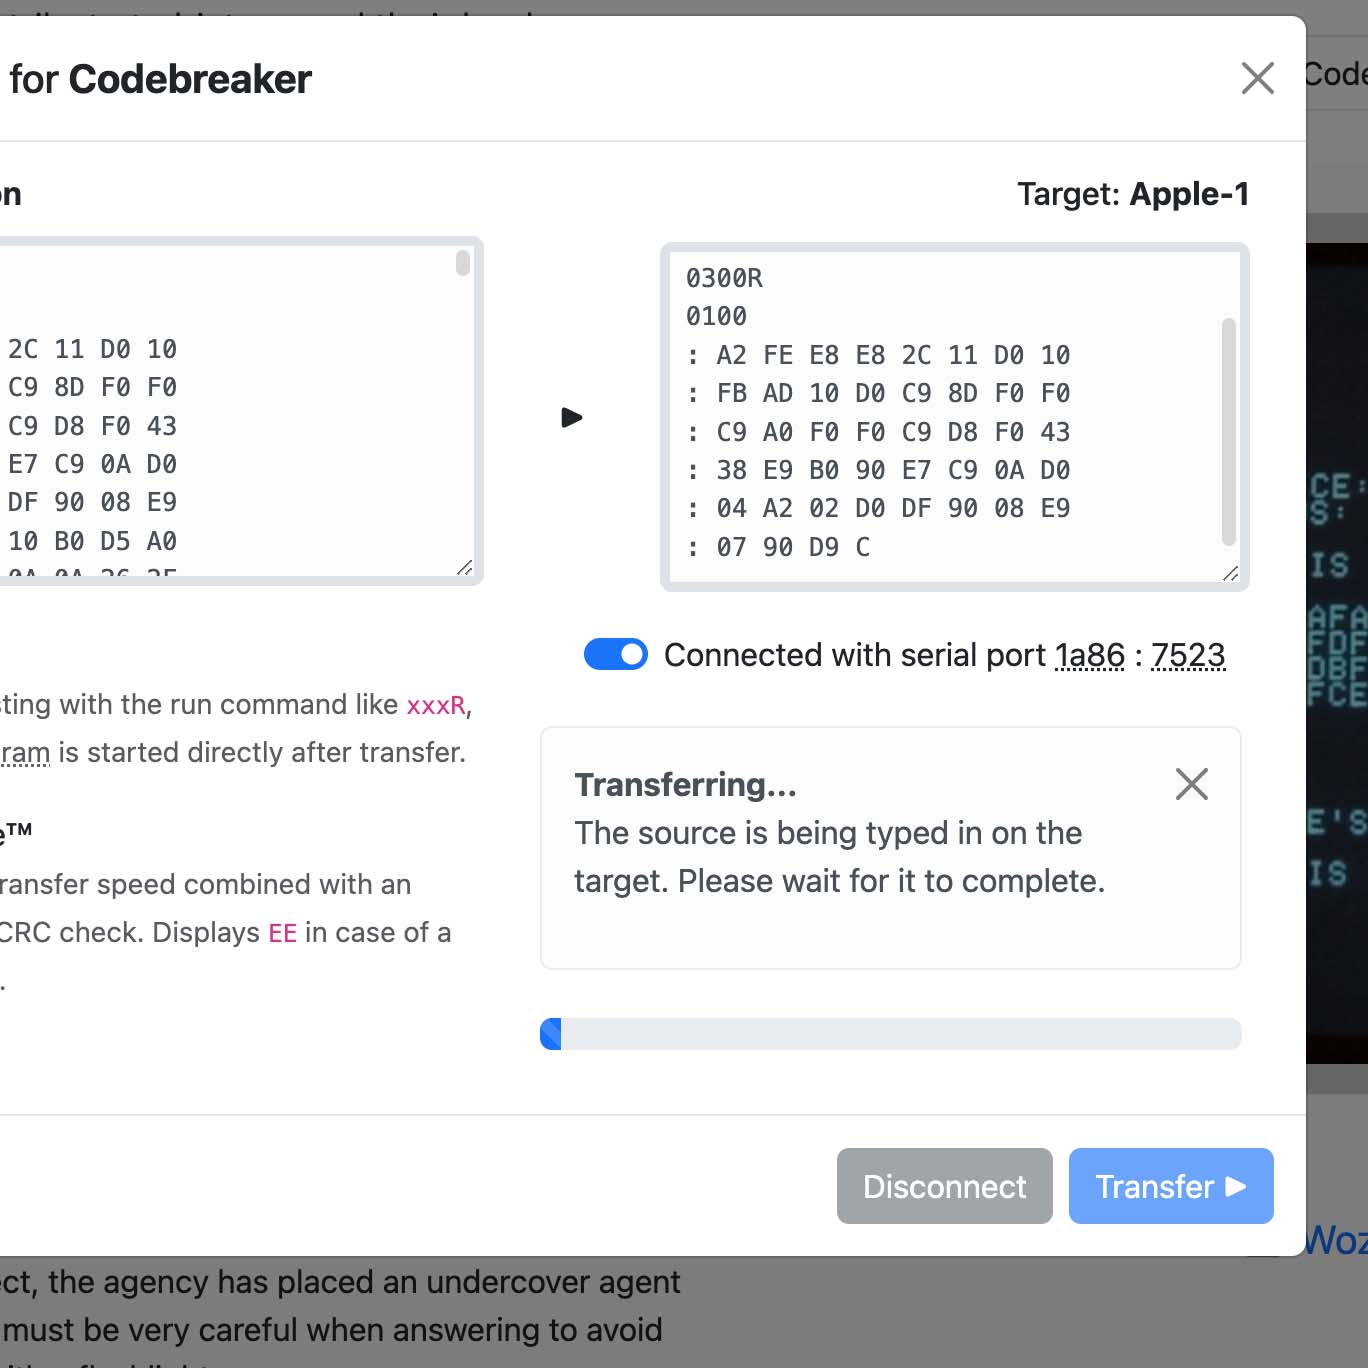
Quickly get to the real fun. Copy-paste software and send keystrokes from a modern computer to an Apple 1 or Apple ][ through a serial (or USB) interface.
Use the Apple-1 Software Library for plug-and-play operation. Use Uncle Bernie's TurboType™ method for faster transfers. For example, use BASIC or play Mini-Startrek within 30 seconds. Get remote control using a terminal application (like Minicom). Select a baudrate of 57.6 kbps or 9600 bps. Orchestrate demonstrations of an Apple-1 or Apple II by the use of control characters. See the manual.
Flip over the adapter socket on the backside and use it with an Apple ][ as well. Browse for games on ASCIIExpress.net and just copy-paste the bytecode. Attach the vintage keyboard of the Apple to the passthrough connector. Use the toggle button to switch over and enjoy games on the real machine.
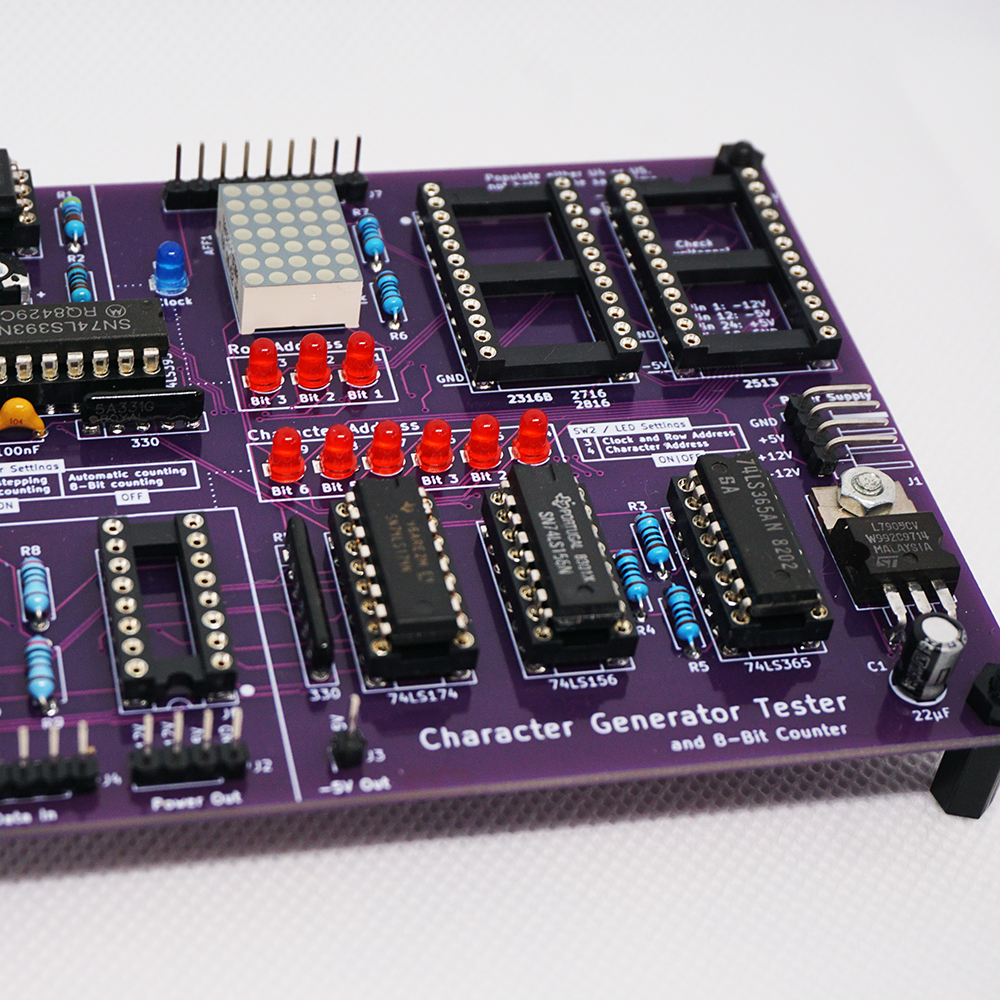
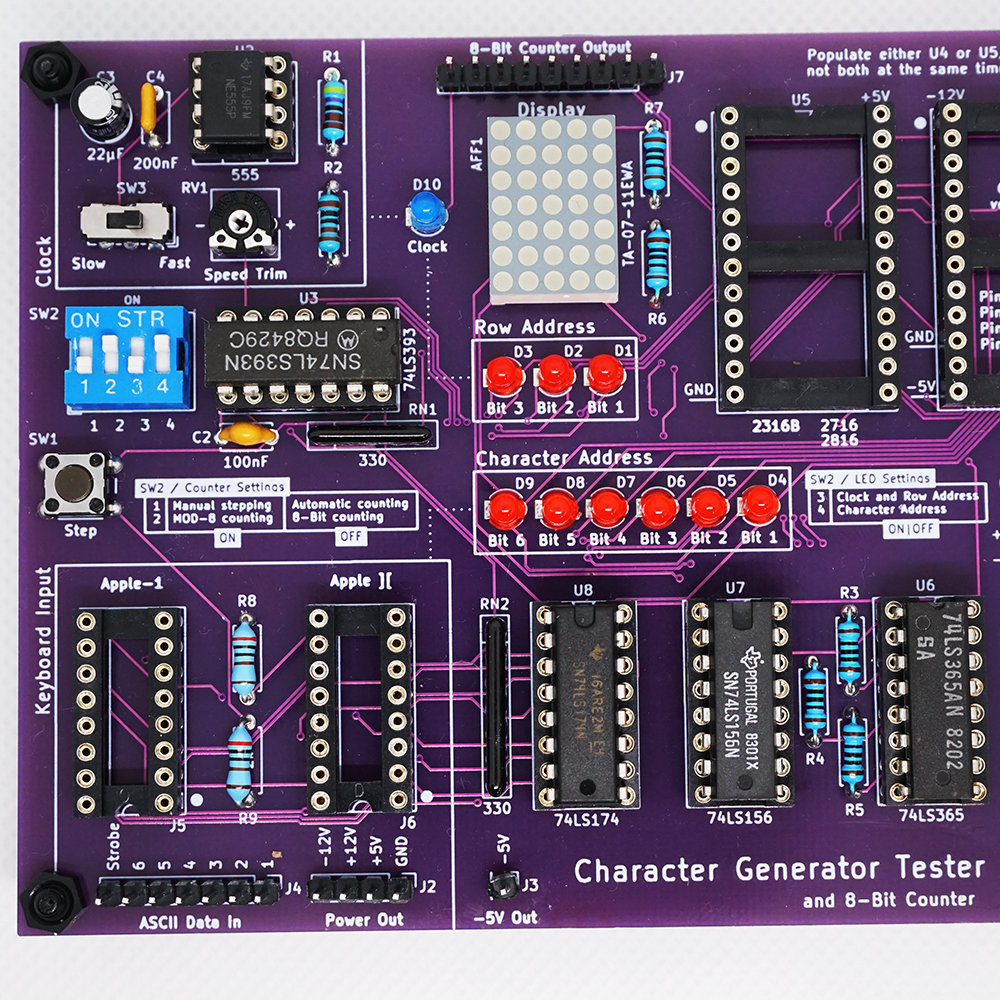
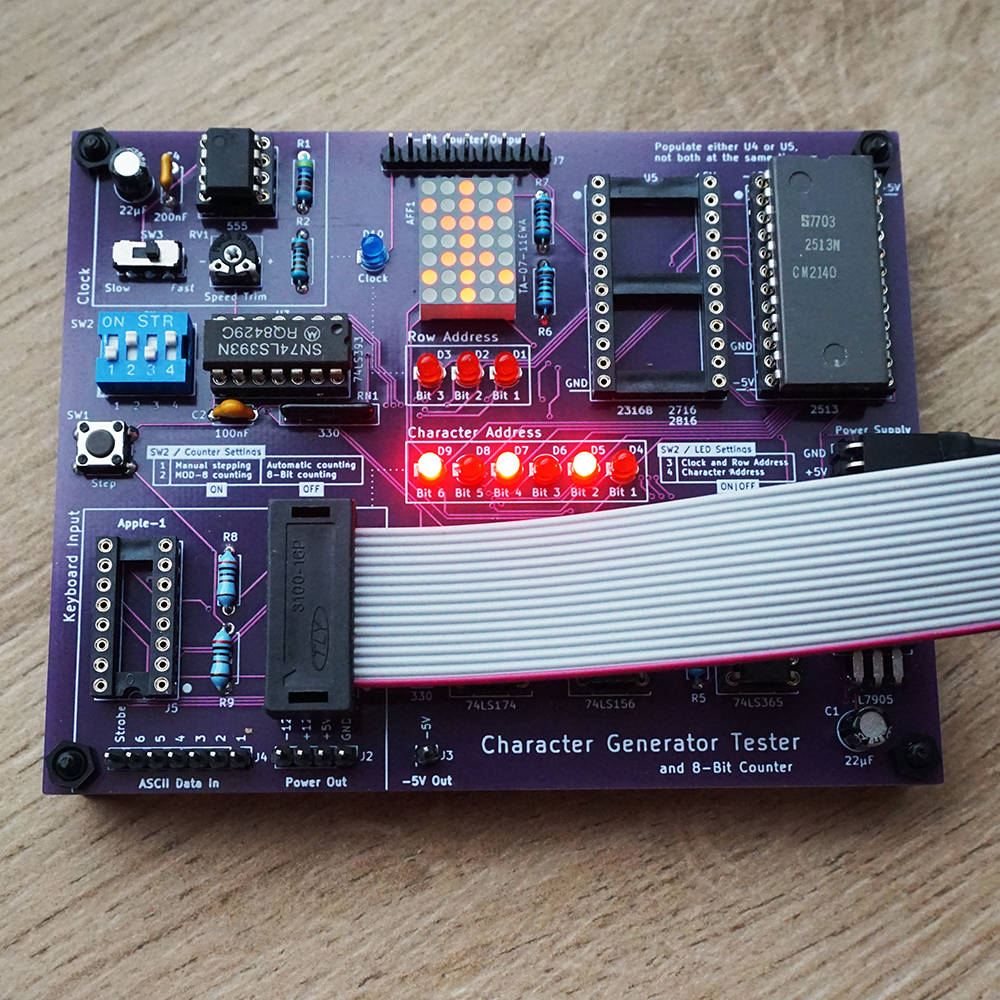
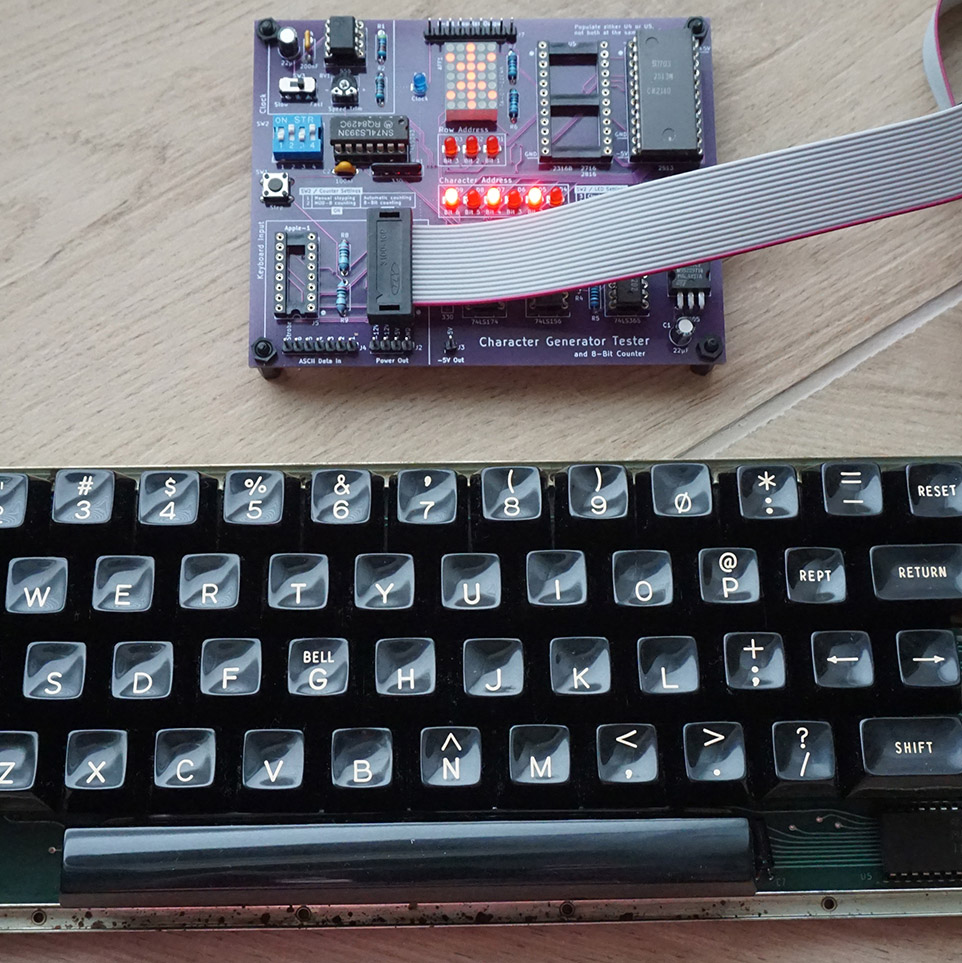

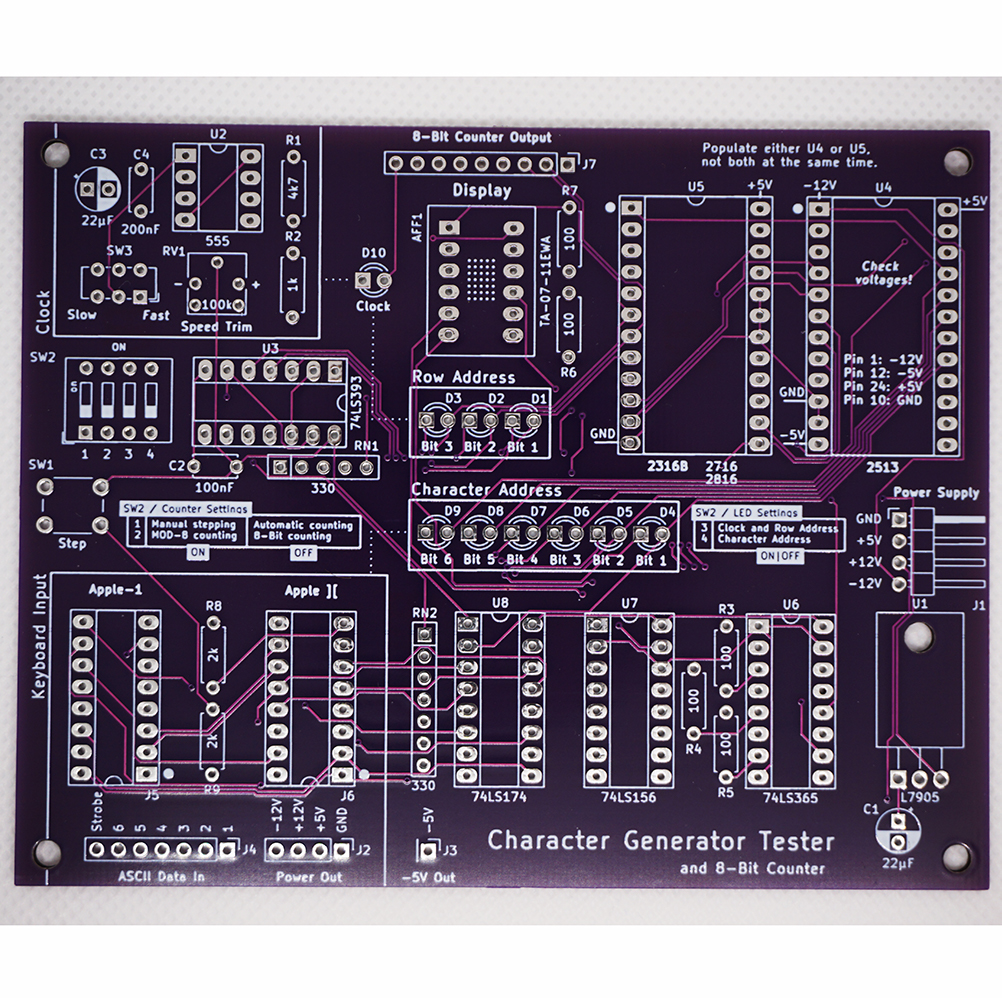

Character Generator Tester
Discover how an Apple-1 or Apple ][ generates a single character for display.
Inspired by Don Lancaster's famous article about a tiny self-made display, attached to an ASCII Keyboard (Popular Electronics, issue April 1974). The character is shown on a 5x7 dot matrix display. The binary row address is indicated by LEDs and you can see how the display is being built up by stepping through the 7 horizontal scan lines. The clock speed can be adjusted from 0.6 Hz to 800 Hz.
Connect an Apple 1 or Apple II keyboard directly using the DIP-16 connectors, or use the ASCII data in pins. Verify the ASCII input to the character generator using the character address LEDs. A power supply with +5V and -12V is needed as a minimum. The -5V is regulated on the board itself. Provide +12V when this voltage is needed by the attached keyboard. Supported character generators: Signetics 2513, 2316B, 2716 EPROMs and 2816 EEPROMs. Extra, feed the 8-bit counter output to the 8-bit Workbench™!
![Connector at the back for Apple-1 and Apple ][ connectivity](images/akttiny-back-connectors.jpg)
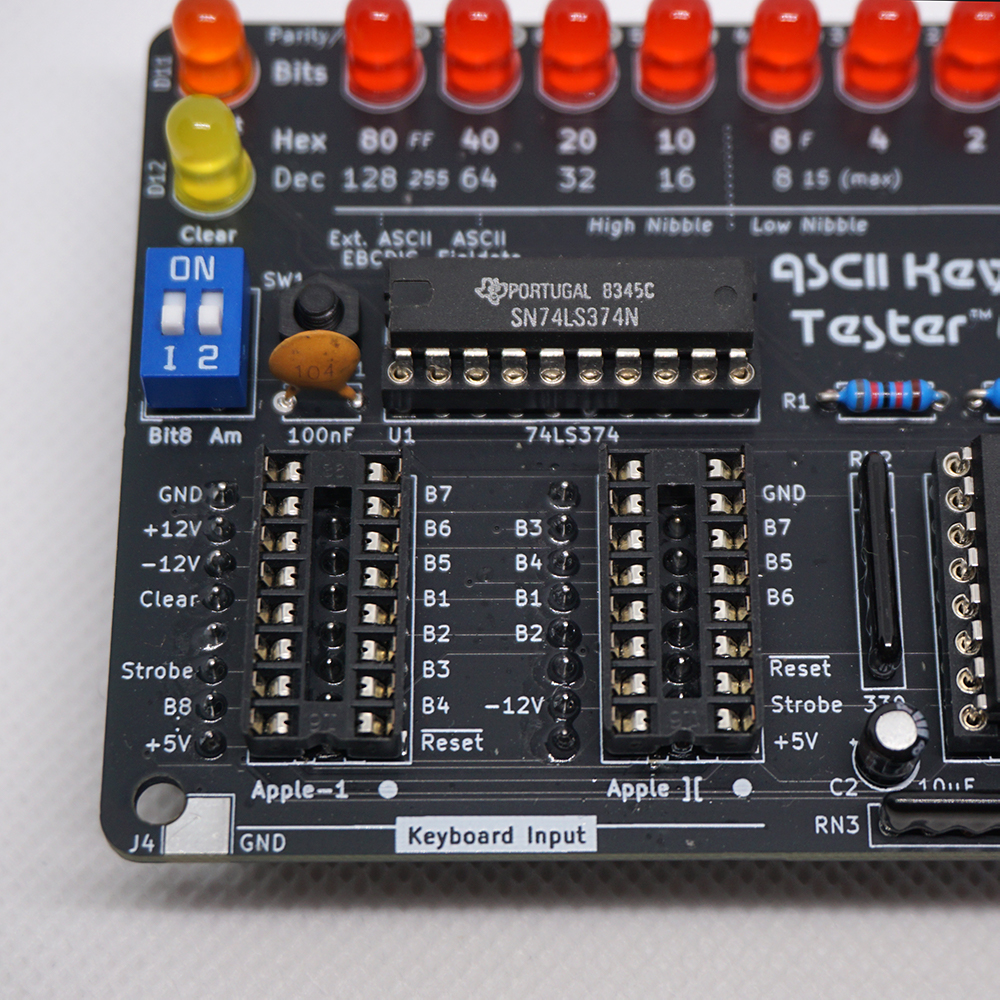
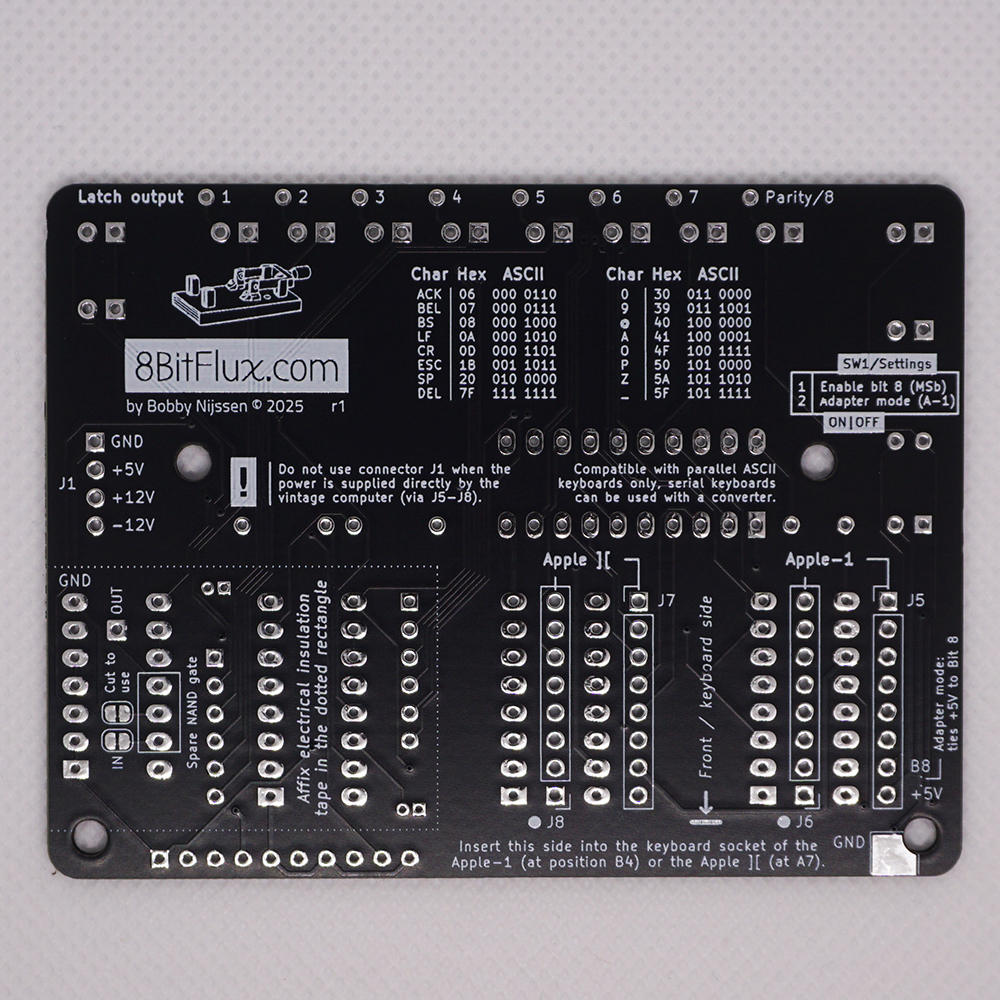
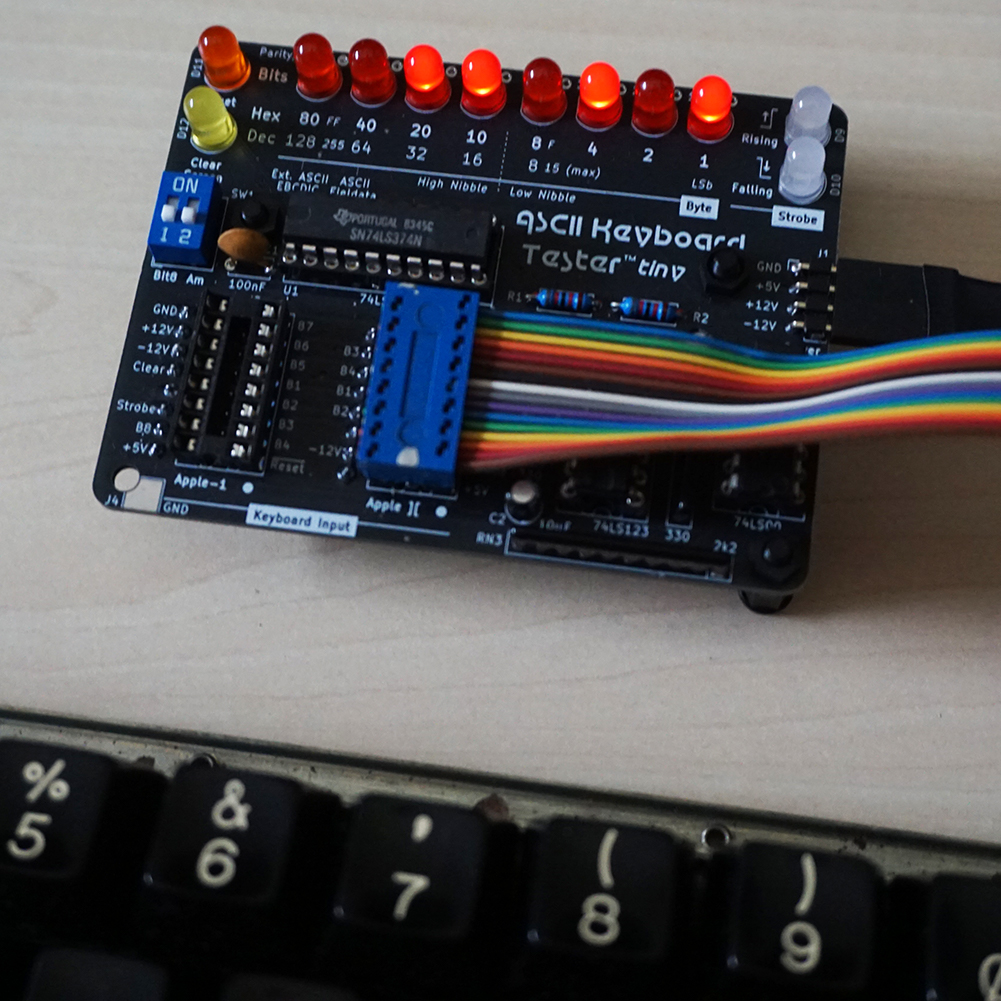
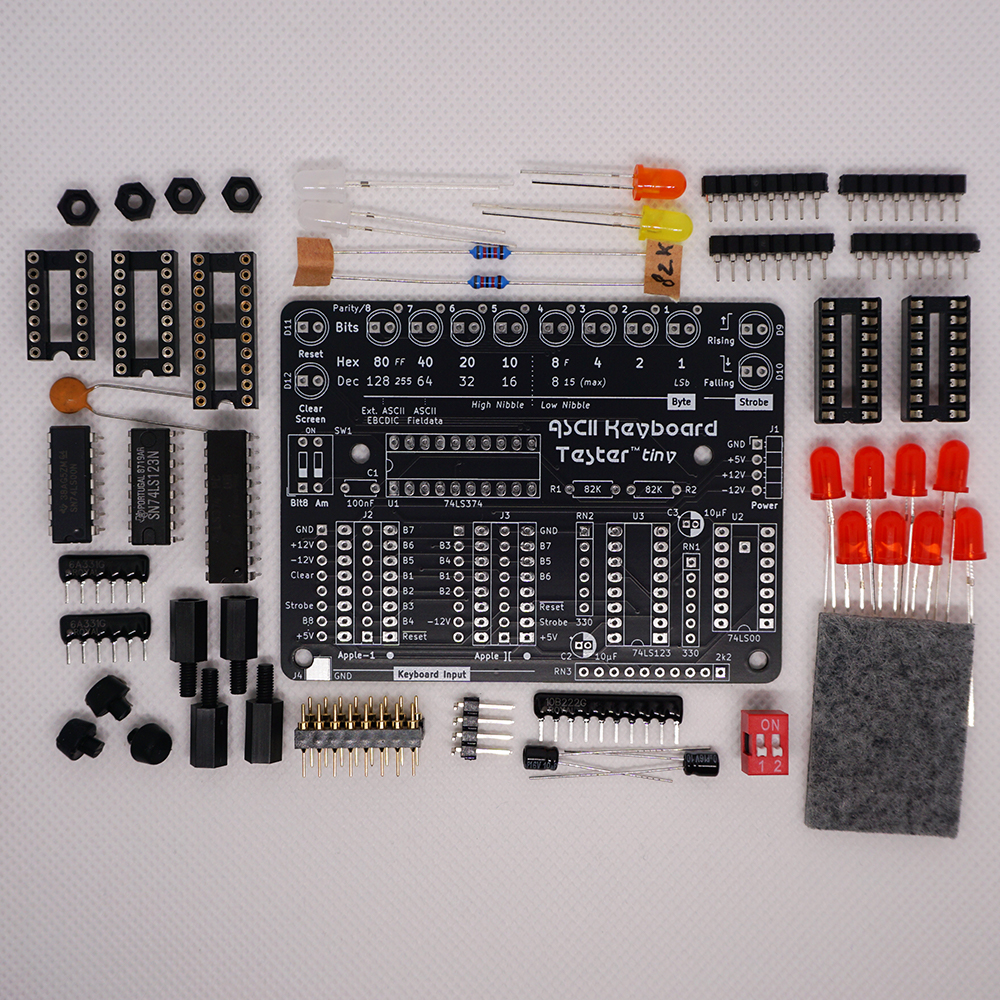
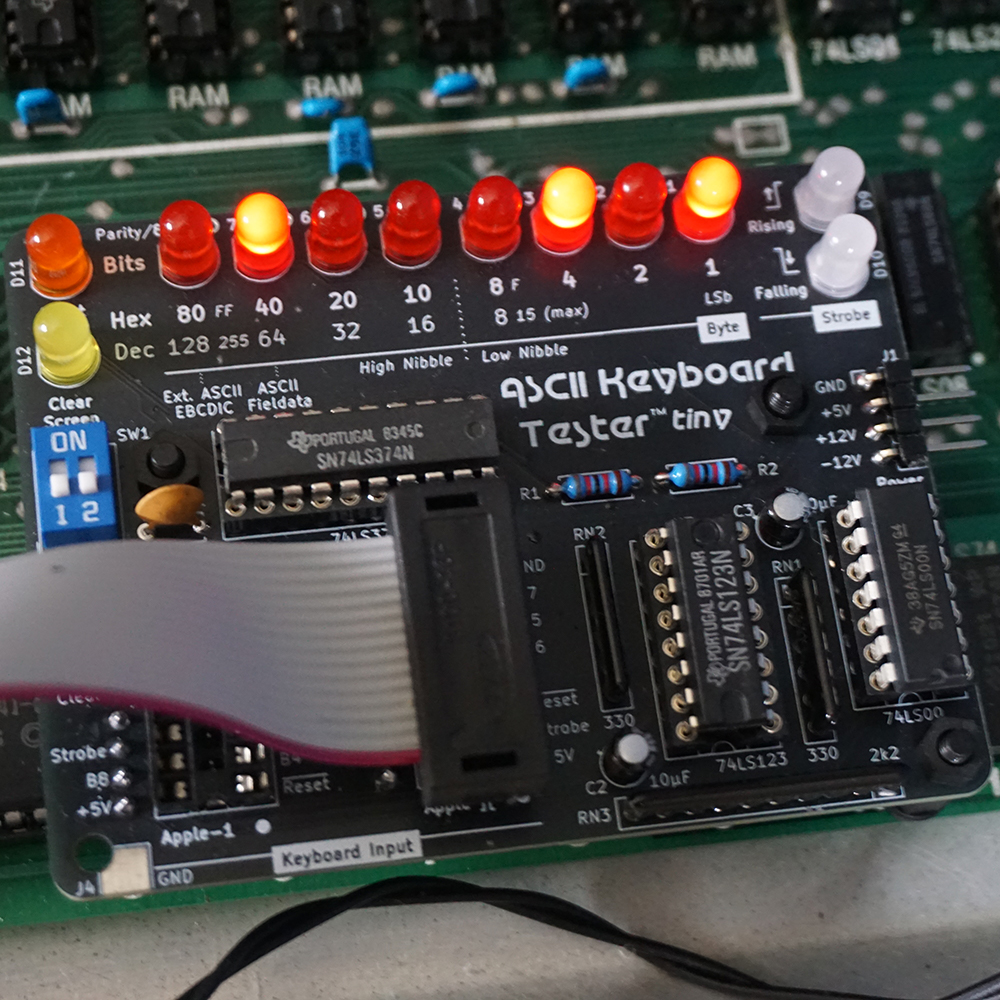
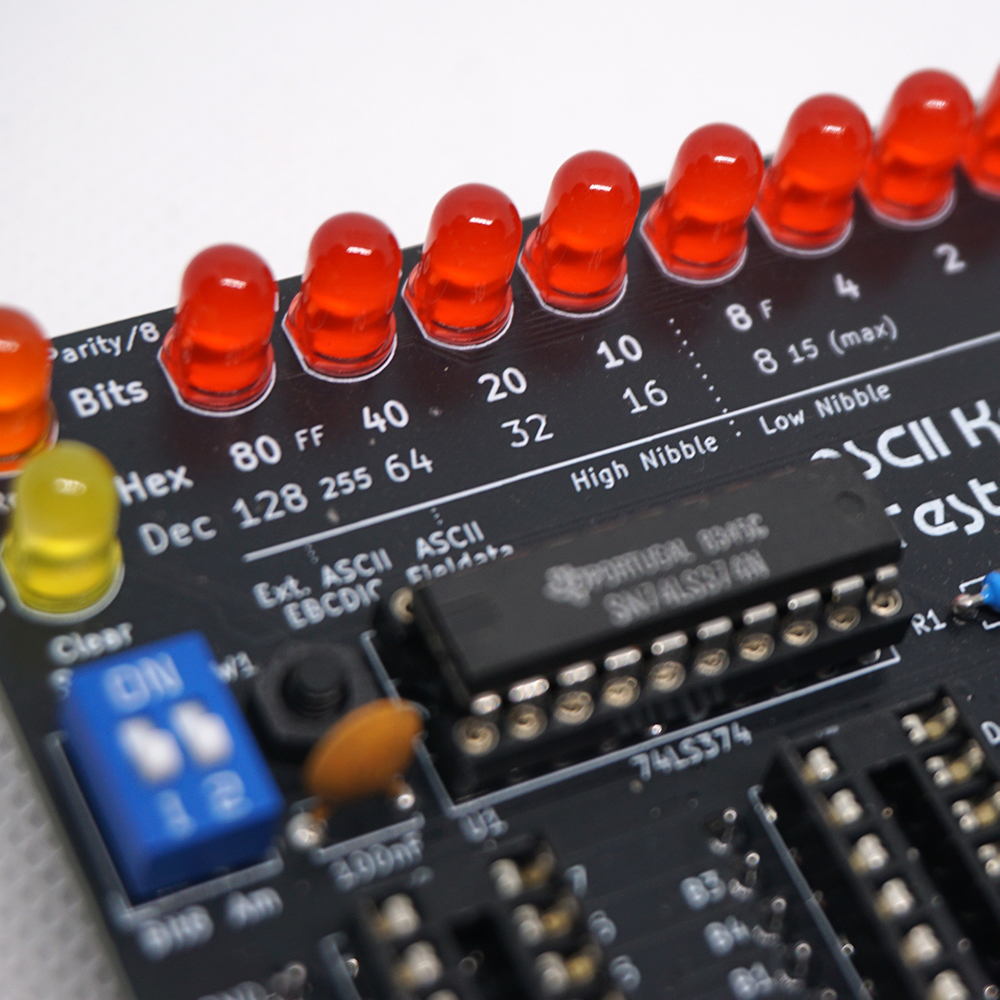
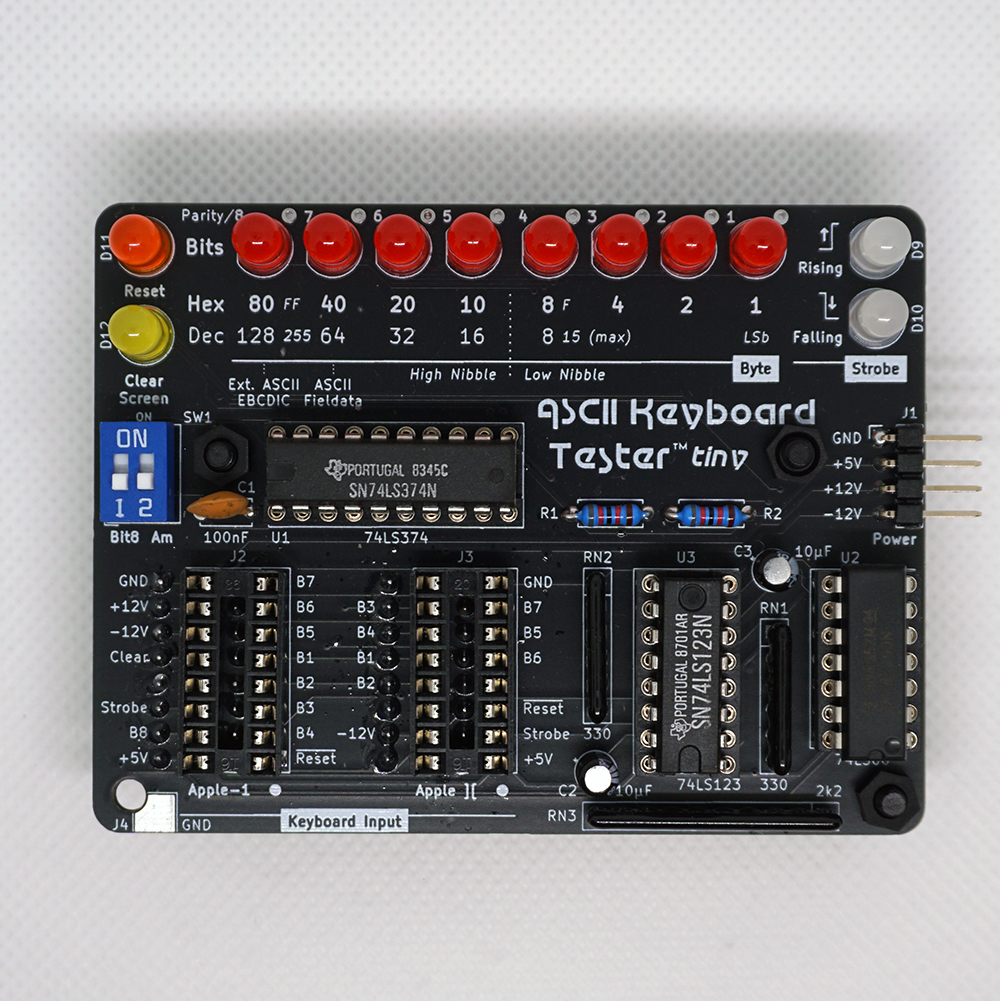
ASCII Keyboard Tester Tiny
A compact board to test vintage parallel ASCII Keyboards. Use it on top of an Apple-1 or Apple ][ and/or connect their keyboards using the DIP connectors.
Evolutionary design of the legendary ASCII Keyboard Tester. It can now eavesdrop on the signals generated by a keyboard and transmitted to the vintage computer, without interfering its normal operation. Of course it still supports familiar standalone usage, so a (self-made) keyboard can be tested in isolation. All bits are annotated to ease conversion and understanding of hexadecimal and decimal number systems.
Use the DIP-swich to turn off the 8th bit or activate adapter mode. The latter is to use an Apple ][ keyboard with an Apple-1 computer. All keyboard connector pins are labeled to make it easy to connect ASCII keyboards that go with other computers, like the Sol-20 of Processor Technology.

ASCII Keyboard Tester Discontinued
Test vintage parallel ASCII keyboards with ease and see how they actually work.
Eight red LEDs show the data bits coming from the attached keyboard, which contain the ASCII code. The strobe signal can be watched, going high to low, or vice versa. Furthermore, the reset and clear signals can be tested for the Apple 1 and Apple II.
The board needs a 5V power supply as a minimum, but some keyboards need -12V and/or +12V to operate. Onboard is a passthrough power out connector for the keyboard. Connect an Apple-1 or Apple ][ keyboard directly using the DIP-16 connectors. The extra parallel data in connector can be used to connect uncommon or custom keyboards.
Use the bread board area to add your own experiments!
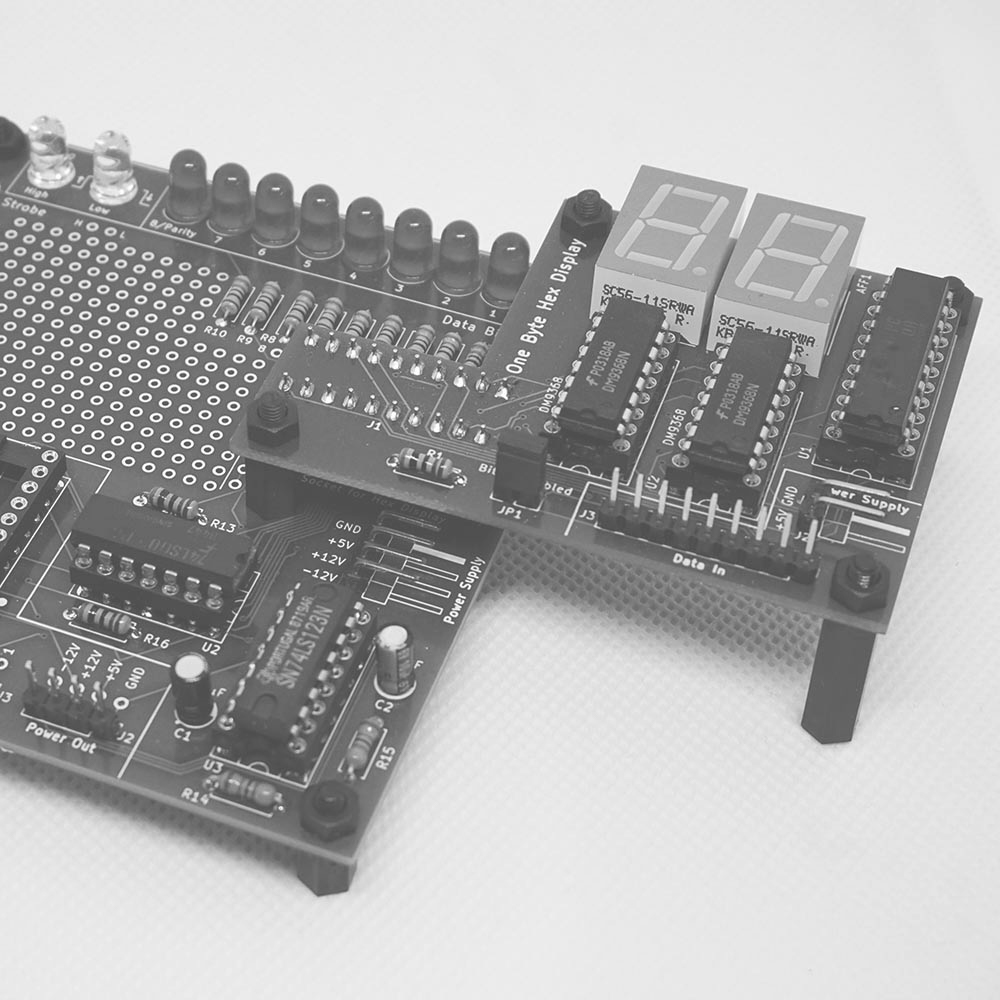
One Byte Hex Display Discontinued
Display the hex value (two digits, 0-9, A-F) of any parallel 8-bits TTL input.
To mount it on the ASCII Keyboard Tester, the 74LS374 IC is removed from this tester board. This frees up a socket to put in the display on top. The removed IC is still needed and is being reused on this board. For stand alone usage, the board needs a 5V power supply. Then the data in connector can be used for custom TTL input.
The jumper can be used to enable (or disable) the 8th bit. This way, both ASCII values (7 bits) and full bytes (8 bits) can be displayed correctly.
![The Apple ][ keyboard connected to the Apple-1 Keyboard Adapter](images/a1-keyboard-adapter-inuse2.jpg)
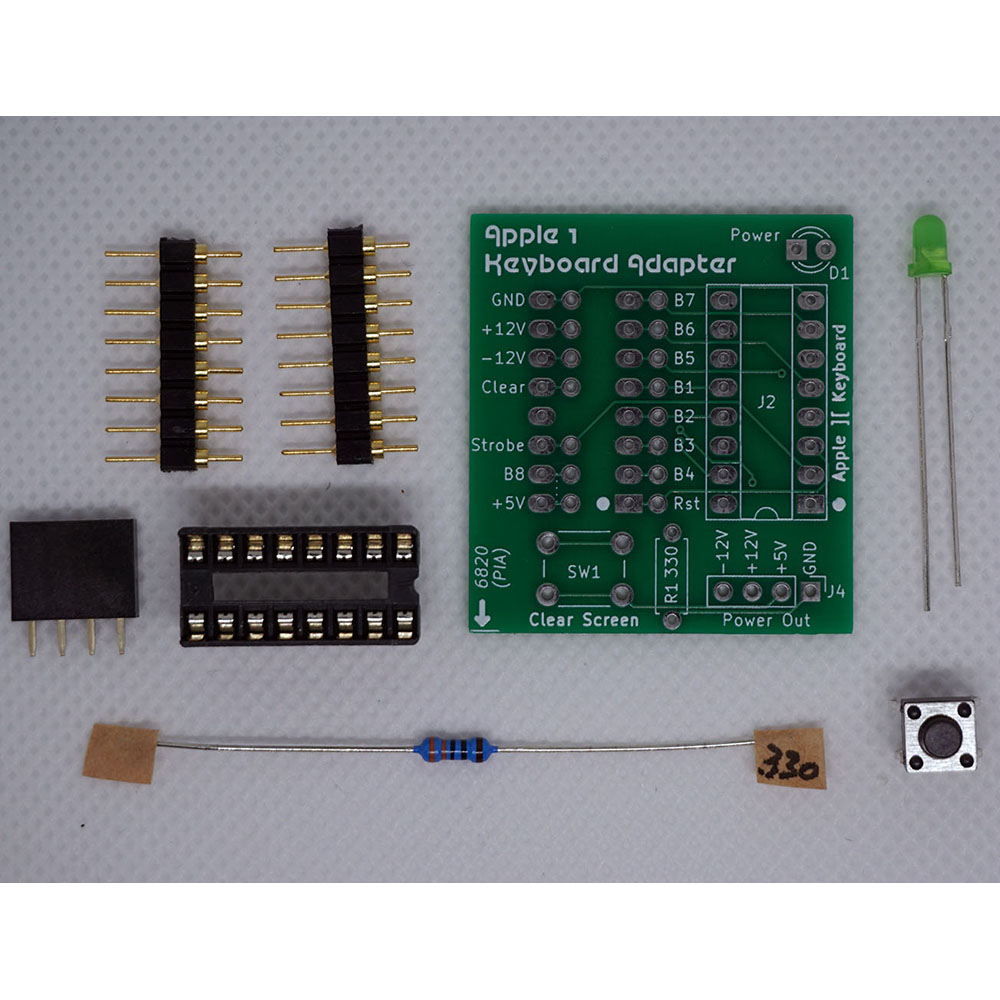
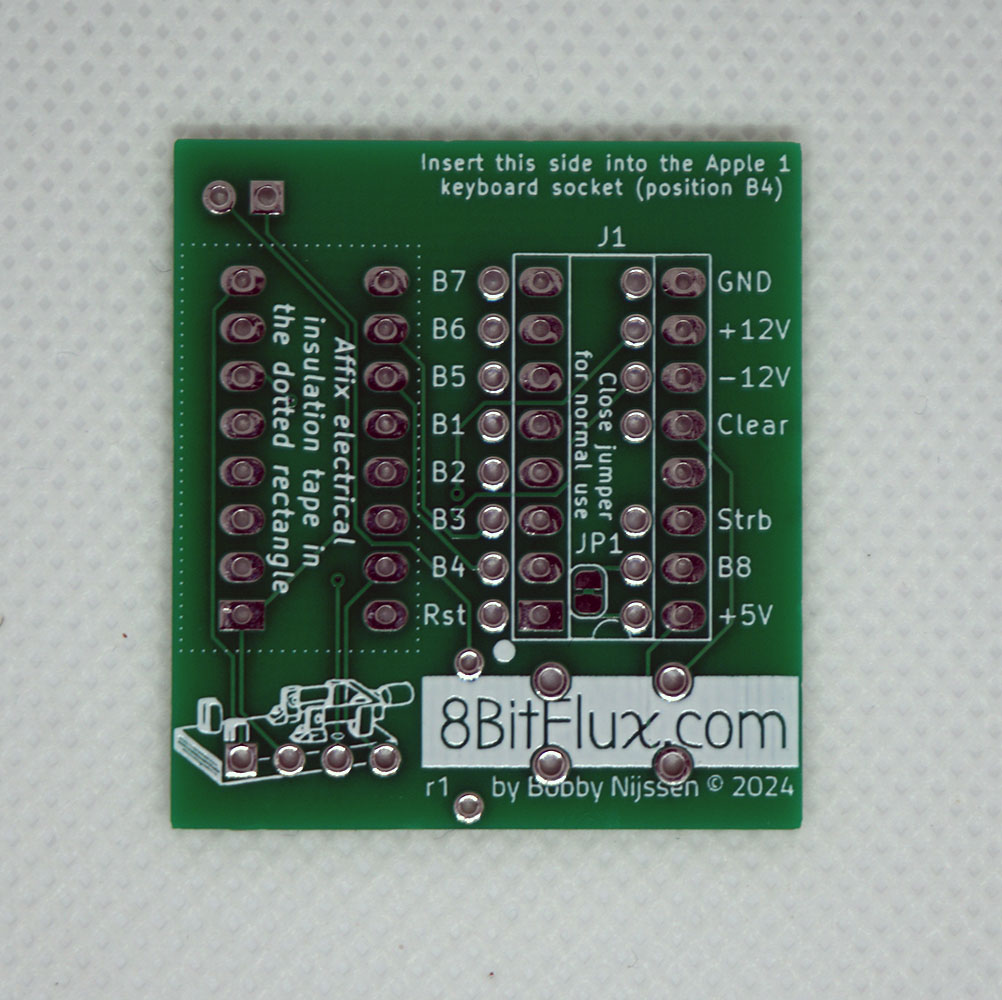
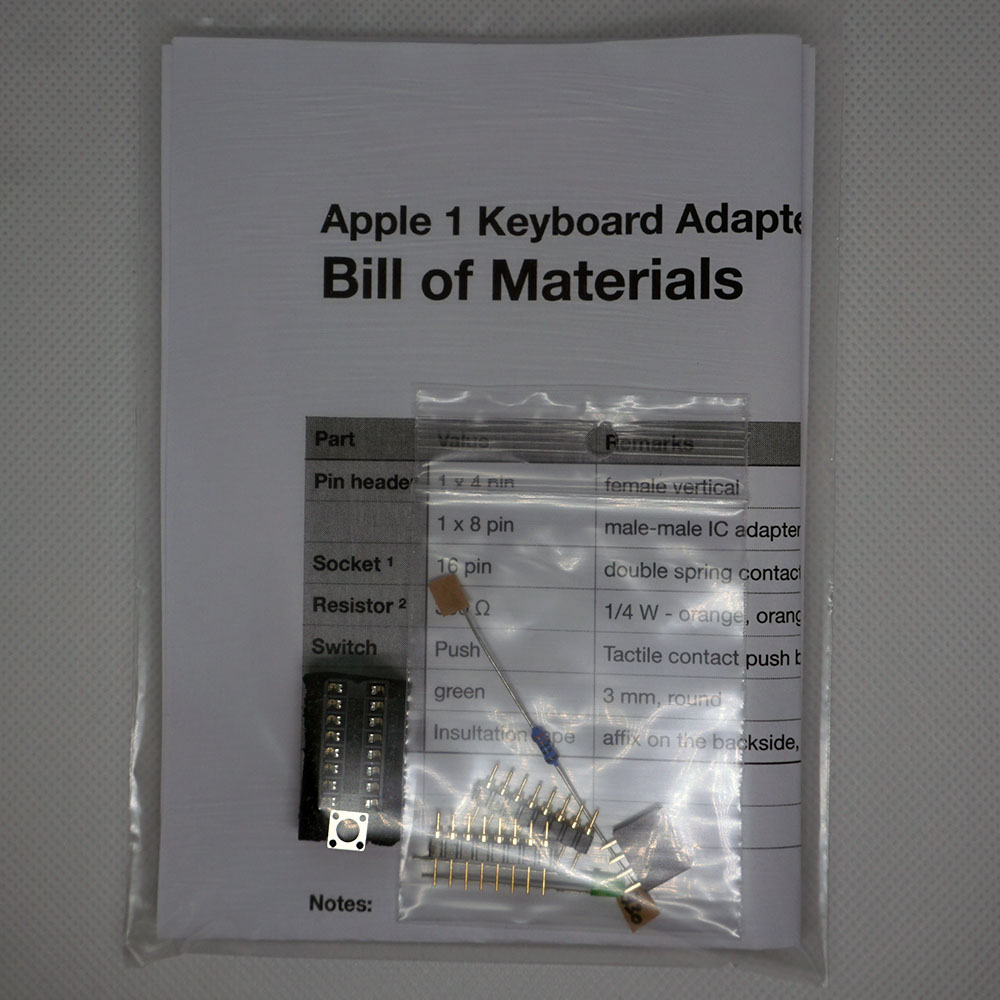
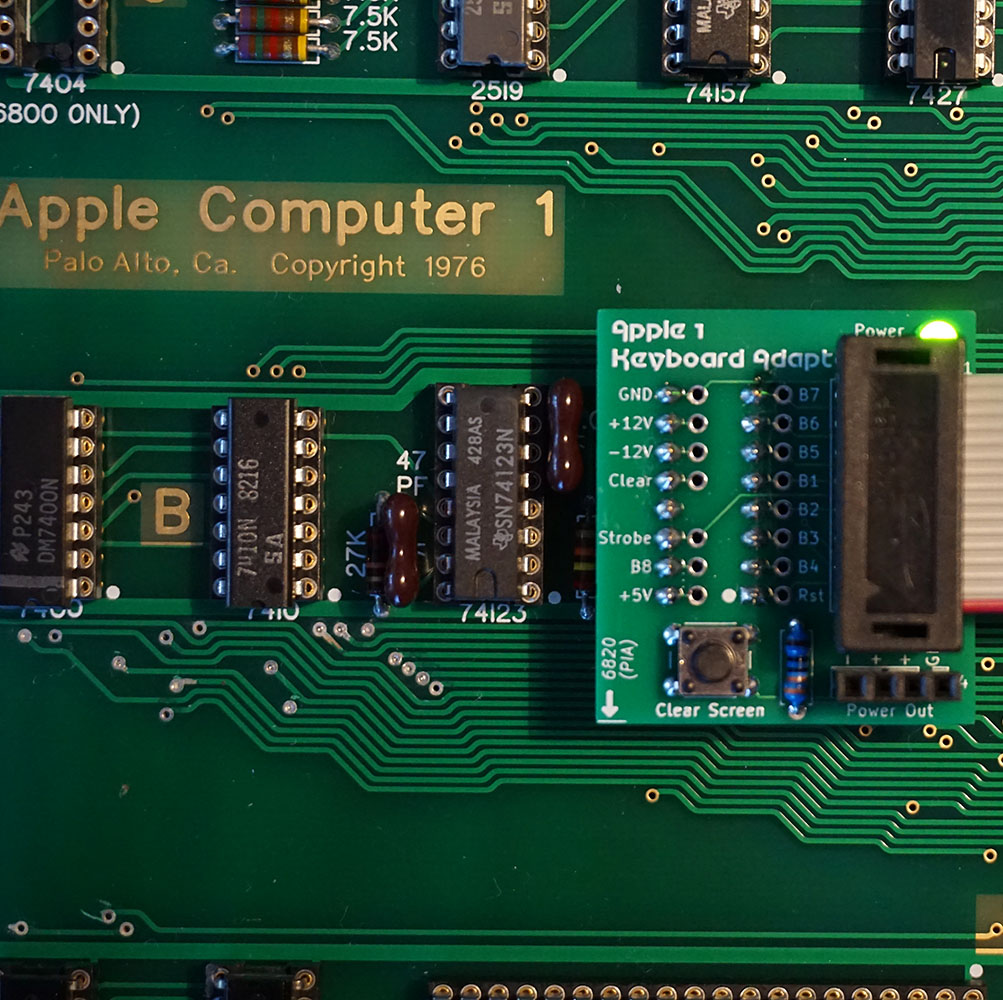
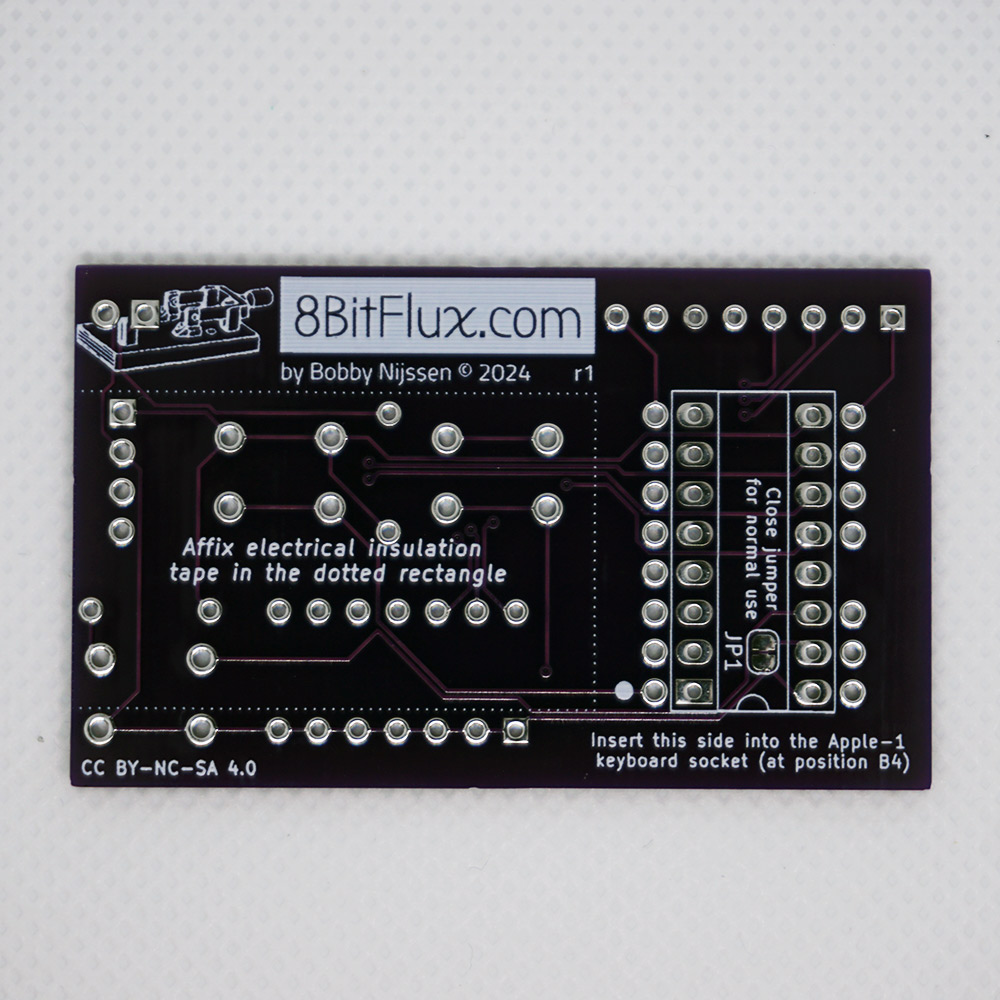
Apple-1 Keyboard Adapter
Conveniently use an Apple ][ or ][+ keyboard on an Apple-1.
Tiniest adapter out there, sits directly on the Apple-1 keyboard socket. No need for extra flat cables. It has a clear screen button and passthrough breakout pins for the Apple-1 keyboard connector. For reset, the key on the connected Apple ][ keyboard can be used.
On the backside, a solder jumper is added to unhook the 8th input bit off the 5V, meant for the advanced user. The power out connector can be used to let the Apple-1 power the Character Generator Tester. Use this adapter on top of the ASCII Keyboard Tester Tiny to easy wire a custom keyboard.
![The Poor Man's Keyboard on an Apple ][](images/a2-poormanskeyboard-in-use.jpg)
![The front of the assembled Apple ][ Poor Man's Keyboard](images/a2-poormanskeyboard-frontal.jpg)
![The Apple ][ Poor Man's Keyboard PCB kit](images/a2-poormanskeyboard-parts.jpg)
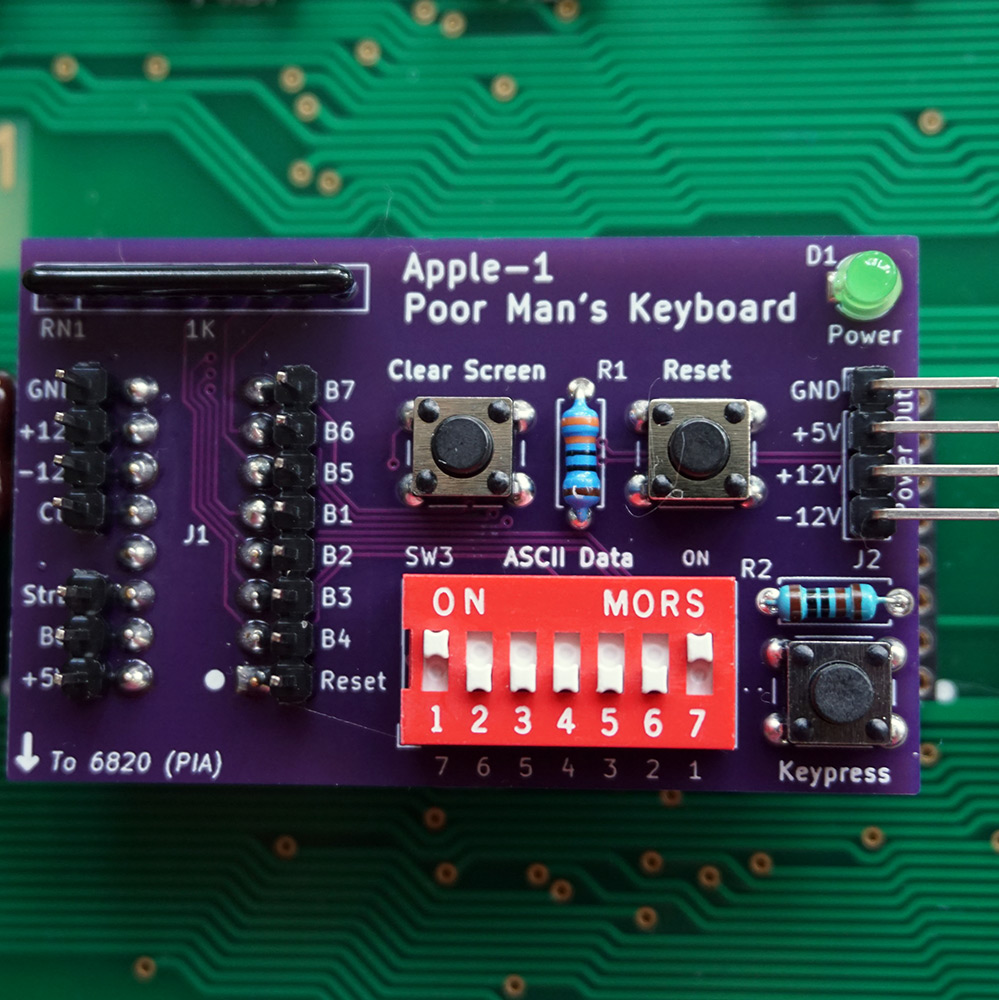
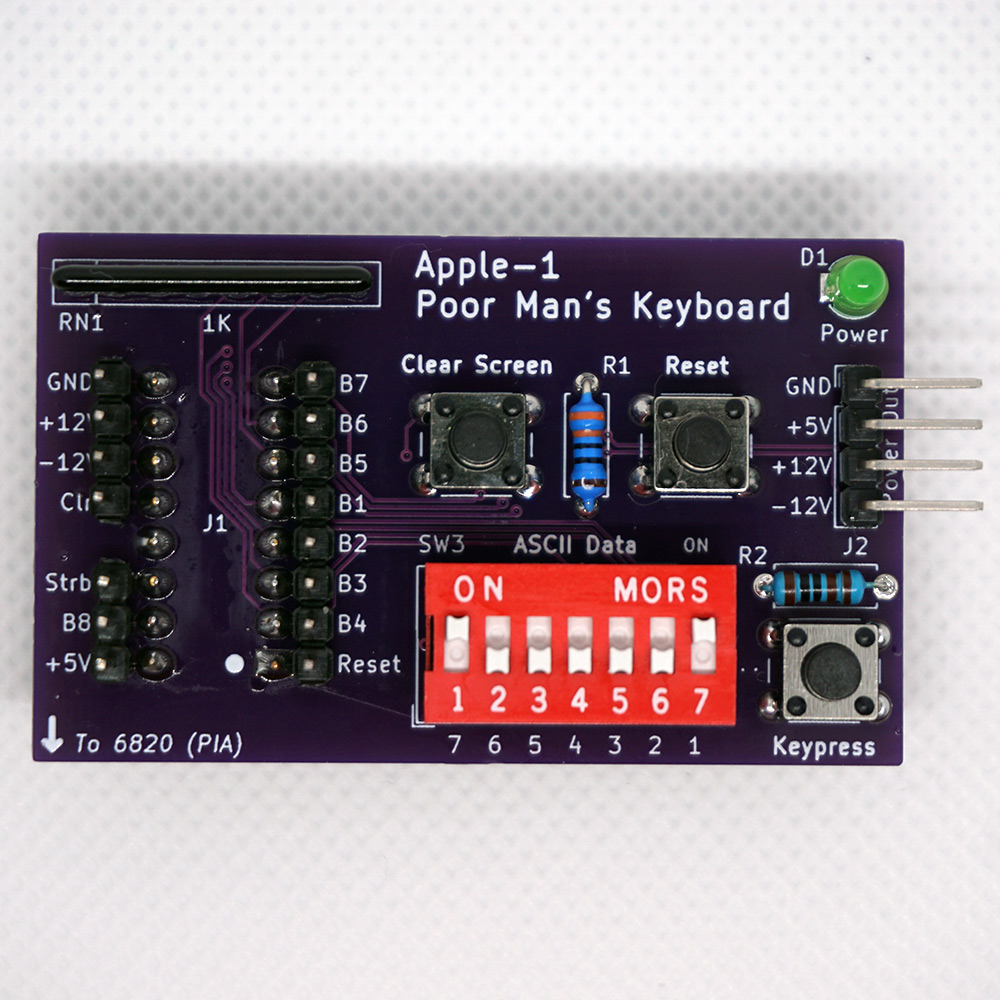
Poor Man's Keyboard / Apple-1 or Apple ][
Possibly the smallest keyboard in the world, a real joke.
Set the ASCII data using the DIP switches, press keypress and off you go! A trained finger puts only one character on the screen. The circuit is implemented without debouncing to keep it simple.
Onboard clear screen (Apple-1 only) and reset buttons. Experiment further with the breakout pins for the keyboard connector. For the Apple-1; a solder jumper is added to unhook the 8th input bit off the 5V, meant for the advanced user. The power out connector can be used in further experiments. This keyboard can be used on top of the Character Generator Tester and ASCII Keyboard Tester Tiny.
Licensed under CC BY-NC-SA 4.0![]()
![]()
![]()
![]()
| Apple-1 | Schematics | BoM | Gerbers | Get one! |
|---|---|---|---|---|
| Apple ][ | Schematics | BoM | Gerbers |